Raising of the Regiment
King James II increased his army in 1685, raising eight infantry regiments; 8th -15th. The second one of these was the 9th Foot, although not numbered as such until 1751. The first commissions were dated 19 June 1685, Colonel Henry Cornwall giving his name to the regiment, the lieutenant-colonel being Sir John Morgan. Colonel Cornwall was a captain in the Royal Horse Guards. Other officers were commissioned on the following three days, each one a captain of a company. They were each expected to recruit enough men to provide a company of 100 privates, as well as a lieutenant, an ensign, 3 sergeants, 3 corporals and 2 drummers. When a captain had raised his company he was to march the men to Gloucester where they would be kitted out and supplied with weapons. After the battle of Sedgemoor on 6 July 1685, Monmouth was captured and his army was no longer a threat, so the companies were reduced from 13 to 10, and each company cut in half; 10 companies of 50 privates each.
The Glorious Revolution 1688
In May 1687 a grenadier company was added to the establishment and the regiment was based at York. The CO, Lt-Col Morgan left in May 1687, succeeded by Major James Purcell, and Purcell’s place taken by Captain James Lacy. Both these officers were staunch Jacobites and later defected to James II’s Irish army after the regiment became part of the army of William III. The anticipation of William of Orange’s invasion meant that loyalties were divided. The Colonel, Henry Cornwall resigned, although he took no active part against William. However, four of the officers were members of the Cornwall family and remained in the regiment during the civil war. The colonelcy was to be given to Colonel Oliver Nicholas on 20 Nov 1688 but he was unable to decide whose side he was on so the colonelcy was conferred on Colonel John Cunningham six weeks later, on 31 Dec 1688.
King William’s War in Ireland, 1689 - 1691
Colonel Cunningham’s Disgrace, April 1689
In February 1689 the regiment was ordered to recruit to full strength in preparation for the campaign in Ireland. The 13 companies of 60 men each were armed with muskets after Colonel Cunningham was given the option of abandoning pikes. His regiment and Richard’s Regiment (later the 17th) were ordered to reinforce Londonderry in preparation for an attack by James’s army which was approaching from the south. With Cunningham in overall command the force reached Lough Foyle on 15 April 1689, and contact was made with Lieutenant-Colonel Robert Lundy in command at Londonderry. But Lundy was actually a Jacobite and informed Cunningham that there wasn’t enough food to support two extra regiments. The citizens rioted and forced Lundy to flee. Cunningham was offered the job of governor but turned it down and for some reason took his troops back to England. King William was furious when he heard this and sacked both Cunningham and Richards.
Londonderry, July 1689
The second attempt at the relief of Londonderry was commanded by Major-General Piercy Kirke, Colonel of the 2nd Queen’s Regiment. The 9th was retained for this expedition, now commanded by Lieutenant-Colonel William Steuart, and the other regiment was Sir John Hanmer’s (11th). They sailed from Liverpool at the end of May 1689 but did not reach Londonderry until 15 June. By this time the city was under siege from the Jacobite army. The besiegers had constructed a boom of chained logs across the River Foyle below the city, which Kirke was reluctant to break through. He felt that his three regiments were insufficient and planned to send part of his force around the Inishowen Peninsula to Lough Swilly, to recruit more men and distract the Jacobites with an attack on their rear.
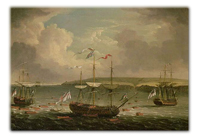
The 9th Regiment was sent to Swilly, and anchored on 9 July. Captain Echlin’s company was put ashore at Rathmullan to round up cattle, presumably for the starving citizens of Londonderry. Steuart disembarked the rest of his men onto Inch Island which, at low tide, was accessible from the mainland. He fortified the place and co-opted Protestants from Tooban into Kirke’s brigade. Captain Echlin was still at Rathmullan, now under threat from approaching Jacobite mounted troops, numbering 1.500, commanded by the Duke of Berwick from Enniskillen. The cattle and civilians were sent over to Inch Island and Steuart’s men barricaded Rathmullan. The ensuing battle on 18 July 1689 cost Berwick the loss of 200 of his dragoons, and Steuart lost an officer killed and several men wounded. That night they returned to Inch Island with the cattle, but Rathmullan was burned by Berwick’s men.
Kirke visited Inch Island and, for some reason, sent two ships to Enniskillen with arms, ammunition and provisions. It was only after pressure from London that he made any move to relieve the besieged garrison of Londonderry. He eventually forced the boom on the River Foyle and attacked King James’s army to relieve the city. Steuart’s regiment and his co-opted citizens remained on Inch Island, threatening the Jacobite rear. When Londonderry was relieved, Steuart’s men marched in on 1 August. But they were soon ordered to march to Dundalk to join Schomberg’s army.
Dundalk, 1689
The Duke of Schomberg commanded an army of around 14,000 entrenched at Dundalk, where Kirke’s brigade went after Londonderry. The soldiers were badly provided with food and shelter and the army suffered from sickness so that about 6,000 men died. The Jacobites also suffered from a bad commissariat and lost 15,000 out of an army of 40,000. King William arrived in Ireland in June 1690 and advanced on Dublin. There was a skirmish on 22 June where Captain Farlow’s company, along with some dragoons, were ambushed as they advanced from Newry to Dundalk. They lost 22 men killed and Farlow and another officer were captured.
Battle of the Boyne, 1 July 1690
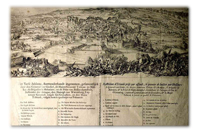
James’s army was drawn up on the south banks of the River Boyne between Oldbridge and Drogheda. William and Schomberg disagreed on the strategy, with William favouring a frontal attack across the river at low tide and Schomberg wishing to cross further upriver at Slane and turning the Jacobite left flank. James commanded an army of 26.000 Irish and French. William’s army was around 36,000 consisting of English, Dutch and Danish as well as Irish Protestants and French Huguenots. William was unsure of the loyalty of his Englishmen so had only two English regiments in his front line. Schomberg’s son, Mainhard took cavalry around to Slane and easily defeated the Irish cavalry there. When James saw that the rear of his army was threatened, he took troops away from the front line and sent them to see off Mainhard’s threat.
The Jacobite front line facing the river was weaker after James moved some of his regiments, and William had little trouble defeating the Irish. However, Schomberg rode through the river during the attack and was cut on the head twice, and then shot in the neck. The irony of his death was that he had strongly argued against attacking across the river at that place. The History of the regiment is unclear about the involvement of Colonel Steuart’s Regiment. Steuart himself was in command of a brigade which did not take part in the fighting. They were part of a force of 12 battalions and 9 squadrons of Horse sent over to reinforce the right wing around Oldbridge. The defeat of James's army was complete and William had only lost 500 men. Steuart’s Regiment had suffered no casualties in this battle of the Boyne.
First Siege of Limerick, Aug-Sep 1690
The army advanced on Limerick which was garrisoned by James’s men under the command of General Boiseleau. Berwick and Sarsfield were also there, and it was Sarsfield whose cavalry attacked William’s siege-train and almost destroyed it on 11 Aug 1690. Steuart’s Regiment were entrenched with 6 other battalions and were attacked by a sortie from the town. They were taken by surprise on the night of 17 Aug and suffered the consequences of sleeping on the job. The artillery managed to create a breach which was stormed on 27 Sep. The grenadier companies numbering 500 led the assault, backed by Steuart’s Regiment.
Captain Farlow had rejoined the regiment after being released in Dublin, and his company joined the grenadiers. The attack was initially successful but unsupported by other regiments, so that the grenadiers and Steuart’s men were subjected to a counter-attack inside Limerick. A three-hour battle ensued in which Irish women took part. Ammunition ran short and the besiegers were forced to retire. The casualties were high, around 500 men killed including 15 officers. and 1,000 wounded (44 officers). Steuart’s Regiment lost two officers killed, including Captain Farlow. Ten officers were wounded including Colonel Steuart and three other officers named Steuart. William decided to raise the siege and the regiments went into winter quarters.
Siege of Athlone, June 1691
William quit Ireland, leaving his army under the care of Lieutenant-General Ginkel. James put St Ruth in charge of the Jacobite army, established at Athlone on the River Shannon. Ginkel was reinforced by the Duke of Württemberg with 7,000 men, bringing his army to 18,000. Athlone was in two parts, the English town, and on the other side of the river, the Irish town. After a day’s bombardment a breach was made in the wall of the English town which was assaulted on 20 June. A force of 300 grenadiers together with Steuart’s and another regiment. They were supported by two more regiments. The assault was successful, so that the Jacobites fled across to the Irish town. Casualties at this stage were 20 killed and 40 wounded. Amongst the wounded was Colonel Steuart whose injuries were so severe that he could no longer take part in the campaign.
The enemy destroyed part of the bridge as they escaped, and many of them took refuge in the castle. This was destroyed by Ginkel’s artillery, and a breach was made in the wall facing the river so that an attack was planned. Each regiment was ordered to supply 43 grenadiers, 83 privates, 7 sergeants, 2 ensigns, 5 lieutenants and 3 captains. Meanwhile St Ruth had increased his garrison with reinforcements, so that the attack on 29 June failed to achieve the objective. Another attack took place the next day. The grenadiers forded the river downstream from the bridge while others threw planks across the broken part of the bridge. Further downriver a pontoon bridge had been constructed. The garrison of the Irish town were taken by surprise from three directions and were soon defeated. The Williamite army suffered only 12 men killed and 5 officers and 30 men wounded.
Battle of Aughrim, 12 July 1691
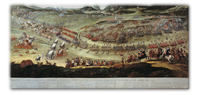
The French commander St Ruth (Charles Chalmont de Saint-Ruhe) retreated from Athlone and adopted a defensive position on Aughrim Hill with around 20,000 infantry and cavalry. The Williamite army, about the same size, commanded by Ginkel was deployed on a lower hill facing Aughrim. There was a bog in the valley between them with a stream, the Melehan, flowing through. Steuart’s Regiment was placed in the middle of the line but was inactive until the early evening. The infantry advance on the left made no headway and three English regiments waded through the bog at around 6pm, supported by Steuart’s and one other regiment. This advance was supposed to hold a position at the foot of Aughrim Hill but the men were unstoppable and found themselves in trouble further up the slope. They were driven back and Ginkel’s prospects looked bad until the Marquis de Rouvigny, a French Huguenot, led his cavalry successfully on the right, near Aughrim castle.
This altered the balance of the battle and the infantry advanced once more. The Jacobites were threatened on their left flank and St Ruth rode over to see what could be done, but a chance round shot knocked his head off and this was the point at which the Jacobites lost heart. Some of the cavalry left the field leaving the left flank exposed. Those infantry regiments still unaware of St Ruth’s death continued to counter-attack but by nightfall they were starting to fall back. Ginkel’s cavalry pursued the retreating men and killed hundreds, including the senior officers. An eyewitness account by George Story in Ginkel’s army, wrote that “from the top of the hill where [the Jacobite] Camp had been…[the bodies] looked like a great Flock of Sheep, scattered up and down the Countrey for almost four Mile round.” It is generally believed that around 7,000 men were killed that day at Aughrim. Steuart, himself was not at the battle, still recovering from his injuries in Dublin, but the commanding officer, Major Cornwall had been killed as well as one ensign. Of the other ranks, 36 were killed and 43 wounded as well as a captain and an ensign.
Second Siege of Limerick, 25 Aug - 22 Sep 1691
The Williamite army moved on to Galway which was captured without much of a fight. A garrison was left there and Ginkel marched towards Limerick where the remnants of the hardened Jacobites had gathered. The inhabitants had left the town and the troops were well entrenched inside so that a bombardment had little effect. However, a breach in the wall was made by 11 September and an assault force was organised consisting of 400 grenadiers supported by Steuart’s and four other regiments. To gain access to the breach this force had to cross the Shannon river, for which a pontoon bridge was built during the night of 15 Sep. This assault was unsuccessful and another was organised on 22 Sep which involved more troops, cavalry and guns. Steuart’s regiment and several other regiments were kept back, holding an entrenched position, so did not take part in the final attack which was completely successful. The fall of Limerick signalled the end of the war and thousands of Irishmen went to France to join Louis XIV’s army. Steuart’s regiment remained in Ireland, forming part of the army of ‘occupation’ until March 1694.
Raid on Brest, June 1694
In 1694 several attempts were made to capture ports on the French coast during the Nine Years War against Louis XIV. At the end of May 1694 an expedition set off from Spithead under the command of Lieutenant General Thomas Tollemache (aka Talmash). The aim of the expedition was kept secret until the army had embarked, but the French were warned by their spies and had a month to prepare defences. On 7 June the fleet anchored in Camaret Bay. Lord ‘Salamander’ Cutts was to lead an assault by the grenadier companies of the 10 battalions. The 9th, commanded by Lt-Colonel Hussey, was one of the regiments, and their grenadiers took part in the doomed assault while the rest of the men stayed on board. The French had prepared several artillery batteries and three lines of trenches filled with troops. Even the foolhardy Cutts hesitated to ‘dash his head against them’, but Tollemache himself led a party of 150 grenadiers who all became casualties. Tollemache was fatally wounded and died on his return to England on 12 June. Those grenadiers that landed could make no headway and were cut down by musket fire, while those waiting in the assault boats came under artillery fire and many were drowned. The casualties amounted to around 1,100 killed and wounded.
The fleet moved east along the coast and bombarded Dieppe, Le Havre, Cherbourg and Dunkirk. The regiment was obliged to remain on board ship for 4 months ‘suffering the discomforts of bad weather and confinement in close quarters aboard ship’. They eventually disembarked in the Thames estuary in early October 1694.
Palamos, August 1695
The regiment spent the winter in Somerset, and in March 1695 sailed from Portsmouth for service against the French in Spain. The troops were commanded by the regiment’s Colonel, William Steuart, and the Mediterranean fleet was commanded by Admiral Russell. They sailed to Cadiz, then Alicante and up the coast to Barcelona. Russell hoped to attack Toulon and Marseilles but was persuaded to attack the French at the Spanish port of Palamos. On 9 August, the English and Dutch troops were landed at Blanes and they camped at a place halfway to Palamos. On advancing to their objective they found the French in a good defensive position on high ground. They were kept under arms all day and night without food which was supposed to be supplied by the Spanish. The English and Dutch were under threat of attack but no battle took place. Russell’s fleet bombarded Palamos but the French were present in strength and the attack was abandoned. The army embarked again and the fleet sailed back to Cadiz and then on to England.
War of the Spanish Succession 1701 - 1714
The Siege of Liège, October 1702
The War of the Spanish Succession broke out in 1701, and Marlborough was put in command of the allied army consisting of British and Dutch troops. The 9th were in a brigade commanded by Major-General Withers, and after much marching around Flanders to outsmart the French army under Boufflers there was a confrontation at Liège, but Boufflers decided not to engage his army and left the area. The town of Liège was soon captured and occupied by allied troops, however, the Citadel and the Chartreuse fort remained defended by French troops. The Bombardment started on 20 Oct and trenches were dug. The grenadiers of the 9th were again in action with the grenadier companies of other regiments. An initial storming was not successful, after which there was a cessation of hostilities. More grenadiers, supported by 10 battalions, made another assault on the breach and forced their way into the citadel. A lieutenant of the 9th Regiment accepted the sword of the governor of the garrison, de Violaine. The historian, Quincy, maintains that Marlborough violated the armistice by sending in the second assault during the ceasefire. There are no casualty figures for the 9th Regiment. A subsequent short bombardment brought about the surrender of the Chartreuse Fort.
The Regiment Leaves Flanders 1703
The 9th took no part in Marlborough’s famous victories at Blenheim, Ramillies, Oudenarde and Malplaquet because the regiment was sent to Portugal along with three other battalions. In his despatch, Marlborough said he would send them to Breda and Bois le Duc to be ready for embarkation at Willemstad on 20 August 1703. He describes all four as ‘old regiments [the Earl of Portmore’s (2nd), the Earl of Stanhope’s (11th), Steuart’s (9th) and Sir Matthew Bridges (17th)] and I think very good ones.’ He added that Steuart’s was one of the strongest of his regiments. The regiments had to wait for the Archduke Charles of Austria to arrive before the fleet could set sail, and they, along with the Archduke, arrived in England to be honoured by Queen Anne who had acceded to the throne on 8 March 1702, on the death of King William III.
The Defence of Castello de Vide, June 1704
Portugal was allied with the British and Dutch against France and Spain. The troops sent from Portsmouth in February 1704 included the four regiments recommended by Marlborough plus the Earl of Barrymore’s (13th) and Leigh’s (33rd). The regiments disembarked at Lisbon where they were quartered in unhealthy conditions for 3 months and suffered severely from sickness. Steuart’s regiment, commanded at this time by Lieutenant-Colonel Hussey, was selected to defend Castello de Vide together with two Portuguese battalions.
The town was poorly fortified but the citadel was strong. The Spanish artillery made little impression on the walls but on 25 June the cowardly Portuguese governor offered to surrender. Colonel Hussey and a Portuguese colonel went to parley with the besieging army and were told that they would be prisoners of war. Hussey lost his temper and refused, but he was overruled and forced to give in because the Portuguese had tipped all the gunpowder down a well. A similar fate had befallen Stanhope’s regiment at Portalegre. The 9th Regiment became prisoners of war and were sent on a long march to France. The Duc d’Anjou ordered this arduous march in the hope that most of the men would desert. On reaching Bordeaux they learned that they were to be released in exchange for French soldiers captured at Blenheim. They were sent back to Portugal.
Battle of Almanza, 25 April 1707
The allied army were involved in sieges throughout the Peninsula over the years 1704-07 including the capture of Gibraltar which occurred before the regiment returned to the war. The British troops were commanded by the Earl of Galway, a French Huguenot aka the Marquis de Ruvigny. They were operating in the south east of Spain in 1707, attacking the French magazines and stores. While they were besieging a castle at Villena they received news of the enemy approaching Almanza. The French army was commanded by the Duke of Berwick, the illegitimate son of the deposed King James II. So when the two armies engaged in battle at Almanza the French were led by an exiled Englishman and the British led by an exiled Frenchman.
Galway and Das Minas, commander of the Portuguese, decided to confront Berwick’s army before it was joined by the Duc d’Orleans bringing fresh troops. The allies had 4,800 British, 1,480 Dutch, 1,100 Huguenots and 250 Germans. The Portuguese consisted of poorly trained levies. Berwick’s army totalled 25,400 French and Spanish, having a large number of cavalry. The allied cavalry attacked Berwick’s right wing and were helped by the fire of General Wade’s brigade. They drove back the Spanish cavalry while the allied infantry were initially successful in forcing the enemy infantry back into the village of Almanza. The battle may well have been a victory for the allies at this point, but the Portuguese failed to attack Berwick’s left wing which would have prevented the French from supporting the withdrawing centre. This left the British infantry exposed to an attack on their right flank as well as their front and rear.
Berwick’s cavalry attacked the Portuguese troops, most of which fled the field, apart from a few squadrons of cavalry. These squadrons along with Minas himself were needed at a time when Galway was wounded. But the enemy had nine battalions in their second line and these threatened Wade’s brigade as well as the 9th Regiment who were sent to help them. These battalions fought desperately but retreated and were saved from being wiped out by British and Huguenot cavalry covering their withdrawal. Galway was able to retreat with 3,500 men unmolested. Another mixed division of 2,000 English, Portuguese, Huguenot and Dutch troops escaped to the hills near Caudete and took up a defensive position for the night, but by morning they gave up and surrendered.
The Remnants of the Regiment, Apr - Dec 1707
The regimental history written by Loraine Petre is unable to provide a number of the men of the regiment killed at Almanza, but there are lists of the officers killed and captured. Out of 26 officers, 8 were killed and 15 captured. All the captured were wounded apart from one or two. The force that escaped the battle with Galway headed north to Catalonia but he left a garrison at Alcira which consisted of 800 English and Dutch including the remnants of the 9th Regiment, all under the command of Lt-Colonel Steuart, a nephew of the Colonel. In May, Alcira was besieged by 3,000 Spanish troops. They held out bravely but lack of supplies forced them to surrender. They were allowed to re-join Galway but were sent on a circuitous 3-month march through Aragon in the height of summer to impede their progress. They reached Galway’s camp at Tarrega on 16 Sep 1707. Galway now had only 2,000 men but was reinforced with another 12,600 to defend Catalonia. Larida was defended against the Duc d’Orleans but capitulated with only 600 men unhurt out of a garrison of 1,800. The remnants of Steuart’s (9th) Regiment may well have been part of this siege, and after going into winter quarters at Reuss and Tarragona, were sent back to England in early 1708. A reconstituted regiment was recruited in Hereford consisting of 13 companies of 60 men each, to be joined by the remnants returning from Spain.
Ireland, Minorca & Gibraltar 1709-55
The regiment was stationed in various parts of Ireland from 1709 to 1718. In 1715, following the accession to the throne of King George I, their Colonel, William Steuart, was obliged to sell his commission as he was suspected of supporting the Stuarts. He had served William III and Queen Anne ‘with great fidelity and distinction’ so it must be assumed that his name gave cause for suspicion. From Ireland the regiment was sent to Menorca, based there from 1718 up until 1746 in which year they were sent to Gibraltar. They remained there until they were sent back to Ireland from 1749 to 1755.
9th Regiment, 1 July 1751
In January 1751 the regiment had a new Colonel, the Hon John Waldegrave and, as was customary, was known as Waldegrave’s Regiment of Foot, but on 1 July new Regulations established numerical precedence for the regular regiments so that ‘Waldegrave’s’ became the 9th Regiment. There was no attachment to Norfolk until 1781 and the regiment still had a connection to Gloucestershire. In the early years of the 19th century it was known unofficially as the 9th or Britannia Regiment of Foot.
After four months of dispersal around Devon, the regiment was concentrated at Plymouth from June 1759 until June 1760, in which time the establishment was fixed at nine companies, each of four sergeants, four corporals, two drummers and a hundred men. The grenadier company had two fifers in addition to the drummers. The total strength was 1,034 including officers.
Seven Years War 1756 - 1763
Belleisle, 1761
The 9th Regiment took part in the expedition under Admiral Keppel to attack Belleisle (Belle Île), a French Island off Quiberon Bay in the north of the Bay of Biscay. The 9th was one of 10 battalions that sailed from Spithead on 29 Mar 1761 and arrived off Belleisle on 7 April. The main town, Le Palais, had a citadel which was strongly fortified, and there were few places suitable for an assault. The place chosen was near Lomaria at the south east of the island, but the cliffs proved to be too difficult and an attack on the 8th April by the grenadier companies ended in failure and the loss of 400 men killed, wounded or captured. The grenadier company of the 9th lost 2 sergeants and 9 grenadiers killed, 3 wounded. The three company officers were captured, one of which was wounded, also one sergeant and 40 men were made prisoners.
On top of this setback the weather deteriorated that evening and a storm scattered the fleet, damaging many of the landing craft. Four more regiments were sent out to reinforce the expedition and another attempt, organised by General Studholme Hodgson, was made on 22 April, involving simultaneous attacks around the island.
This attempt was successful, but the defenders, numbering 2,500 regulars and 4,000 militia, retreated to Le Palais. Siege artillery had to be landed which was delayed by bad weather. The French used the time to construct four redoubts to protect the town. On 3 May the defenders made a sortie which resulted in heavy casualties on both sides, and the capture of Brigadier-General Crawford. On 13 May the redoubts were stormed and the French were forced to retreat to the Citadel. A bombardment commenced which formed a breach on 7 June. The French commander, St Croix, could see that the British fleet prevented any help from arriving, and that the breach was assailable, so decided to capitulate. The French surrendered and were accorded the honours of war. They were transported to the mainland at Nantes.
The 9th Regiment remained on Belleisle until January 1762 when they sailed back to Portsmouth. However, a storm scattered the fleet and on 16 Jan there were still four transports missing. It is not clear whether men of the 9th were among the missing and whether they eventually made it to safety. Belleisle was returned to France in the Treaty of Paris in 1763.
Siege of Havana, Jun - Aug 1762
The Seven Years War against France involved invasions of colonies in the West Indies which were controlled by France and Spain as well as Britain. Spain took sides with France so that war against them was declared in January 1762, and a force was sent out to capture the Island of Cuba, Spain’s principal possession in the region. Lord Albemarle was appointed to command what turned out to be a most difficult, and costly, in terms of manpower, expedition to Havana.
The expedition left England on 5 Mar 1762 and reached Barbados on 20 April. They were supposed to join up with General Amherst’s 4,000 troops from North America and four further battalions from Martinique but Amherst’s men were delayed and the Martinique division was reduced by sickness. Albemarle was in a hurry to avoid the hurricane season in the Caribbean, so arrived off Cuba with only four infantry brigades. The 9th Regiment was in the second brigade commanded by Brigadier-General H Walsh. They landed a few miles east of Havana on 6 June. The grenadier and light companies were combined to form a corps d’élite under Colonel Carleton. They advanced towards Havana leaving a force under General Elliott to protect the beachhead and collect supplies. This force included a mounted infantry unit of 100 men commanded by Captain Suttie of the 9th and made up mainly of men of the 9th who could ride, and mounted on local horses. They proved useful during the siege for patrolling and rounding up cattle.
 |
|
|
The mouth of the harbour was 200 yards wide and protected by Fort Moro on the east bank, and Fort Punta on the west bank. Along the east bank also was a ridge called the Cavaños fortified by the Spanish Redoubt which was captured by Carlton’s flank companies on 11 June, and a howitzer battery established. Other batteries were constructed using fascines, for the siege of Fort Moro, but cannon-fire from the fort set the fascines on fire. The dry weather ended, followed by the rainy season. Heavy rainfall caused havoc with the health of the army as they had very little in the way of shelter. Returns up to 17 July show 4,863 sick, against 5,553 fit for duty. The 9th Regiment fared better than most, having 242 sick against 612 fit.
The bombardment of Fort Moro began on 18 June using howitzers and mortars. Other guns came into play on 1 July together with firing from the ships, HMS Cambridge and Dragon. Meanwhile the miners dug approaches but came up against a dry ditch 70 feet deep. This needed to be filled at the point of assault by mining on the other side, and exploding the rock so that rubble filled the ditch. Several attempts were made by the defenders to make a sortie and drive the British from their positions, but they all failed. The last of these, and most serious, was against the Spanish Redoubt which resulted in the enemy retreating to their boats with the loss of 400 men killed or drowned and many wounded. The flank companies of the 9th took part in this last action.
The troops from North America arrived on 27 July, but only half of the expected 4,000 men. The mining work in the ditch was completed on 30 July and two explosions were set off, one of which filled the ditch and created a narrow breach in the wall. This allowed a single file of men through, led by Lieutenant Forbes, causing enough of a surprise amongst the defenders to prevent heavy casualties on the assault party. The determination of the officers and men drove the Spanish back. The whole fort was soon captured and the defenders were either killed or drowned as they attempted to escape in boats. The British lost 3 officers and 39 men killed or wounded. The enemy loss was heavy, 700 as well as the commander, Don Luis de Valesco.
A feature of Fort Moro is the tall lighthouse in which some of the defenders took refuge. The British, unaware of this, assumed the fort to be clear of the enemy and three officers were congratulating each other on the successful assault when firing from the lighthouse killed two of them, Lieutenants Nugent, grenadier officer of the 9th and Holland of the 90th. The third officer, Lieutenant Forbes, who had led the assault, took some men and immediately stormed up the stairs of the lighthouse and killed every one of the defenders.
The capture of Moro sealed the fate of Havana but there was still Fort Punta to deal with. Bombardment began in early August and a summons to surrender on the 10th Aug was refused. But on 11 August concerted fire from mortars and howitzers silenced the defenders and they showed a white flag. The defenders were allowed the honours of war, as the British were in no position to impose harsh measures. Sickness was prevalent and increasing so that far more men died of disease than in battle. Two regiments, the 17th and 77th had, between them only 20 fit men and had to be sent to America. In October the 700 survivors buried 3,000 men. Albermarle’s position was precarious as the other towns and forts in Cuba had not surrendered. However, this did not prevent the British from benefiting from the booty. Ten large warships carried off stores of tobacco and other goods and valuables ‘not belonging to private persons’.
Casualties at Havana
The casualties of the 9th Regiment were itemised in a return of 13 August 1762. Officers: Ensign Wood killed; died of disease, Lieut-Col Thomas, Captain Suttie (commander of the mounted infantry) and Lt Surman. Other ranks: 19 killed, 31 wounded, one sergeant and 10 men missing; died of disease, 2 sergeants, two drummers, 24 men; 5 men died of wounds. Lieutenant Nugent’s name does not appear on the list so it is assumed that this is only the casualty list of the battalion companies. Casualties of the grenadier and light company would have been greater. The battle honour for HAVANNAH was not granted until 1909, and for BELLEISLE even later.
Florida 1763 - 1769
The regimental history by F Loraine Petre states that the troops were better housed after the capture of Havana but that their health remained unimproved, and they ‘had to be kept in this pest-house to guard its conquest till the Peace of 1763. The Treaty of Paris meant that Cuba had to be returned to Spain but that the Spanish possessions in Florida were ceded to Britain. The 9th was sent to Florida to be stationed in one of these possessions, St Augustine on the east coast. This proved fortunate in that the health of the men improved. The strength of the regiment when it reached Florida in August 1763 was 16 officers, 16 sergeants, 9 drummers and 234 rank-and-file. At the start of the Cuban expedition they had been 1,000 strong. Although their health improved, in 1766 a fresh batch of recruits arrived from England who were so sickly that it was difficult to provide them with medical attention. This badly affected the rest of the regiment and once more they were subjected to an epidemic of fever. They were ordered to Ireland in May 1769 and reached there in Jan 1770, stationed initially at Limerick.
The American War of Independence 1775-78
The Campaign of 1776
The 9th Regiment was ordered to prepare to sail from Ireland to Quebec in April 1776. The American colonies were in revolt and had captured the fort at Ticonderoga near Lake Champlain, also controlled by the rebels. The strength of the regiment was 25 officers, a quartermaster, a surgeon’s mate, 30 sergeants, 22 drummers and fifers, and 462 rank-and-file. Since the order to embark for North America was announced, there had been 66 desertions. The regiment, under the command of Lieutenant-Colonel Hill, sailed from Cork on 8 April 1776. The history records that three men jumped overboard during the voyage, hopefully while they were only a short distance from the harbour. They arrived in Quebec on 29 April.
Crown Point, 11-13 Oct 1776
The 9th were part of the force that sailed from Quebec to Three Rivers which they reached on 5 June 1776. The Americans attacked but were beaten off, and the allied army, commanded by Sir Guy Carleton, pursued the retreating enemy southwards to St John’s. The British spent three months building boats to sail south through Lake Champlain to attack the Americans who were now at Crown Point and Fort Ticonderoga. A mini sea battle took place from 11 to 13 Oct which forced the enemy to abandon Crown Point. This ended hostilities for 1776 and the 9th Regiment went to their winter quarters in the Isle Jésus near Montreal.
The campaign of 1777 was organised from London by Lord George Germaine aka Lord George Sackville, notorious for failing to do his duty at the Battle of Minden. He planned a three pronged attack on the Americans, based at Albany. Carleton was replaced by Lieutenant-General John Burgoyne who now led seven British battalions, a flank company battalion and German troops that included Jãgers and British marksmen in a body of men known as the Rangers. This, together with 42 artillery guns were shipped down Lake Champlain to Crown Point. The Americans were defending Ticonderoga and Fort Independence at the junction of Champlain and Lake George but British artillery gained the heights of Sugar Loaf Hill and forced the enemy to abandon the forts and head south.
South Bay. 7 July 1777
The 9th, along with the 20th and 21st Regiments were taken by boat to South Bay to cut off the enemy retreat, but the Americans had escaped to set up a strong defence which was attacked by the light companies commanded by Lt-Col Simon Fraser, CO of the 24th, and German troops under Baron Riedesel. The grenadiers and light company of the 9th were involved in this battle. The allied casualties were 17 officers and 109 other ranks killed or wounded. Two officers of the 9th were among the casualties, one, Captain Stapylton, dying of his wounds.
Fort St Anne, 10 July 1777
The 9th, with a strength of only 190 men, advanced to St Anne to observe the enemy, but they were attacked by a large force of Americans. Lt-Col Hill commanded his men well and repulsed the enemy after a three-hour battle. Hill’s men ran out of ammunition and were in danger of defeat but Burgoyne had sent a party of native Americans under the command of Captain Money of the 9th to relieve them. Unfortunately the ‘Indians’ deserted Money and he went on alone. As he approached the scene of the battle he imitated a native American war-cry which spooked the enemy and, as they were also short of ammunition, they retreated. The Americans burned Fort St Anne and fled towards Fort Edward. The 9th had captured stores and baggage, as well as 30 prisoners and the Colours of the 2nd New Hampshire Regiment. Their casualties were eleven killed and 19 wounded.
The Trek to Fort Edward, Jul-Aug 1777
Burgoyne’s force needed to cross the watershed between the river systems of the St Lawrence and the Hudson. This involved a hard trek through 18 miles of forest where the tracks had been obstructed by the Americans, and bridges over streams and causeways over swamps had been destroyed. The lines of communication were almost cut off so that supplies had to be captured from the enemy in a raid on Bennington on 14 August. The men of the 9th were not involved in this disastrous failure at Bennington but two officers of the regiment were casualties. Burgoyne had to wait for supplies from bases further north, and build a bridge of rafts over the Hudson above Saratoga. The Americans were now commanded by General Horatio Gates and occupying Stillwater, 12 miles south of Saratoga.
Freeman’s Farm, 19 Sep 1777
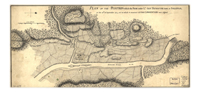
Burgoyne’s force consisted of the 9th, 20th, 21st, 24th, 62nd, and 47th, together with battalions of flank companies, 300 artillerymen and 50 marksmen. German troops brought the total up to about 6,000 men. The artillery was made up of 35 guns and howitzers and 6 mortars. The Americans were entrenched on Bemmis Heights and the British advanced towards Freeman’s Farm on 19 Sep, with the 9th on the right, but they were ordered to hold back and form a reserve. They struggled through thick woods and the advance guard had to fall back when they encountered superior enemy numbers. Gates at first moved out against Fraser’s light troops, but then switched to attack the centre battalions (20th, 21st, 62nd and the 9th) which numbered 1,100 men. The enemy movement was obscured by the thick woods but when the confrontation occurred the fighting was intense. The Americans were reinforced and posed a huge threat to the British infantry. The enemy used trained sharpshooters led by Daniel Morgan to pick off British officers. The casualties were 11 officers killed and 17 wounded, of which three of the wounded were officers of the 9th. The casualties of the other three battalions were 350 killed and wounded out of 800. The Germans under Baron Riedesel and the artillery came to the aid of the hard pressed infantry and the Americans were finally driven off having suffered heavy casualties.
Second Battle of Saratoga, 7 Oct 1777
Burgoyne was expecting to be reinforced by Sir Henry Clinton but they did not arrive in time to save the allied force from the defeat at Saratoga. General Gates entrenched his men and waited, but Burgoyne was in no position to attack at this stage and supplies were running low. On 7 Oct the British attempted to turn Gates’s weaker left but the enemy replied with a determined attack in force on Bugoyne’s left and then an attack on the British right which forced Burgoyne to retreat to their camp. The Americans poured a heavy fire of musketry and artillery. Daniel Morgan’s marksmen caused many casualties including Simon Fraser, commander of the light companies. Another defensive position held by Germans under Breymann had to be evacuated. At nightfall the whole force made a retreat to the heights where three redoubts had been prepared earlier. They had their backs to the river and they retreated further the next night, the 8th-9th Oct, over the Fishkill River, made harder by heavy rain.
Burgoyne’s Surrender, 17 Oct 1777
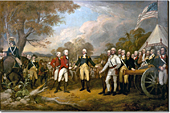
The allied force was now reduced to 3,500 while Gates’s army was increased to 16,000. Besides his hungry men, Burgoyne had 460 sick and wounded. He had little chance of putting up a good fight so, after holding a council of his senior officers, decided to capitulate. The negotiations for surrender on 17 Oct, called The Convention, looked favourable, as Gates agreed to let them march to Boston for embarkation to England. However, only Burgoyne went home. The rest of his army, including officers, became prisoners of war and were kept in poor conditions. The Convention troops, as they were known, were kept in captivity for years. Most were sent home in 1781 under an exchange of prisoners, and the remnants of the 9th were able to join the two companies that had remained in Britain.
9th or East Norfolk Regiment, 31 Aug 1782
Up until 1782 British infantry regiments in the regular army did not have titles that connected them to any particular county, but in that year an effort was made to territorialize the infantry regiments so that the number of precedence could be augmented by a county name. A letter was written by the Commander-in-Chief, General Henry Seymour Conway on 31 August 1782, addressed to the Colonel of the Regiment, Thomas Twisleton, Lord Saye & Sele:
‘Sir, His Majesty having been pleased to order that the regiment of Foot which you command shall take the county name of “9th or East Norfolk Regiment” and be looked upon as attached to that division of the county, I am to acquaint you it is His Majesty’s further pleasure that you shall in all things conform to the idea, and endeavour by all means in your power to cultivate and improve that connexion, so as to create a mutual attachment between the county and the regiment which may at all times be useful towards recruiting the regiment.’
The 9th had no special connection to East Norfolk, but in 1782 they happened to be stationed in Norwich. There was also no indication that the regiment would follow the instruction to recruit in Norfolk as recruiting parties were sent to Lancashire and Ireland. The rather specific attachment to only the eastern half of Norfolk was also quite random. West Norfolk was allotted to the 54th regiment which was raised in Shrewsbury in 1755.
French Revolutionary Wars 1793-1802
Tobago, 14 April 1793
The regiment left Norfolk in September 1783, marching to Berwick, then were stationed in Ireland from 1785 until 1788. In that year the 9th East Norfolks went to the West Indies, quartered at Brimstone Hill on St Kitts with a detachment on Nevis. They spent their time there peaceably until the war with France broke out in 1793. In the spring, the flank companies were ordered to be part of a force sent to capture Tobago from the French. They sailed south to Barbados and joined Major-General Cornelius Cuyler whose force consisted of 9 companies of the 4th Bn 60th Regiment, 25 Marines and some artillery.
They arrived in Great Courland Bay on 14 April. Cuyler’s order to the French commander, de Monteil, to surrender was met with refusal and Cuyler, unsure that he had enough manpower, decided to attack that same night. His force consisted of only 394 men, of which the flank companies of the 9th made up 5 officers and 92 other ranks. The 60th Regiment faced the hardest part of the fortress but their assault diverted attention from the attack made by the grenadiers and light troops of the 9th, so that their part in the action was made easier. Under the command of Major Baillie, they gained entrance and forced the garrison to surrender. The casualties of the grenadiers and light troops were one officer wounded, one drummer and three men wounded. The captured French troops were 68 regular soldiers, 17 officers and 80 National Guard.
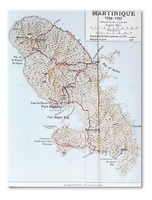
Martinique, 5 Feb - 23 Mar 1794
The whole regiment was next ear-marked for active service in Sir Charles Grey’s expedition tasked with capturing Martinique, Guadeloupe and St Lucia, French-controlled islands which lie in the middle of the Lesser Antilles. Grey’s force, in January 1794, was 7,000 strong, made up of 3 Grenadier battalions and 3 Light Infantry battalions together with three brigades of conventional infantry. The 9th’s battalion companies were in John Whyte’s 3rd brigade. The 9th’s grenadier company was in the 2nd Grenadier Battalion and the light company was in the 1st Light Infantry Battalion.
The fleet sailed from Barbados and was off the southern end of Martinique on 5 February 1794. The French troops were commanded by the governor, Vicomte de Rochambeau who also had the help of the local black and Mulatto population. The French Republic promised these people liberty and citizenship in exchange for their help to fight off the British invasion. The defenders were scattered around the island in small detachments and Grey planned to land his forces in three places. Major General Thomas Dundas was to be landed at La Trinité on the north east. The 9th’s flank companies were part of his force of grenadiers and light infantry. His 2nd Battalion of grenadiers was commanded by Colonel Campbell, CO of the 9th. The light infantry successfully captured Morne le Brun just south of Trinité. A fort in Trinité was held by the Mulatto leader, Bellegarde, but that was evacuated and they set fire to the town.
Bellegarde retreated south, first to Gros Morne, then Morne Bruneau which was captured from him so that the harbour of Fort Royal was in sight. The nearby Fort Mathilde was captured and held by Lt-Col Craddock on 8 Feb. On 10 Feb this was attacked by Bellegarde’s Mulattos who were successfully beaten off by grenadiers including the 9th’s company. Meanwhile Lt-Col Campbell was detached with 5 grenadier companies, and captured Colon, then on 11 Feb, Lemâitre, with flank companies which included those of the 9th. General Grey’s force had landed on the south coast on 6 Feb with Whyte’s brigade which was sent round to the south of Fort Royal Bay. The main part of Grey’s force made their way round to the north of the Bay.
Morne Rouge
Dundas’s force made contact with Grey but then retraced their route back to Trinité, from where he sent Campbell with three light companies to capture Montigné, at which place they arrived on 16 Feb. Dundas moved along the north east coast, turned inland to the Calabasse Pass which was also reached on 16 Feb. Campbell was confronted by 600 of the enemy and was able to alert Dundas who sent 63 men under Captain Ramsay to help him out. The fighting around Morne Rouge became intense and Campbell led a bayonet charge of light troops against the attacking enemy. This was successful but Lieutenant-Colonel Campbell was killed in action. There was further fighting at Morne Rouge which ended with the enemy retreating to a redoubt, but this was abandoned in the night.
St Pierre
St Pierre was the next objective, but it is not clear which of the three columns captured it. Dundas approached from the east while Colonel Symes sailed there and landed 3 light companies to the north of the town and was probably the first to take possession. Meanwhile, Colonel Myers from Sir Charles Gordon’s division, took 10 flank companies up from La Coste and reached St Pierre via the southern approach.
Fort Royal
The capital, Fort Royal, was protected by two forts, St Louis and Bourbon. There was also the redoubt on the Sourier Heights to capture, held by Bellegarde. The defenders made a sally to attack Grey’s left flank on 18 Feb, but this was repelled by a charge led by Prescott. The redoubt was now only defended by a small force of Mulattos. Grenadiers and light troops, including the 9th Light company, captured the Sourier Heights and seized the French guns. But it wasn’t until 28 Feb that Bellegarde surrendered. Fort Bourbon was besieged and finally capitulated on 23 March and St Louis was captured soon after. British casualties were minimal and the 9th had no casualties in this final battle.

St Lucia, April 1794
General Grey wasted no time in organising the next invasion, the island of St Lucia. with nine battalions: Three Battalions of grenadiers, made up of the grenadier companies taken from regiments serving in the West Indies. The grenadier company of the 9th was in the 2nd Battalion. The whole grenadier brigade was commanded by Major General HRH Prince Edward, fourth son of King George III, later Duke of Kent, and father of the future Queen Victoria.
Three Battalions of light infantry, made up of the light companies taken from regiments under Grey’s command. The light company of the 9th was in the 1st Battalion. The whole light brigade was commanded by Major General Thomas Dundas. The battalion companies of the 6th, 9th and 43rd Regiments formed the third brigade under Colonel Sir Charles Gordon. He also had detachments of Engineers and artillery.
The Landings
The force arrived at St Lucia on 1 April 1794, landing at four different places. Dundas, with the 3rd Light Infantry was deposited at Anse du Cap on the north of the island. The 2nd Light Infantry landed at Anse du Choc in the northwest. These battalions were tasked with capturing artillery before joining the siege of Morne Fortuné overlooking Castries, the capital, on the northwest coast. The 1st and 3rd Grenadiers under Prince Edward were landed at Marigot des Roseaux, south of Castries, and the 1st Light infantry, that included the 9th’s company, landed at Anse de la Tocque. The rest of the force was kept in reserve on board ship in Cul-de-Sac Bay.
The Siege of Morne Fortuné
The 1st Light Infantry was the main attacking force in the siege of Morne Fortuné. Colonel Coote led an assault on a redoubt and two batteries. The French defenders, caught unaware, were overwhelmed without any serious British casualties. The French Commandant, General Nicolas Xavier de Ricard, soon surrendered and the garrison laid down their arms. French regular troops numbered only 125 and the defenders of the fort lost 2 officers and 30 men killed. The British renamed Morne Fortuné as Fort Charlotte after Prince Edward’s mother. They left St Lucia on 4 April, having appointed Sir Charles Gordon as governor. Gordon retained the battalion companies of the 6th and 9th Regiments to garrison the island.
The 9th (East Norfolk) Regiment of Foot in the Napoleonic Era
The 9th (East Norfolk) Regiment of Foot was one of the British Army’s oldest infantry regiments, founded in 1685
and formally linked to Norfolk from 1782. By the time of the Napoleonic Wars it had already fought on three
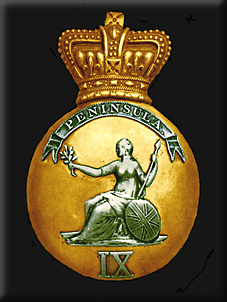
continents and earned the nickname “The Holy Boys”, supposedly because Spanish observers mistook the
figure of Britannia on their cap badge for the Virgin Mary. Another nickname, “The Fighting Ninth”,
reflected its long-standing reputation for stubborn battlefield performance.
Expansion and Early Hardship
In 1804 the regiment expanded by raising a new 2nd Battalion, joining the veteran 1st Battalion. Disaster struck
the following year when the 1st Battalion’s transport ship was wrecked off the French coast while en route from
Ireland to Germany. Around 300 men survived the wreck only to be captured and held as prisoners of war. Despite
this setback, the regiment rebuilt quickly and was soon back in the field.
Peninsular War Service
Both battalions served in the Peninsular War (1808–1814), fighting in some of the most decisive engagements of
the conflict. The 9th Foot took part in:
- Vimeiro (1808) — helping repel Junot’s French forces in Portugal.
- Corunna (1809) — where the regiment buried Sir John Moore and was the last British battalion to evacuate.
- Barrosa (1811) — a fierce battle near Cádiz that restored British honour after earlier setbacks.
- Vitoria (1813) — a sweeping victory that broke French power in Spain.
- San Sebastián (1813) — a brutal siege where the regiment suffered heavy casualties.
The regiment’s conduct at Corunna became one of its defining moments. After Moore was fatally wounded, men of the
9th Foot helped bury him under fire before withdrawing to the ships. Their discipline during the retreat earned
praise from senior commanders.
Colin Campbell’s First Campaigns
One of the most notable figures to serve with the regiment during this period was
Colin Campbell, later Field Marshal Sir Colin Campbell, 1st Baron Clyde. Commissioned into the
9th Foot in 1808, he fought in several major battles and was wounded while leading the
forlorn hope at San Sebastián — a dangerous honour reserved for volunteers who led the first assault
through a breached wall. His early service with the 9th shaped the leadership qualities that would later define
his distinguished Victorian career.
War of 1812 and Aftermath
After years of campaigning in Spain and Portugal, the 1st Battalion was sent to North America for the closing
stages of the War of 1812. Although it returned to Europe too late to fight at Waterloo, it joined the
Army of Occupation in France, helping enforce the post-war settlement after Napoleon’s final
defeat.
Legacy of the East Norfolk Regiment
By the end of the Napoleonic era, the 9th (East Norfolk) Regiment of Foot had endured shipwreck, captivity,
gruelling marches, and some of the hardest fighting of the age. Its colours carried honours from battles across
the Peninsula, and its ranks produced officers who would shape British military history for decades. The regiment
later became part of the Norfolk Regiment in the 1881 Cardwell Reforms, but its Napoleonic legacy remained central
to its identity.
|