British Empire Title

The Westcountry Walker: Hiking Through History

Sampford Courtenay and Honeychurch: Contrasting churches and Rebellion


Battle of Sampford Courtenay

On the face of it, Sampford Courtenay is just another beautiful Devon village with pretty thatched cottages and a church built on the wealth of the wool trade. And yet in 1549 this isolated Devon village was at the forefront of rebellion in both its initiation and its conclusion.

The 1549 Prayer Book Rebellion is usually considered a Cornish rebellion, but the Cornish—angered over the imposition of a prayer book in the Saxon tongue rather than their own Cornish language—found that worshippers in Devon were equally outraged at the wider changes being implemented in their churches during the reign of Edward VI. In addition to changing the prayer book from Latin to English, priests were to wear plainer robes, altars were to be replaced by simple tables, prayers for purgatory were outlawed, and the doctrine of trans‑substantiation was challenged. It was even more galling for many worshippers that Henry VIII, who had instituted a limited and conservative challenge to Papal power but kept much doctrine untouched, had stated in his will that his son would not change religious practices until Edward reached maturity in 1561. Until that time, a regency had been established under Edward Seymour, the Duke of Somerset, the young King’s ambitious uncle. Somerset, a strong Protestant, knew he had to push reforms quickly in case Edward’s Catholic half‑sister returned to the throne (which she indeed would only a few years later). His policies were due to come into effect on Whitsun Day in 1549.

The Cornish rising had begun at the start of June on the anniversary of the death of the unpopular Archdeacon of Cornwall, William Body, who had been removing statues from churches in Cornwall. A promise that his killers would be pardoned was not honoured, which further enraged many Cornish. They gathered at Bodmin and captured Trematon Castle before heading north up the Tamar Valley just days before the Whitsun reforms were to be implemented.
St Andrew’s Church, Sampford Courtenay

The Rector of St Andrew’s Church at Sampford Courtenay was William Harper, and he took the service on the Sunday, which enraged many members of the congregation. The following day a large group of locals gathered, seething with disgust and talking openly of joining the Cornish marching in their direction. A local yeoman called William Hellyons stood on the steps outside the Church Room just in front of the church, imploring them not to get involved in rebellion, but his message fell on deaf ears. It is not clear whether he fell and broke his neck or was assaulted and killed outright, but the first blood of the Prayer Book Rebellion was spilled here in Sampford Courtenay. There was now no turning back, and the local people joined with the Cornish and marched on Crediton, Exeter, and as far as Fenny Bridges with as many as 10,000 rebels under the command of Arundell.

The government forces were caught off guard, not helped by the fact that they were at war with the French and the Scottish too. Hence they had to rely on an eclectic mix of mercenaries from Spain, Italy and Germany. They would later be joined by a Welsh contingent. These Landsknechts and arquebusiers wore fantastically colourful uniforms and, to add insult to injury, many of them were Catholic fighting for a Protestant paymaster against rebels who wanted to retain Catholic traditions and rituals.

They failed to seize Exeter, and a growing government army managed to contain their advance and start pushing them back, although not without considerable losses in the process—largely at the hands of Westcountry longbowmen who could fire far faster than the arquebusiers could manage. What the rebels really lacked, though, was cavalry, and so they struggled to exploit opportunities or react to dangers.

Arundell had reluctantly retreated with the remains of his army—perhaps a couple of thousand—to Sampford Courtenay itself and a camp on Green Hill just to the east in August 1549. It was here that 9,000 government forces, including the recently arrived Welsh, set upon the rebels camped on Green Hill. Arundell saw the rebels being pushed back by superior numbers and tried to sally out with forces from the village but was pushed back into it. The government army waited for yet more forces to arrive before delivering a determined attack on the barricaded village and church. The defenders were eventually overwhelmed, suffering some 700 casualties in the process. Many fled but were ruthlessly pursued, and many were hanged, drawn and quartered for treason.

The rebellion had crossed its Rubicon with the death of William Hellyons in Sampford Courtenay back in June and rather fittingly finished in almost exactly the same spot some nine weeks later. On the face of it, it was a failure, and many thousands of Westcountrymen were executed for challenging the power of the state. And yet the most powerful victim of all was the Duke of Somerset, whose rush to implement Protestant reforms was blamed for igniting the rebellions. He himself would be executed in 1552 by his successor, John Dudley, the Earl of Warwick.

Intriguingly, the original wooden altar table used at that Whitsun service in June 1549 is still in the church. It is now used as the altar table in the Lady Chapel, but it provides a chance to touch and feel the Protestant Reformation in a raw physical manifestation. The changes demanded by the government upon the church did indeed motivate thousands to open rebellion, knowing full well the consequences of their actions—which indeed were inflicted savagely. The small altar table’s appearance inspired hostility and rebellion.

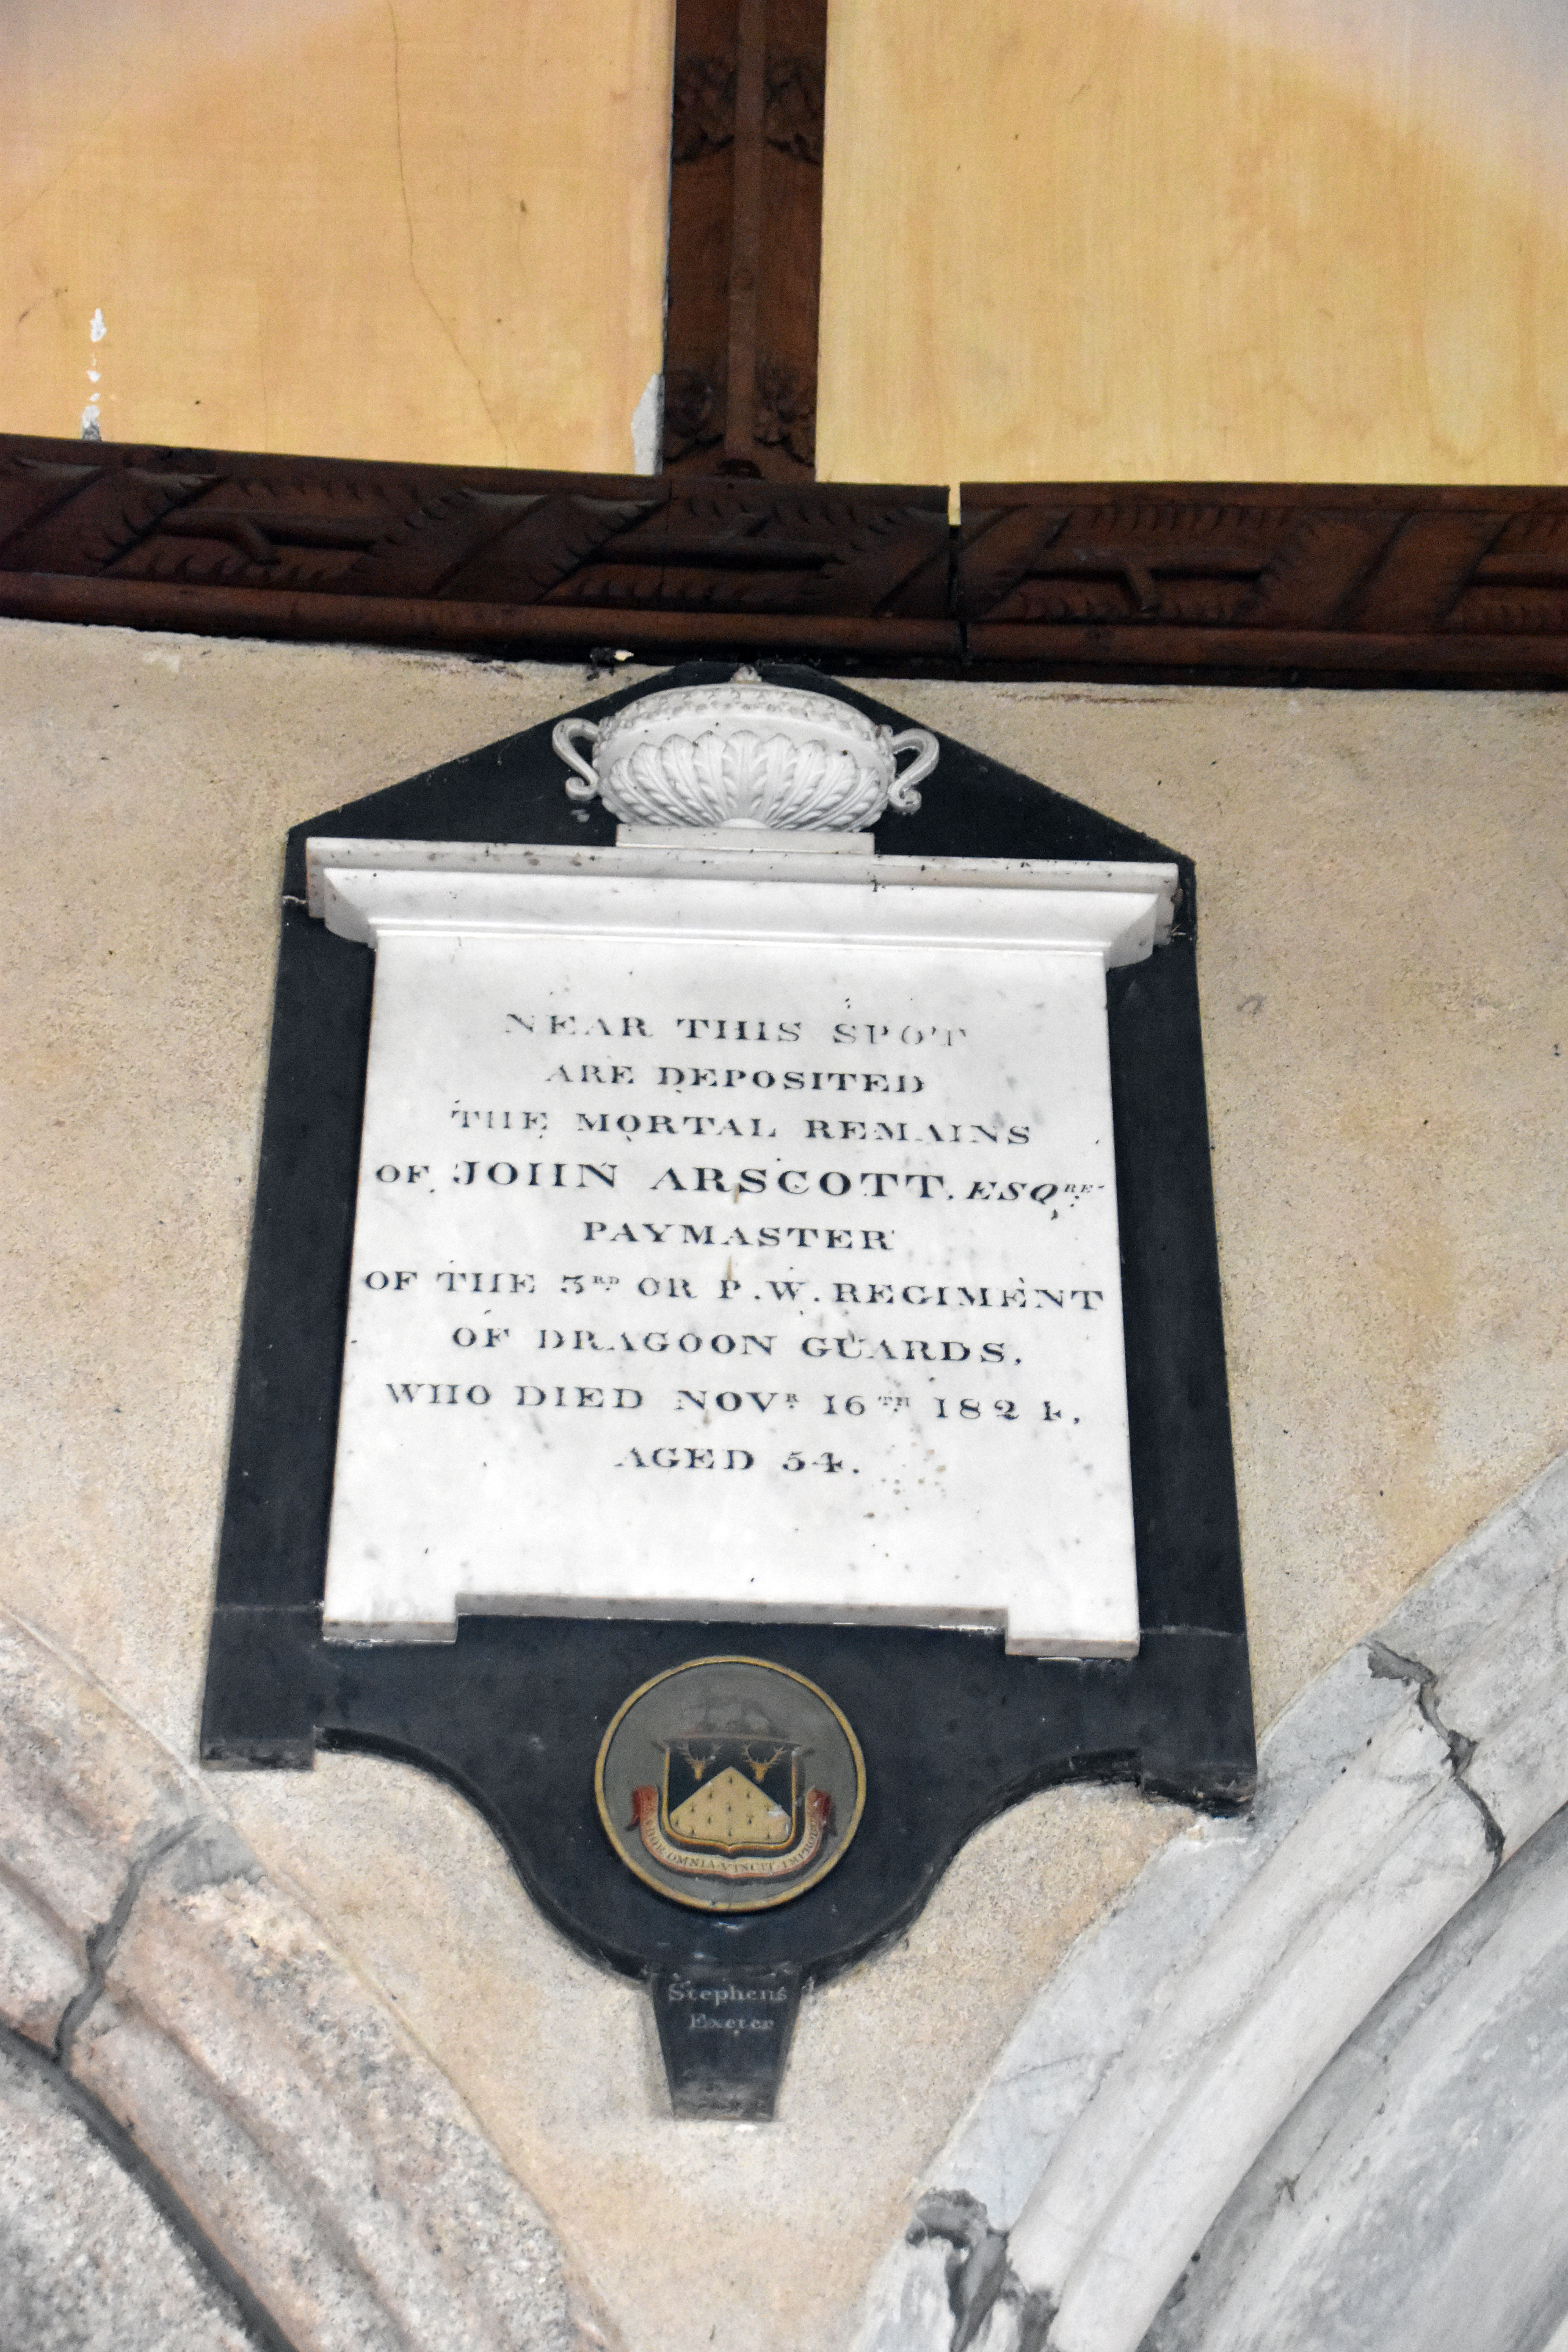
Of course, the church holds far more history than just the events of the summer of 1549. We noticed a dedication to John Arscott, a Paymaster in the 3rd Dragoon Guards who died in 1824. He had trained as a surgeon. It transpires that he had been captured in 1812 whilst fighting in the Peninsular War and was eventually released as part of a prisoner exchange by the Duke of Wellington himself.

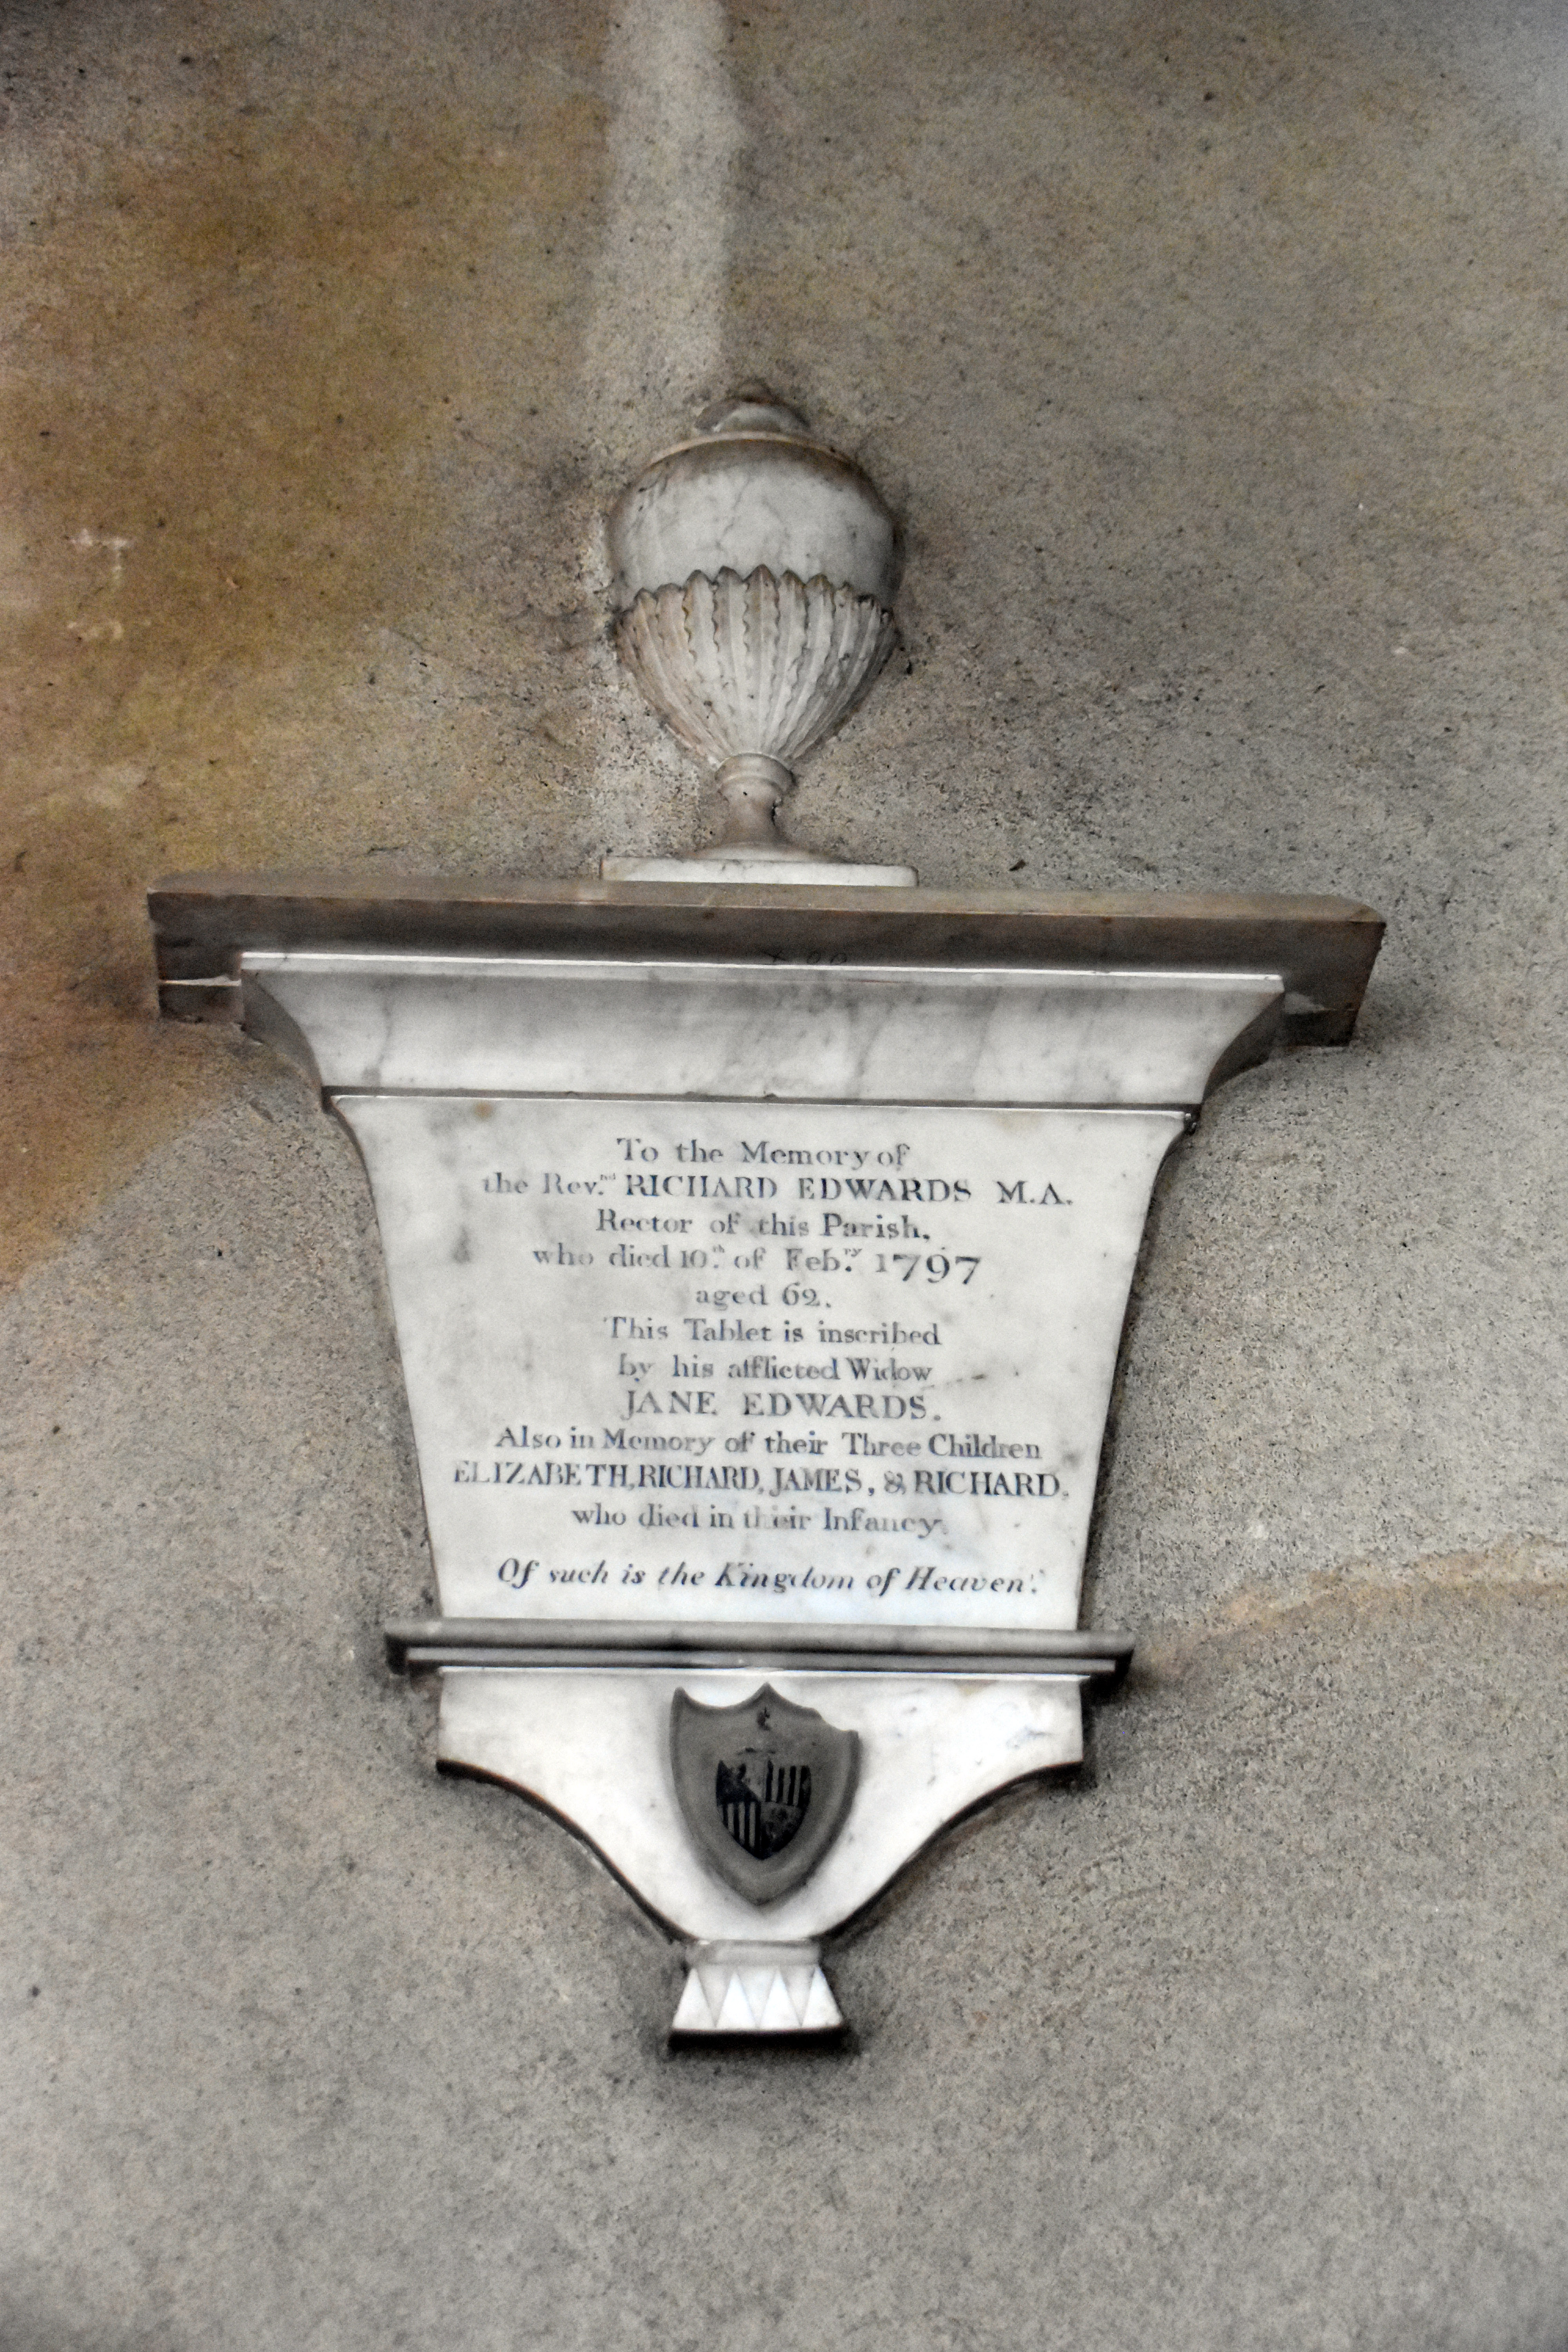
There was a sad memorial inscribed by Jane Edwards for her husband Richard, who had been the rector and died in 1797, made even more poignant when it points out that she had also lost three of her children in their infancy.

At the other extreme was a memorial to Mary Tickell, who, it says, “enjoyed the unimpaired possession of her faculties to nearly the Age of Ninety”. Although child mortality was horrific, if you survived to adulthood and led “a life of temperance” like Mary did, you might well live to a grand old age indeed.

Of course, it is war that cuts down the young and healthy, and in addition to a war memorial for the dead of the village is a sad memorial to Edwin John Hawkins, who fought with the Somerset Light Infantry and tragically died of his wounds just two weeks before the end of hostilities in 1918.

Green Men Bosses

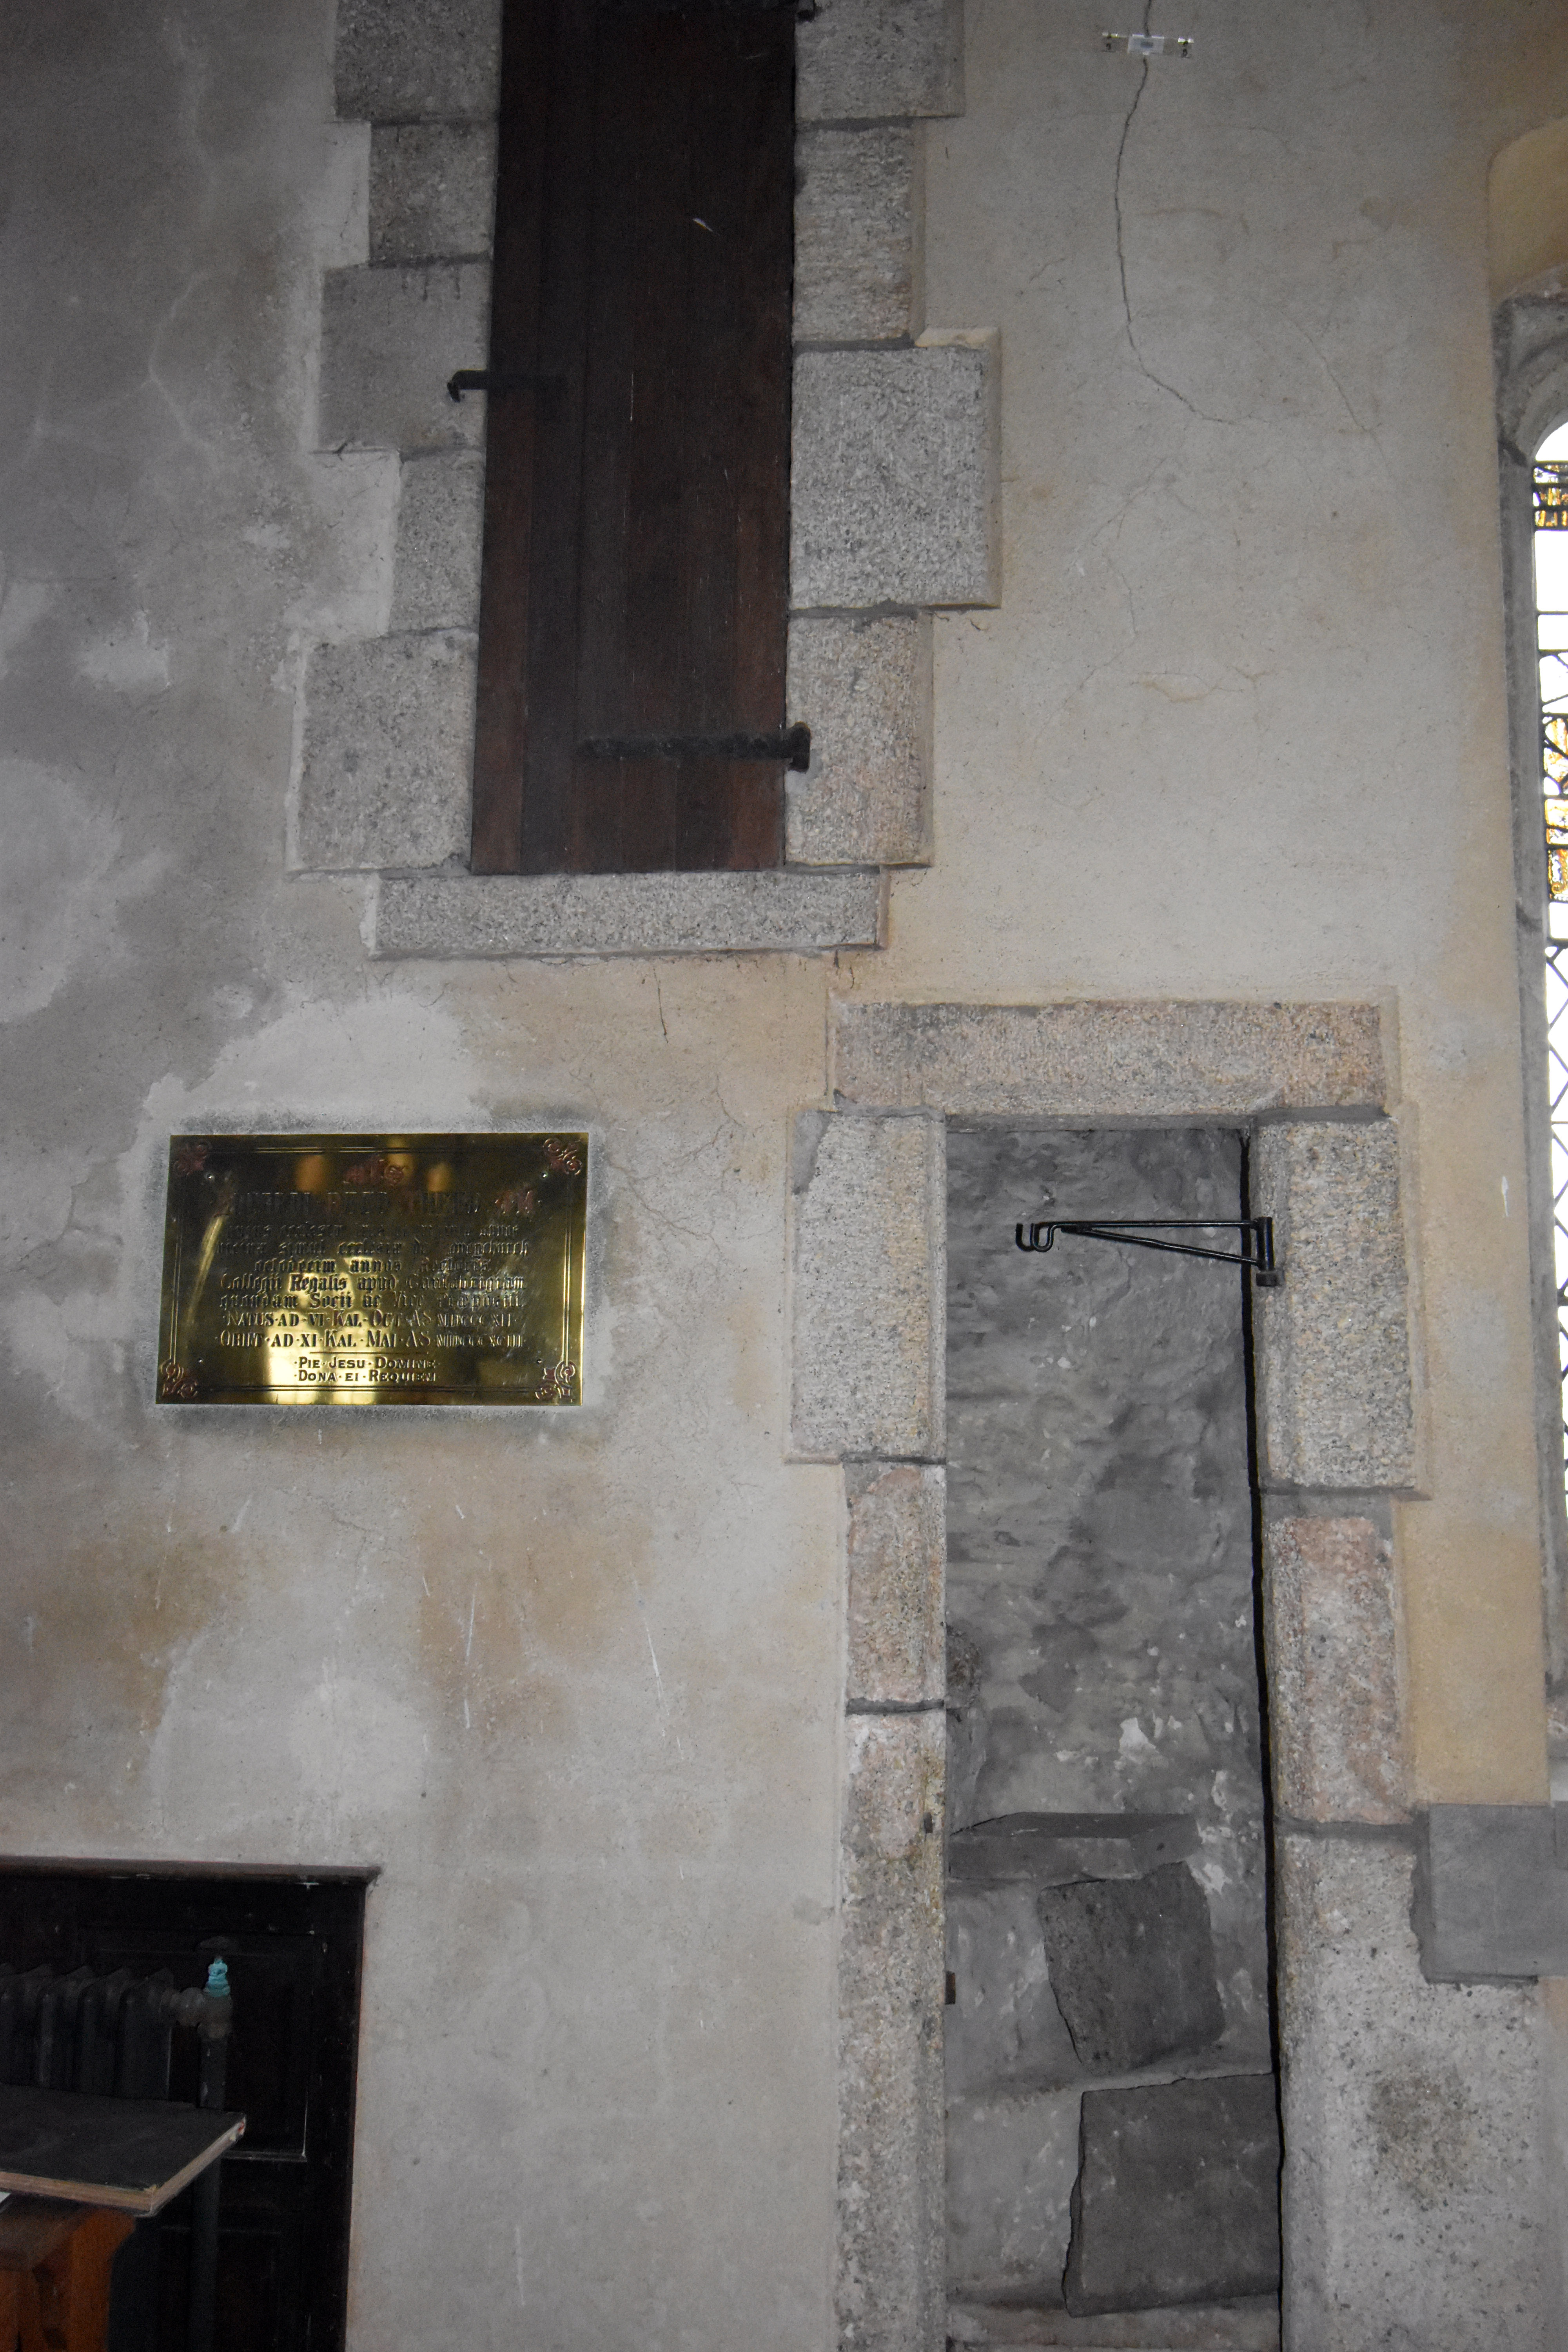
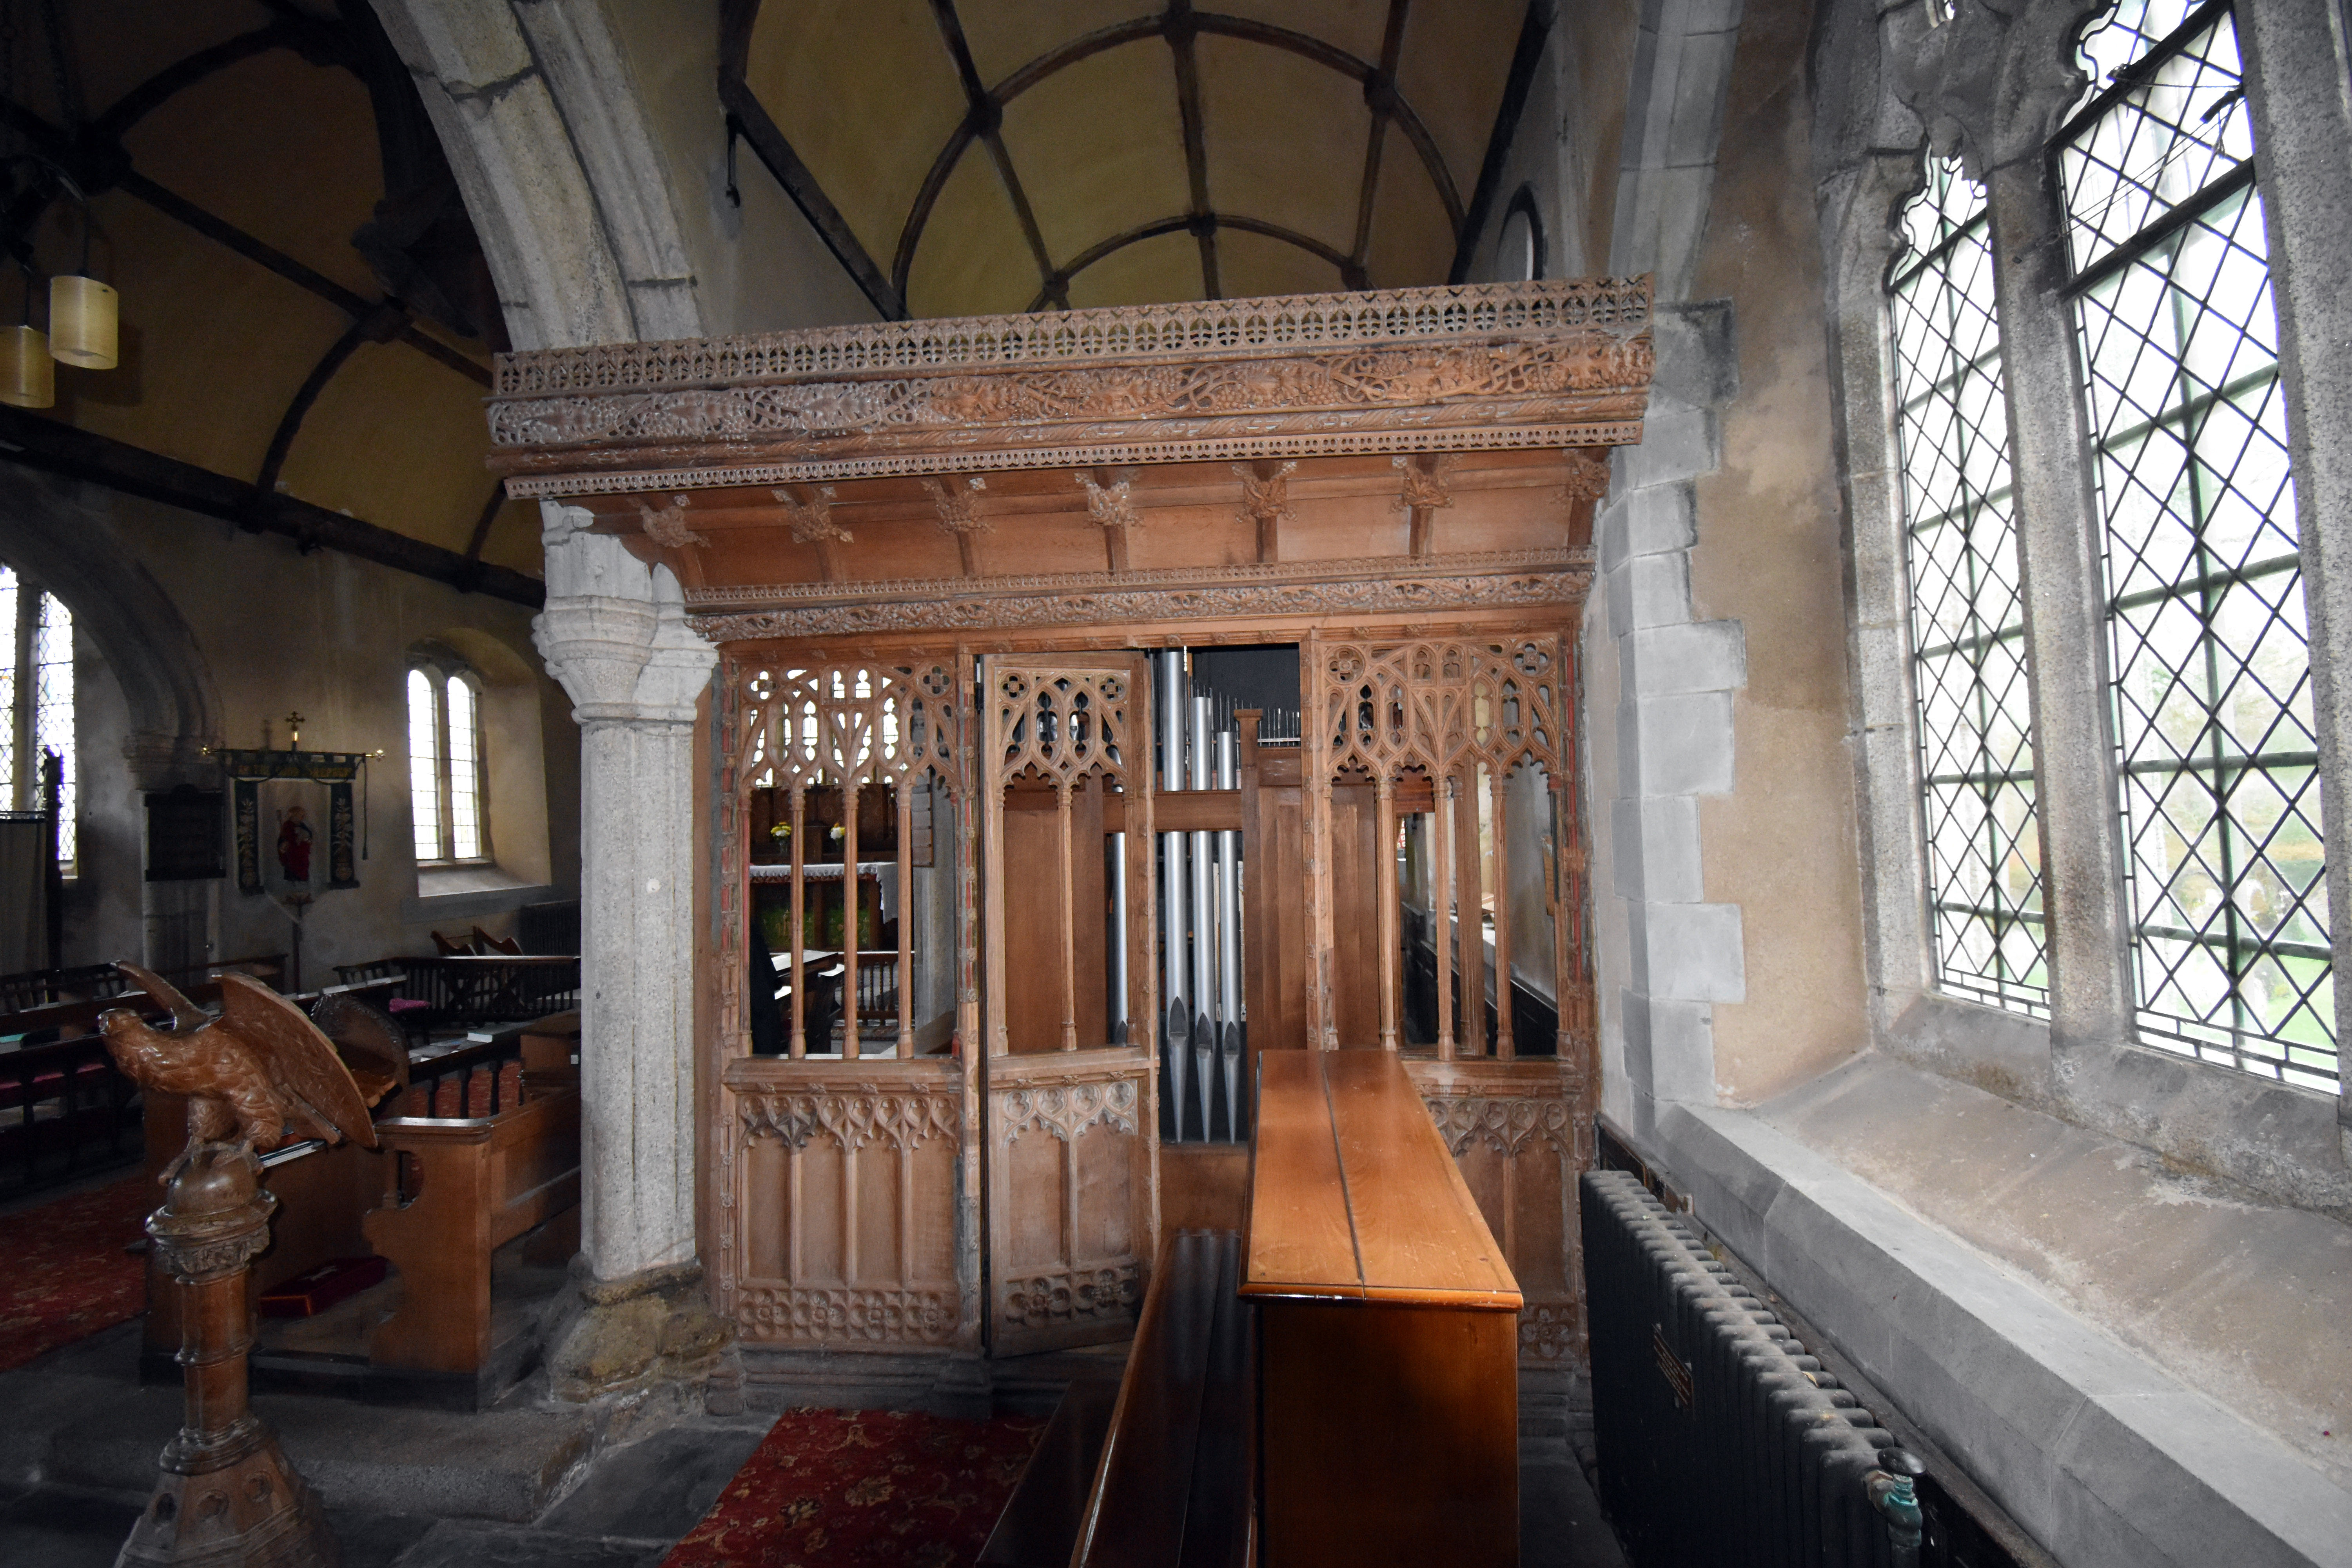
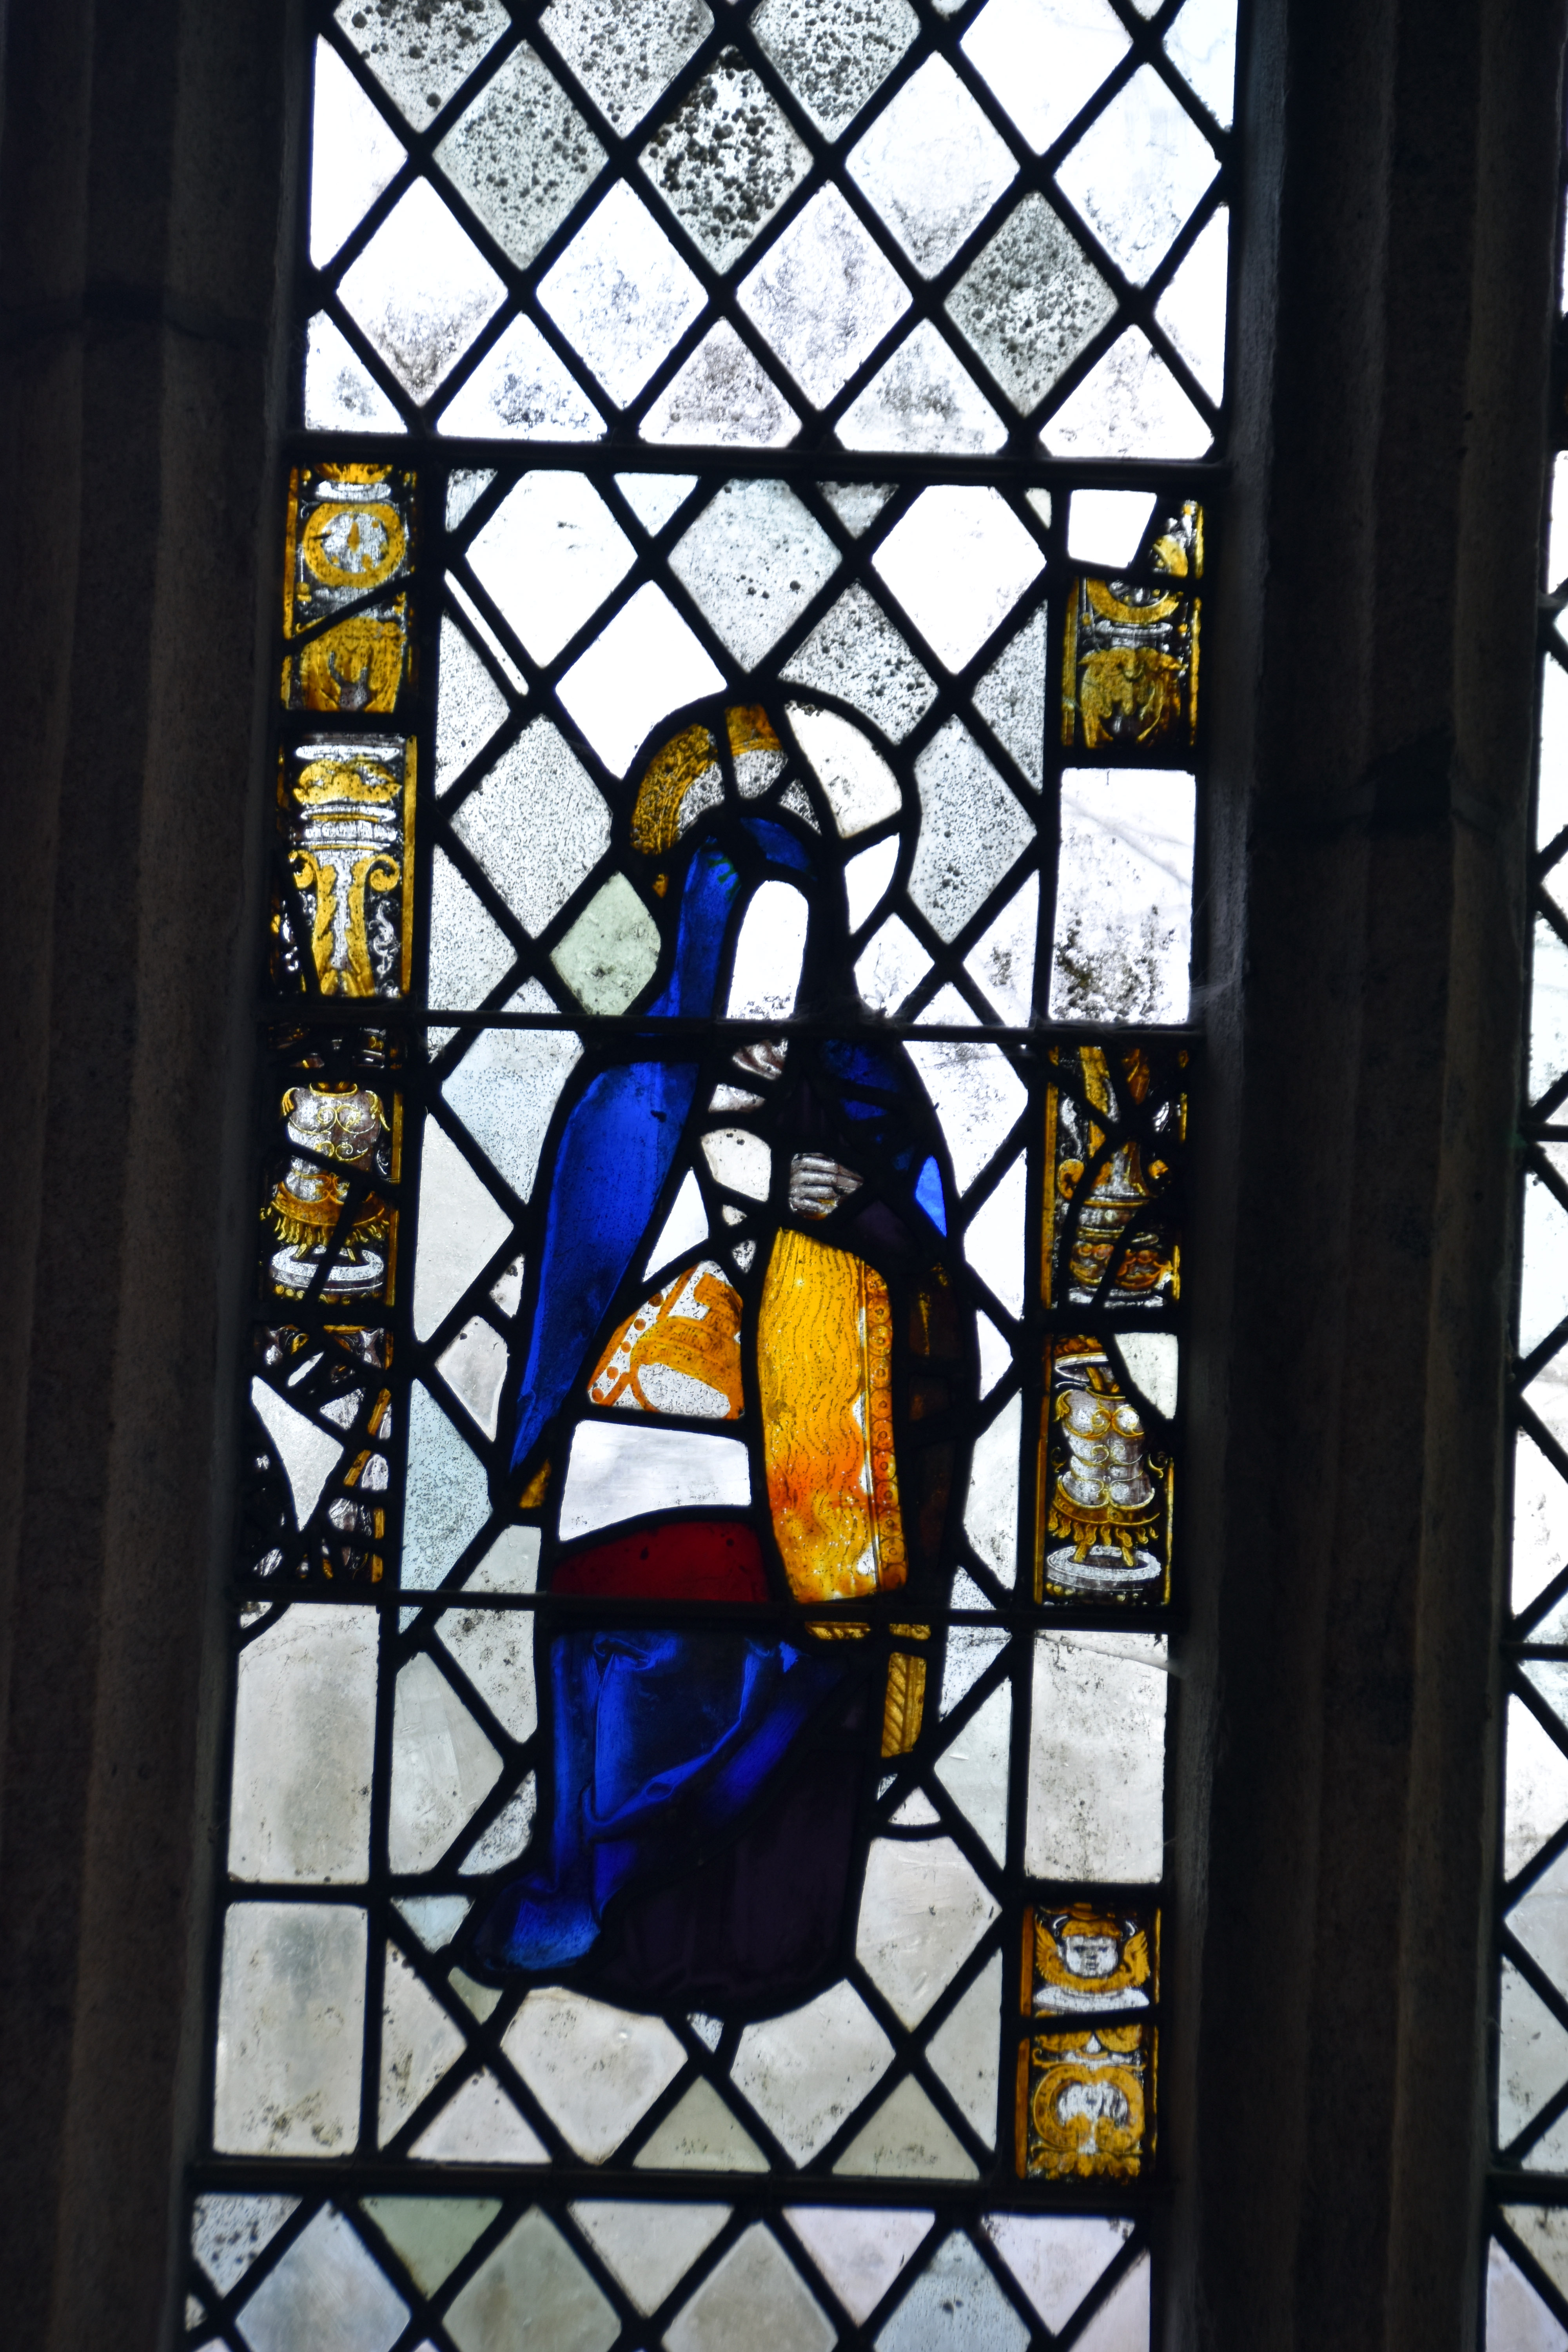
There is only a little part of the rood screen left in the church, although you can plainly see where the rood loft entrance would have been—and in fact that would still have been in place in 1549. Rood lofts were not removed until the reign of Queen Elizabeth a decade later. Interestingly, the church also retains some of its original medieval glass, which again would have been there during the fighting of 1549.

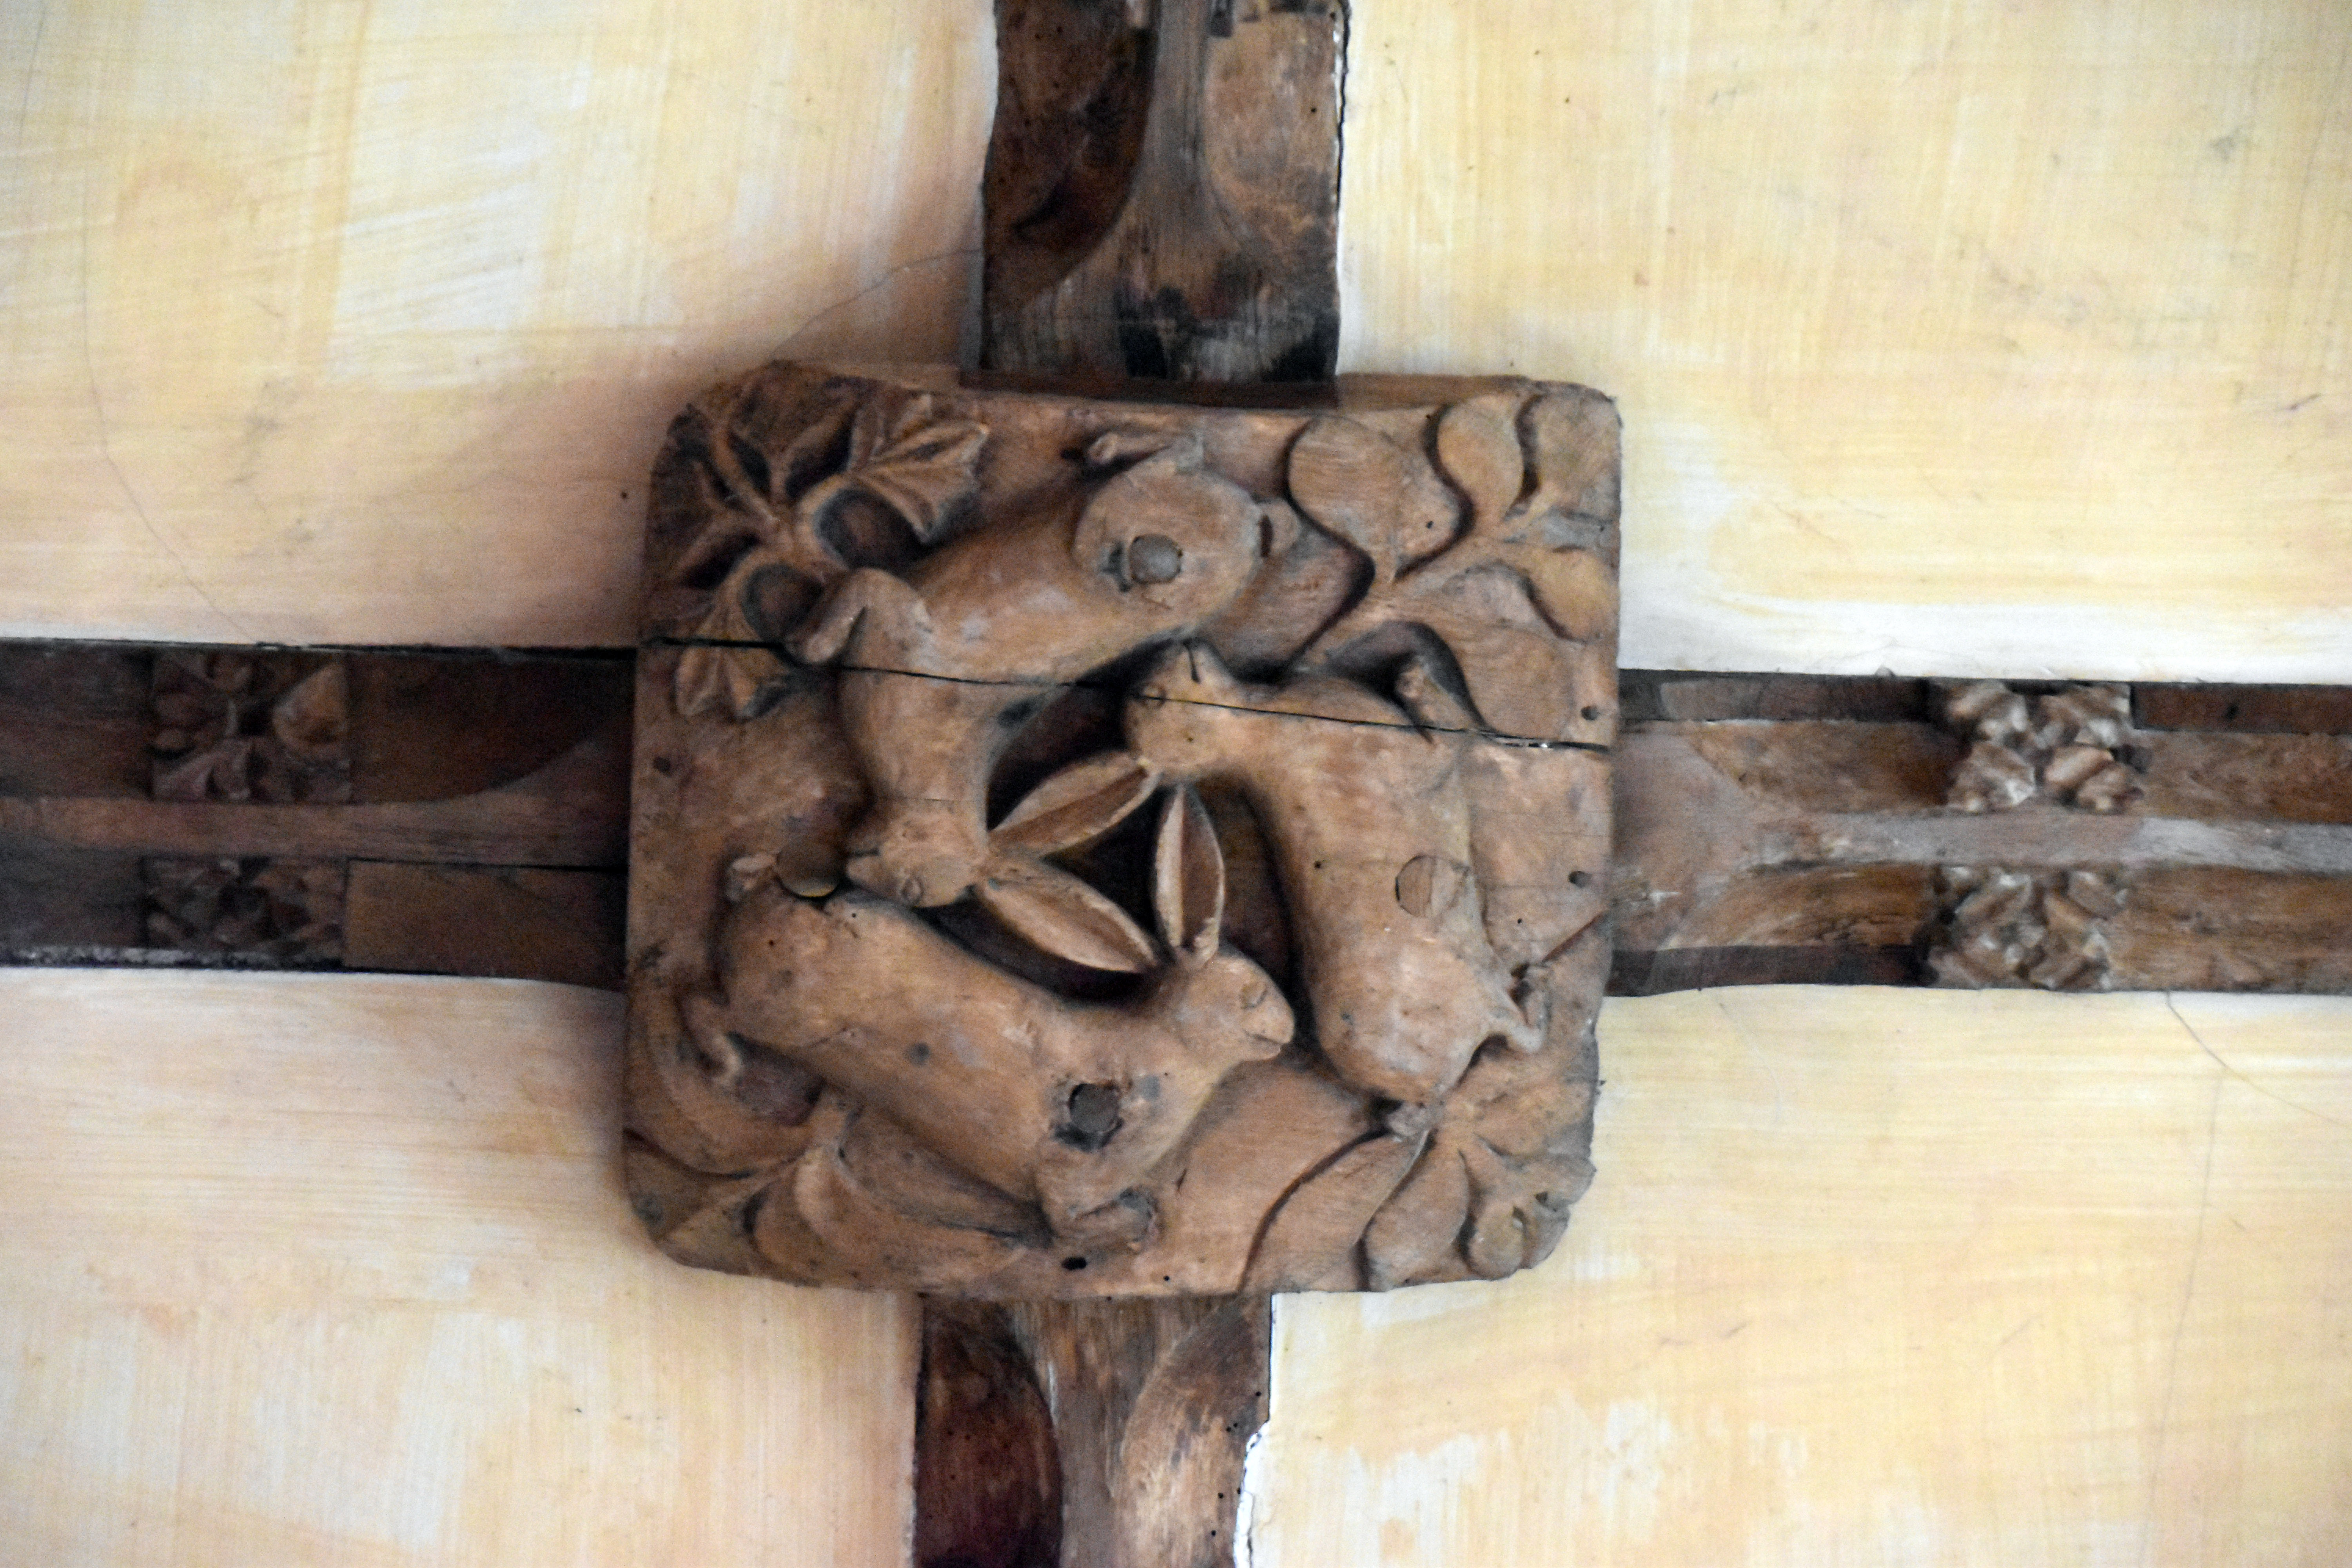
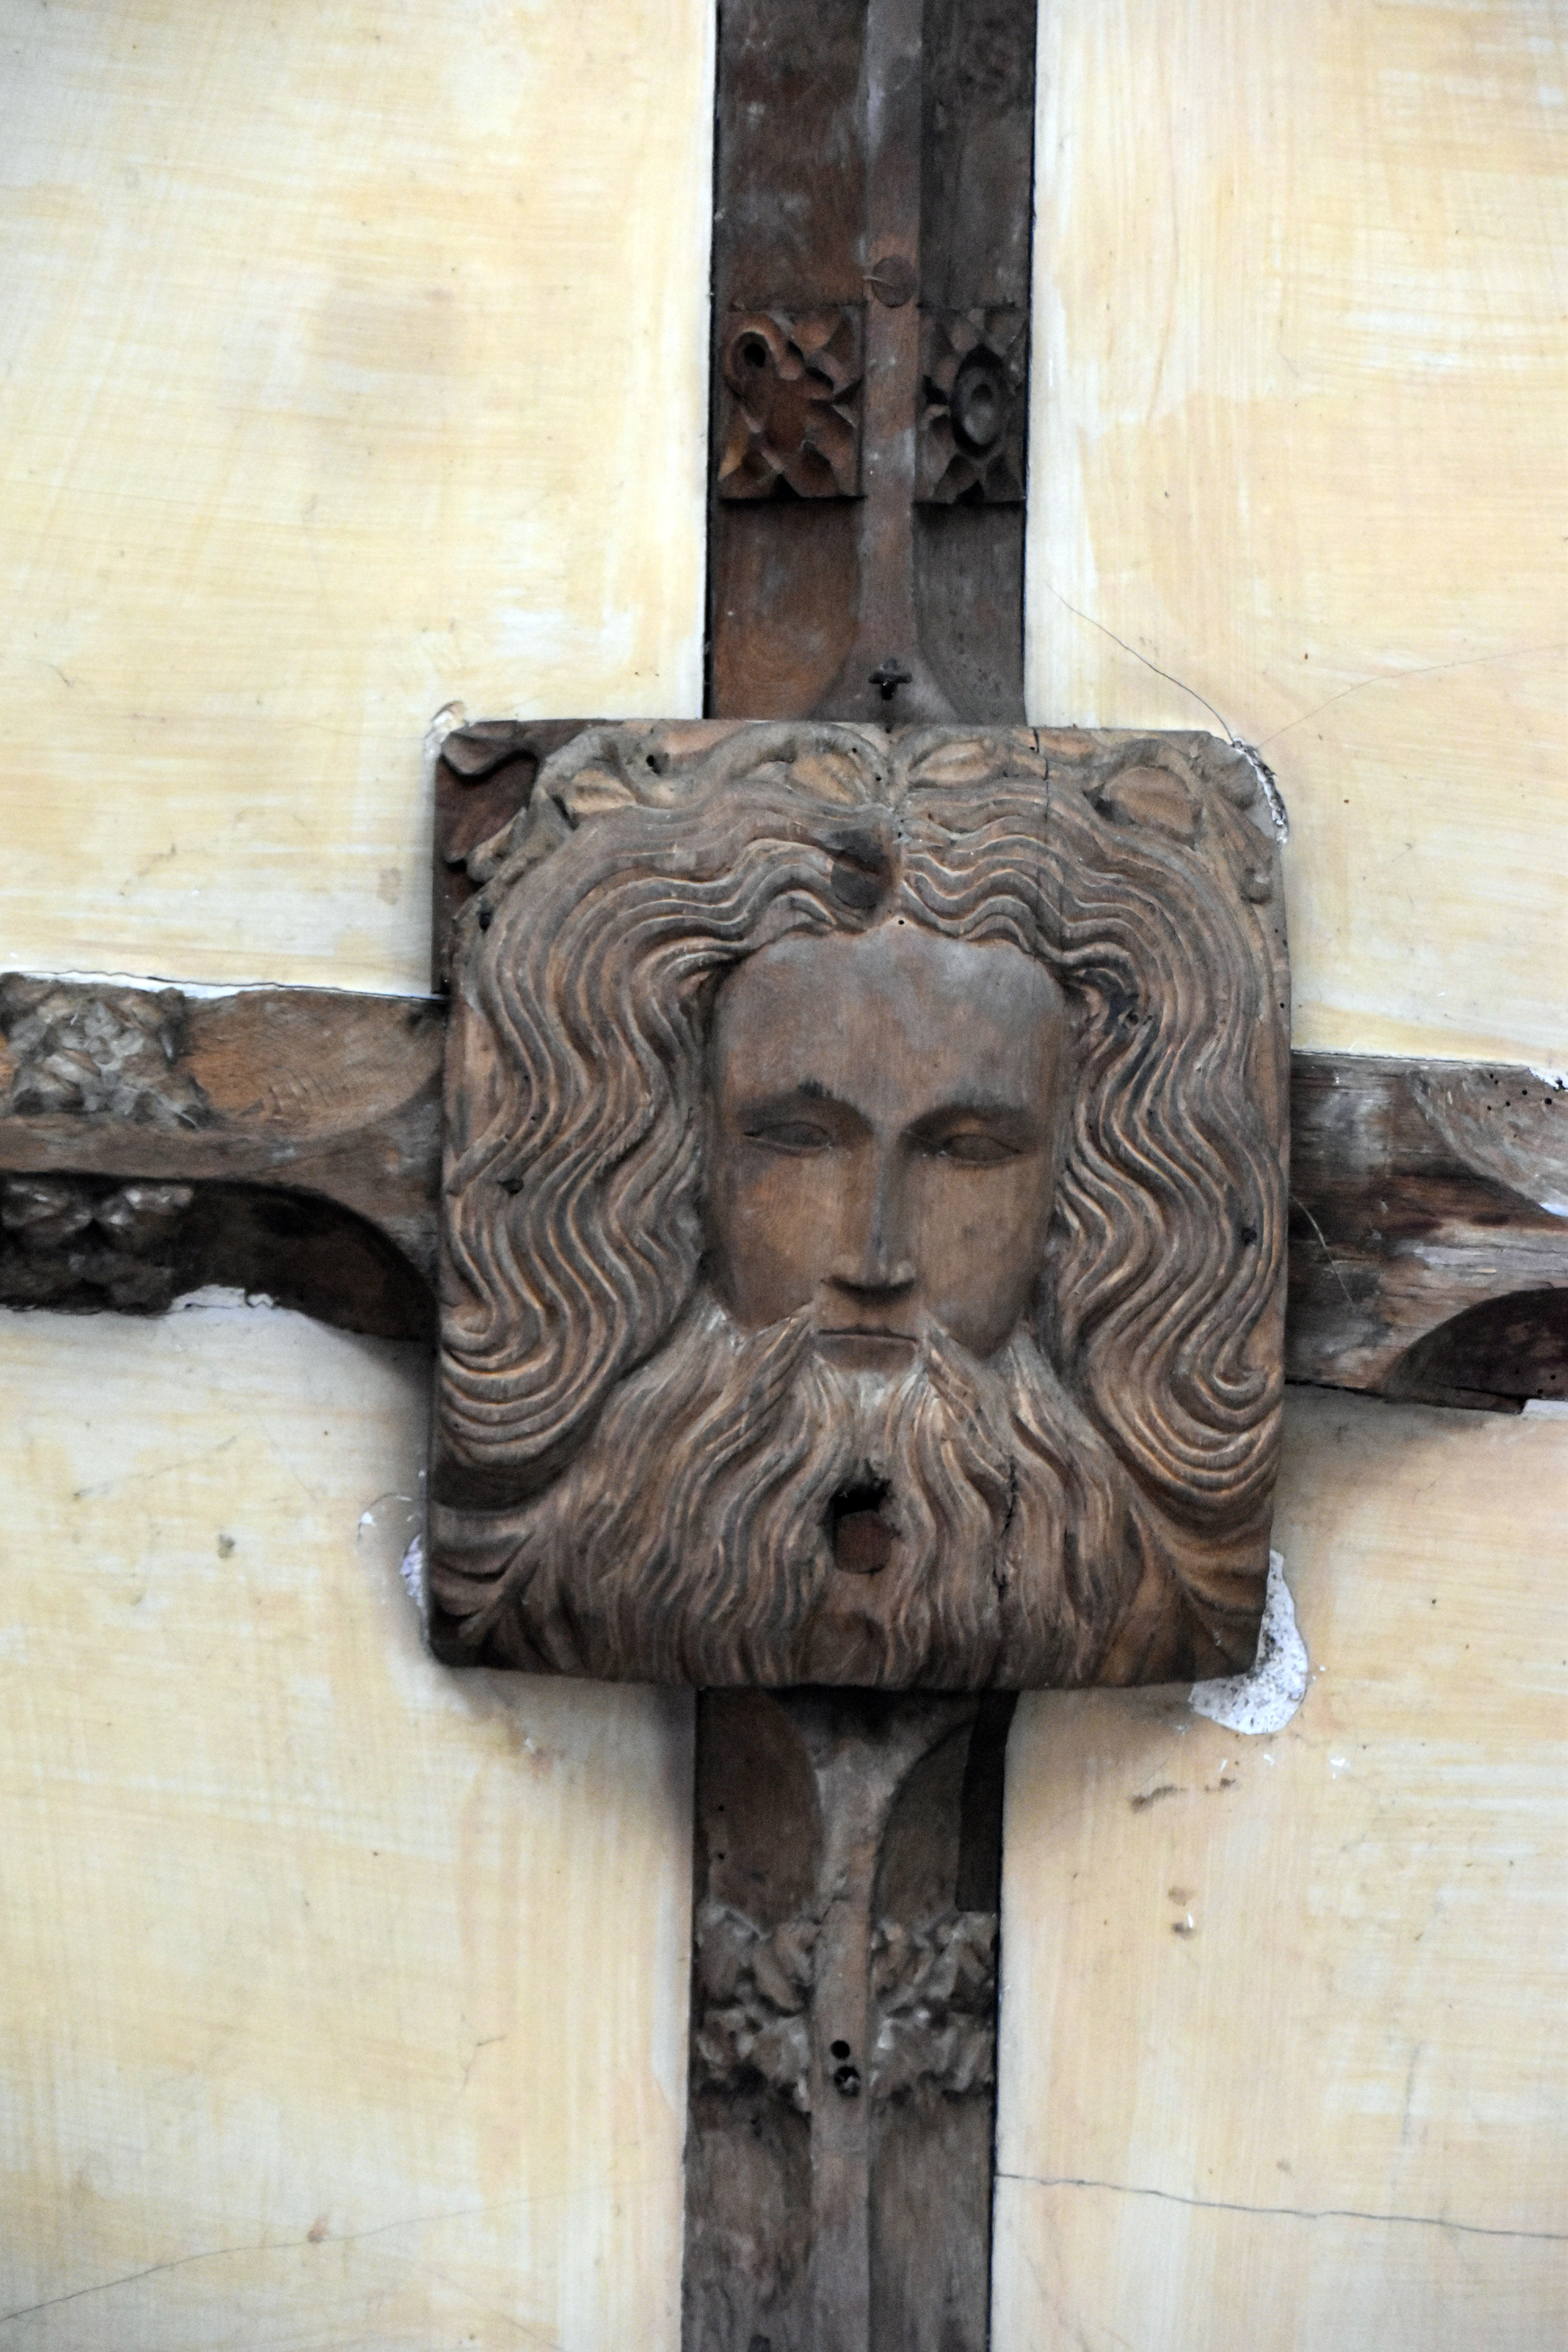
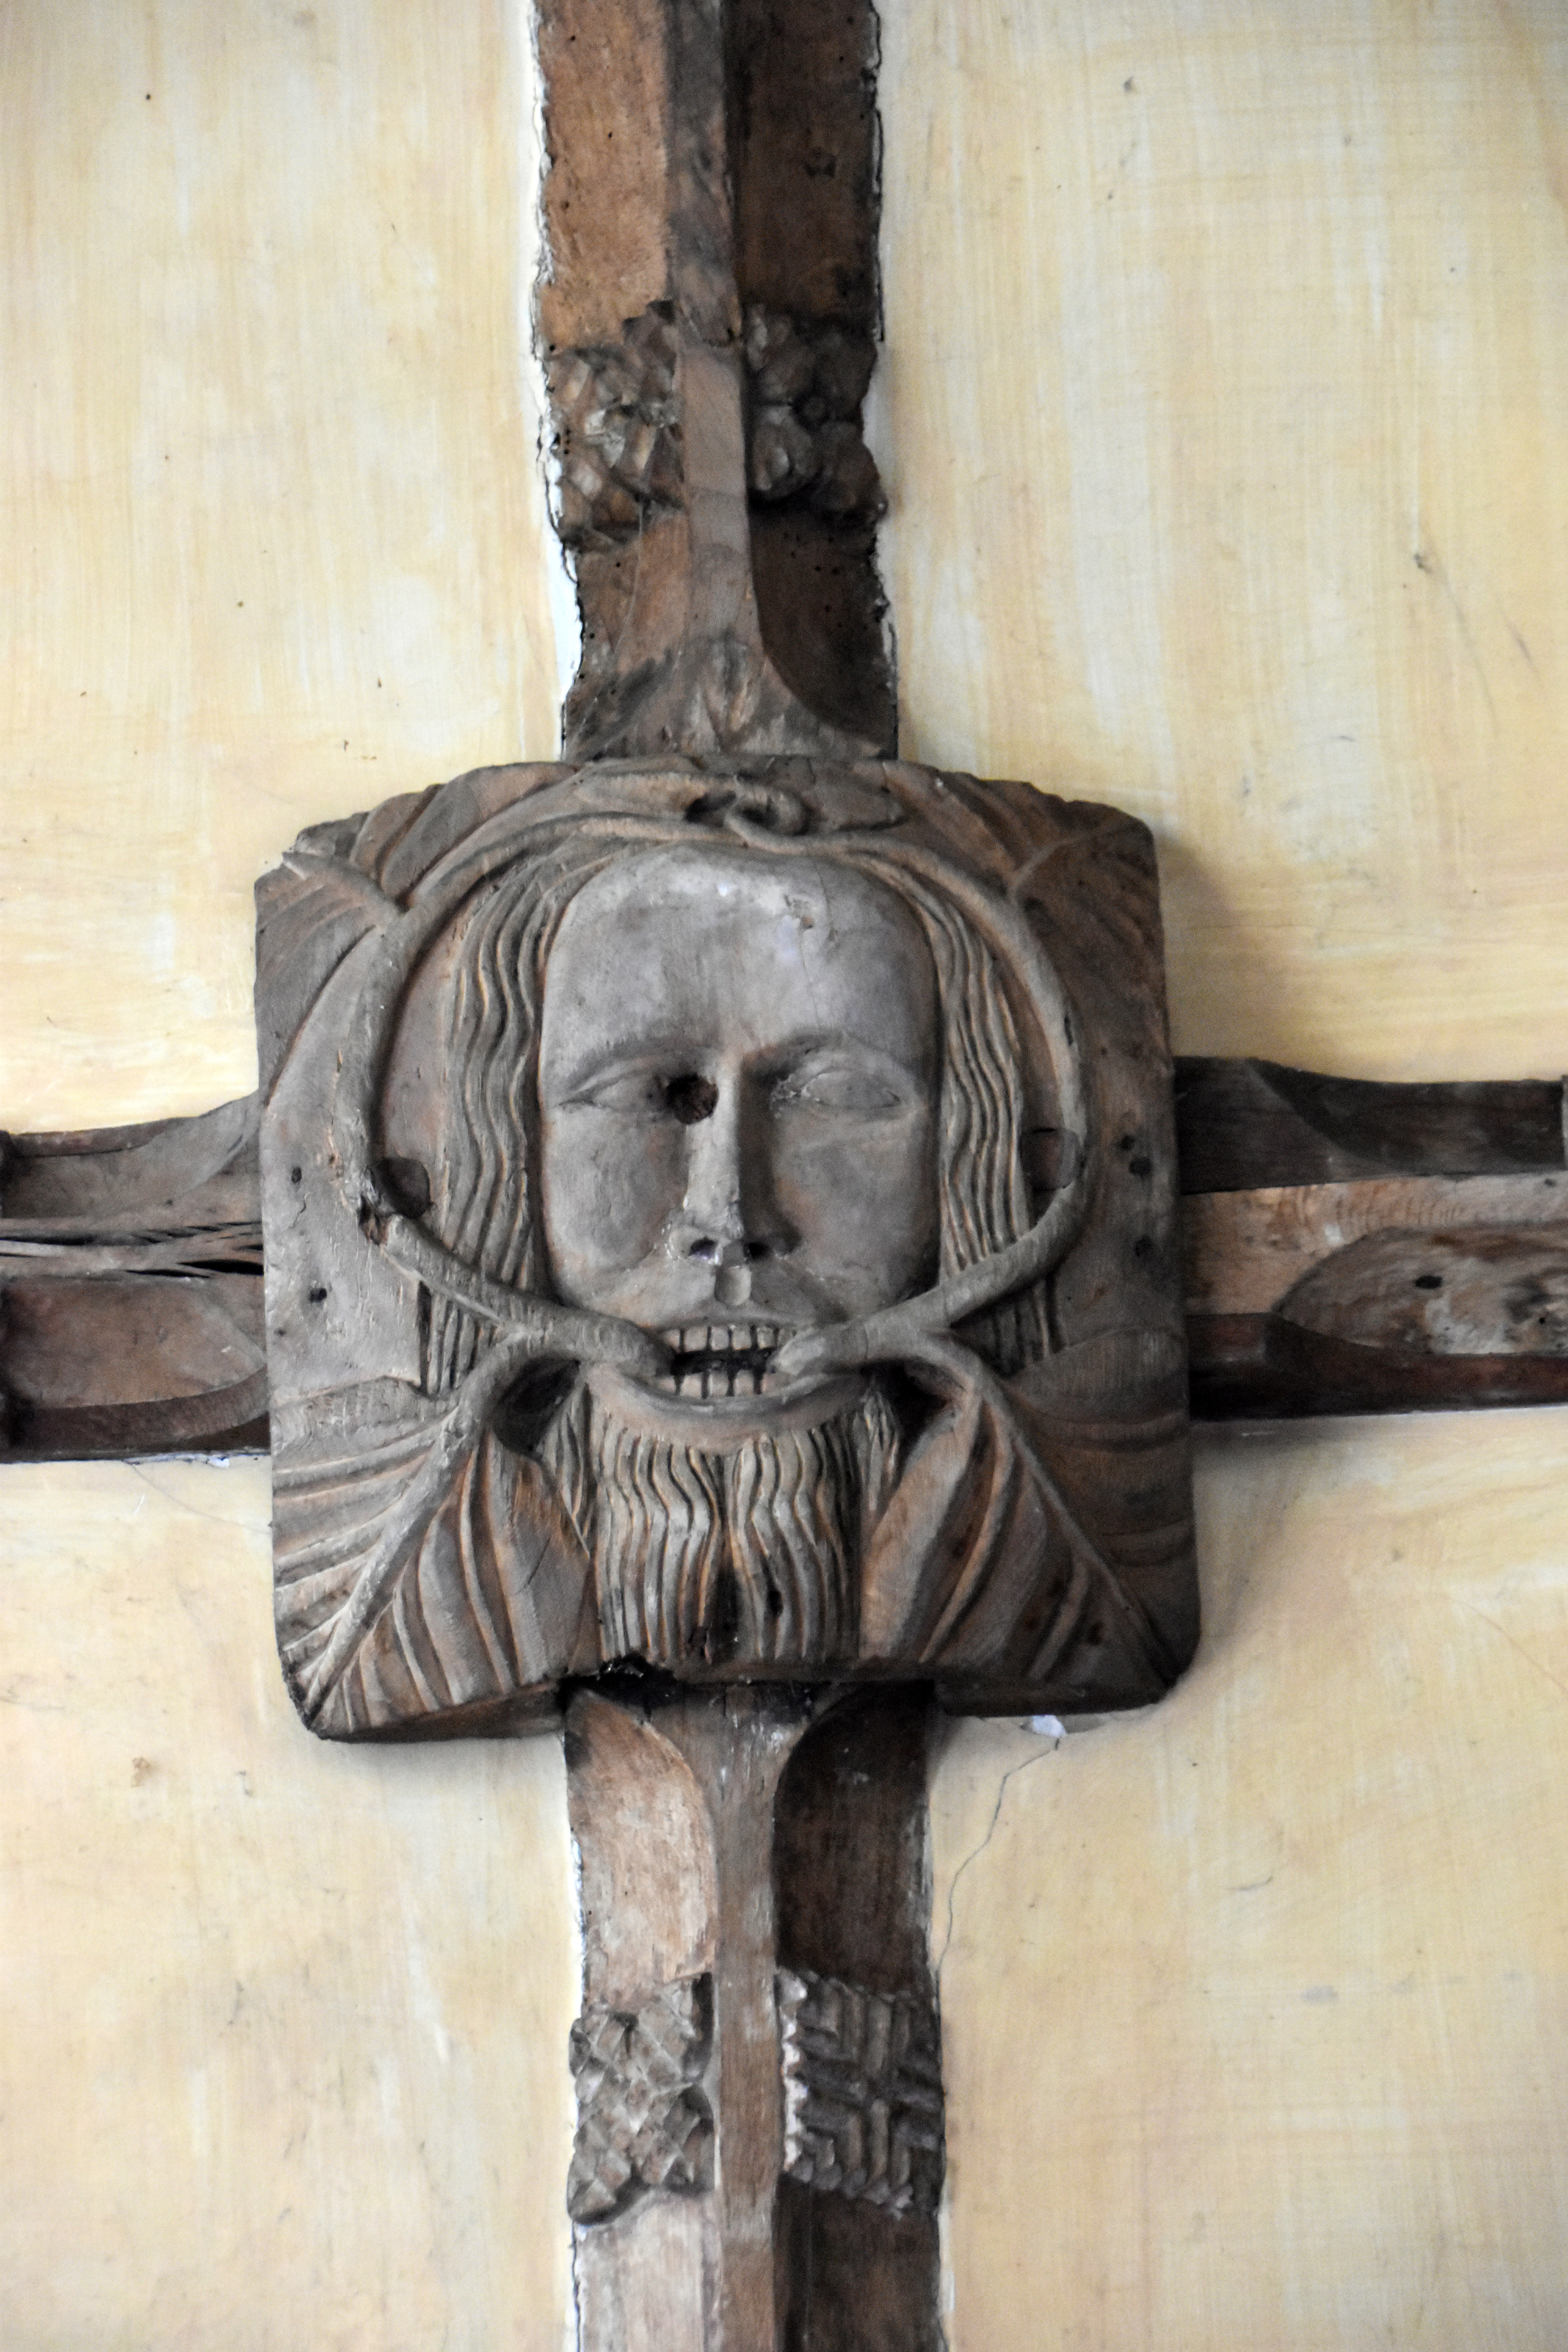
If you look up, though, you see some magnificent carved bosses looking down on the congregation—including quite a collection of Green Men. Often you might find a single Green Man hidden away, but here there are at least four. And I don’t know if it is a coincidence or not, but when the church was renovated by the Victorians they used the old pew ends as a dado around the wall and installed chairs dyed a very distinctive green colour.

Methodist Chapel

Next to the church is the Church House mentioned earlier, where William Hellyons was to meet his end and catapult the village into rebellion against the Crown with tragic consequences. Not many of these Church Houses survive. They were a venue to raise money for the church, often through selling church ale, and also a venue for manor courts to arbitrate on local matters. On the outside is where you will find plaques honouring the parish’s war dead and William Hellyons and the Prayer Book Rebellion.

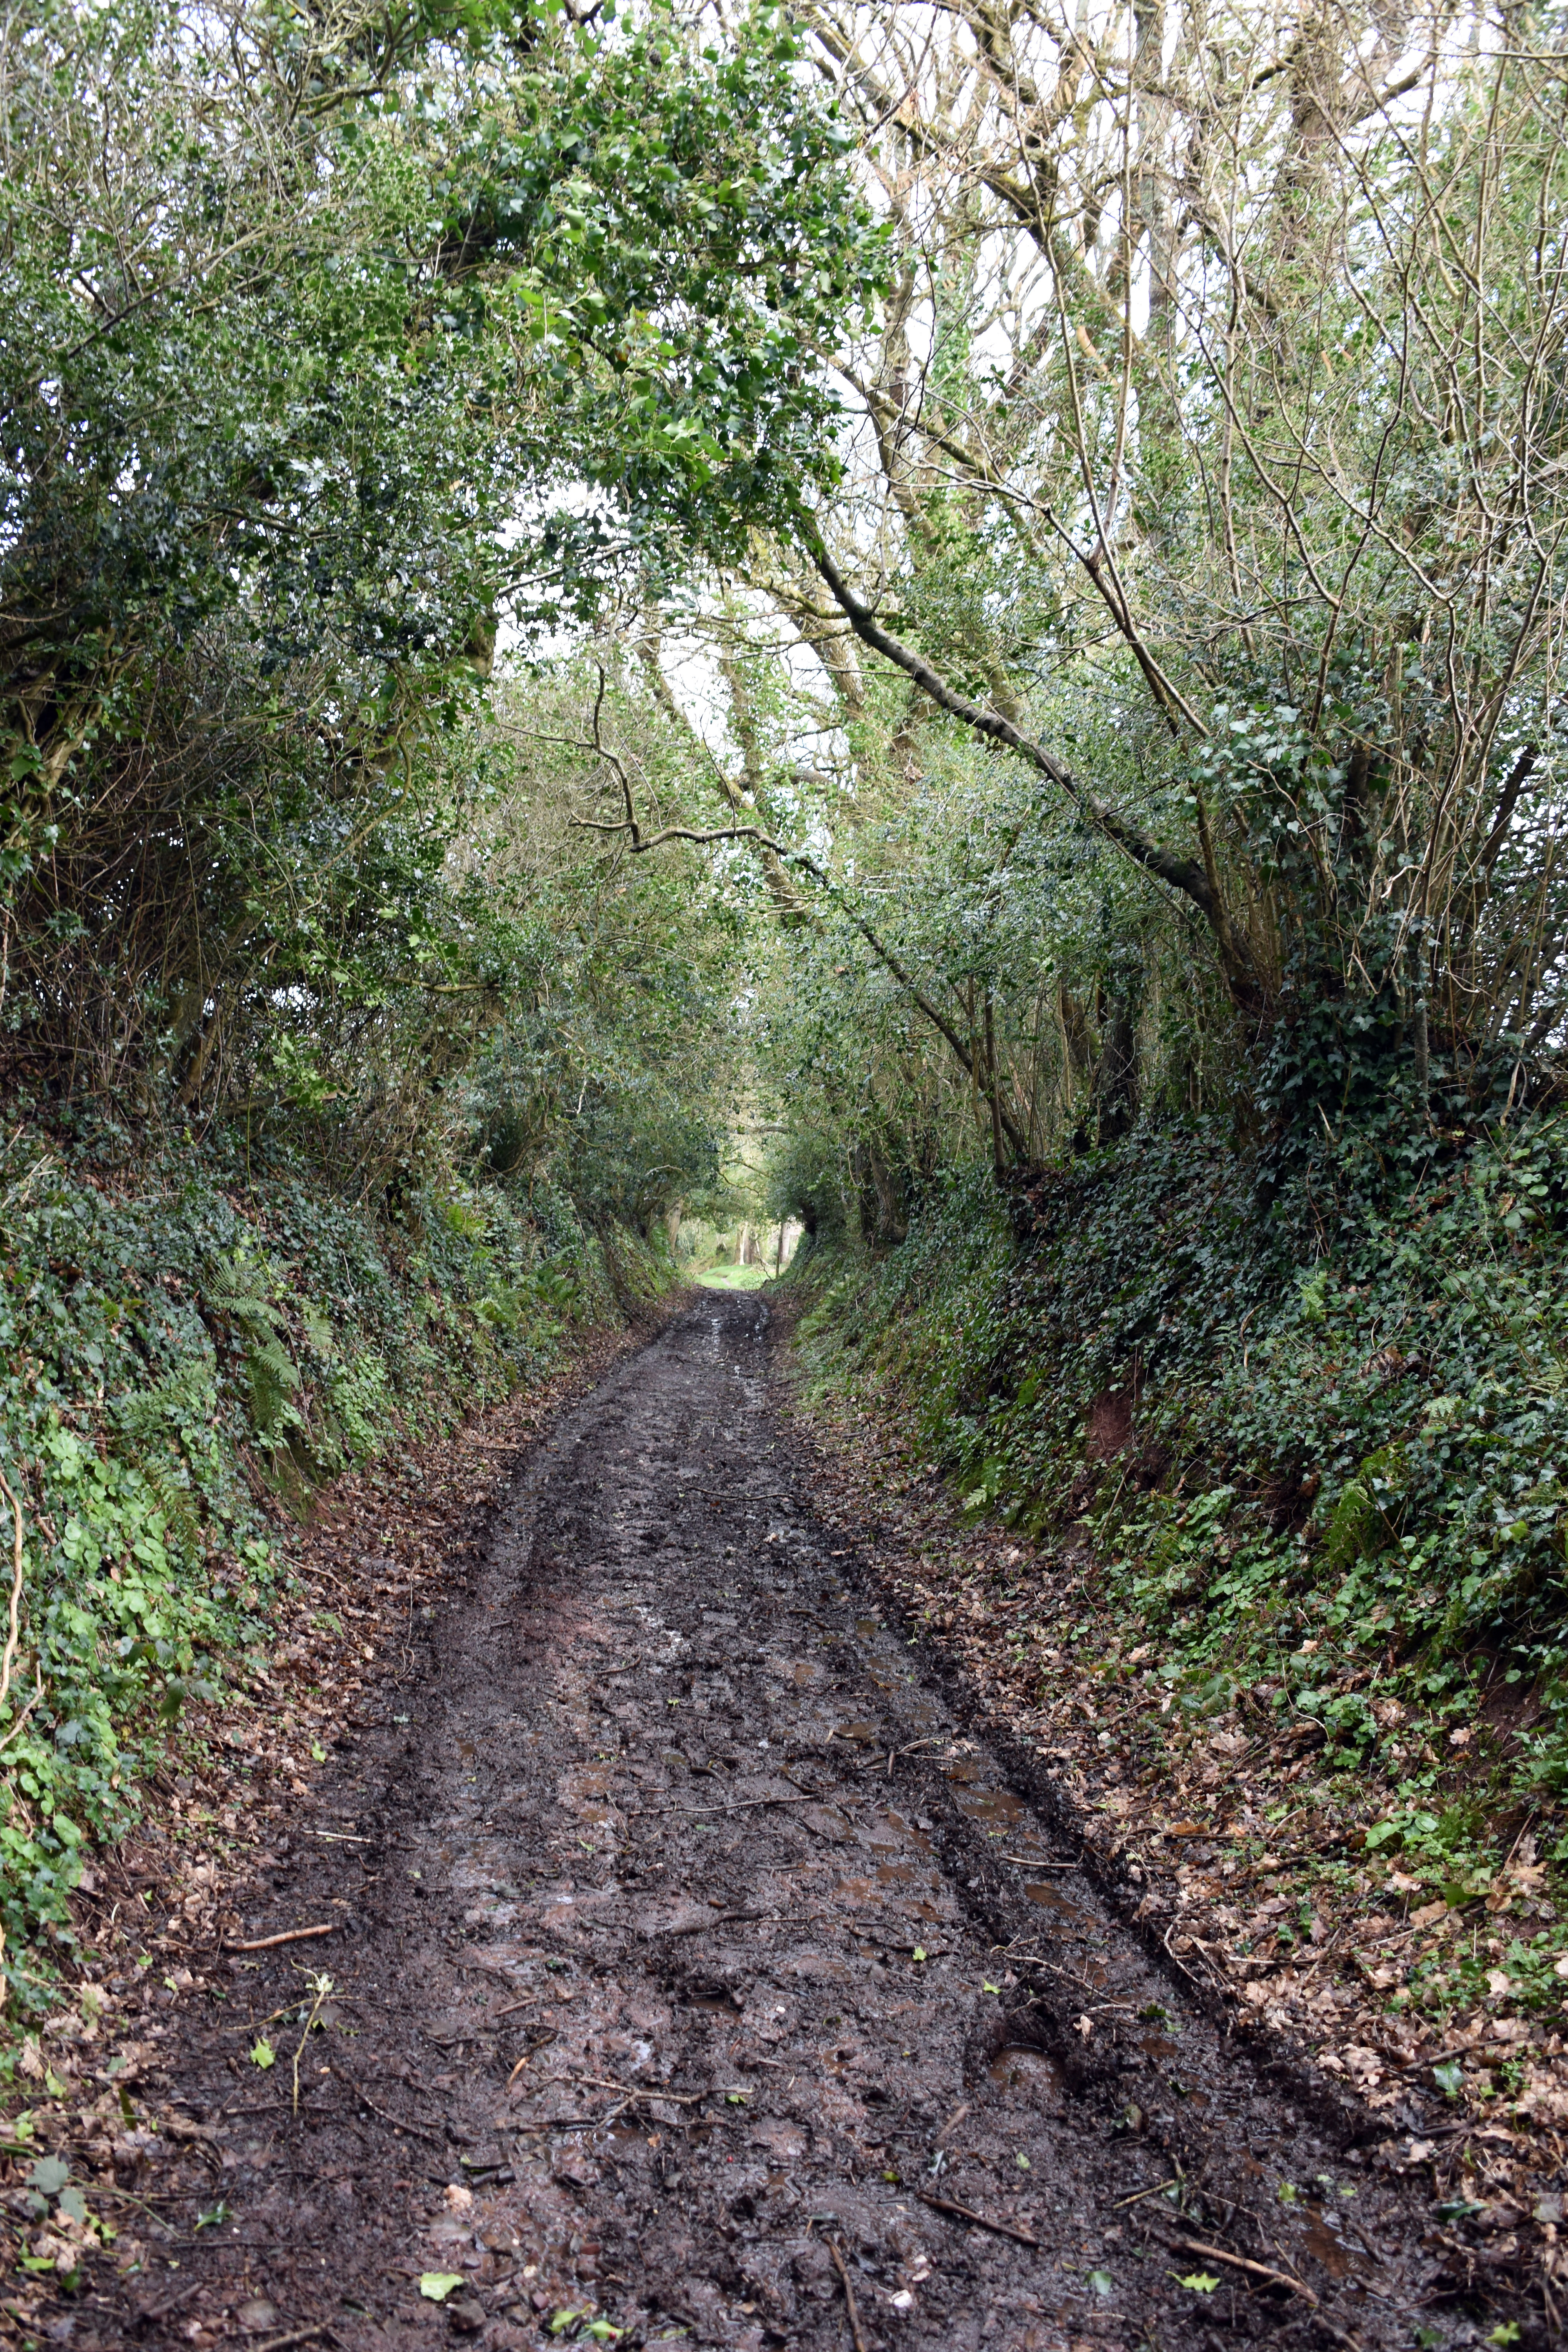
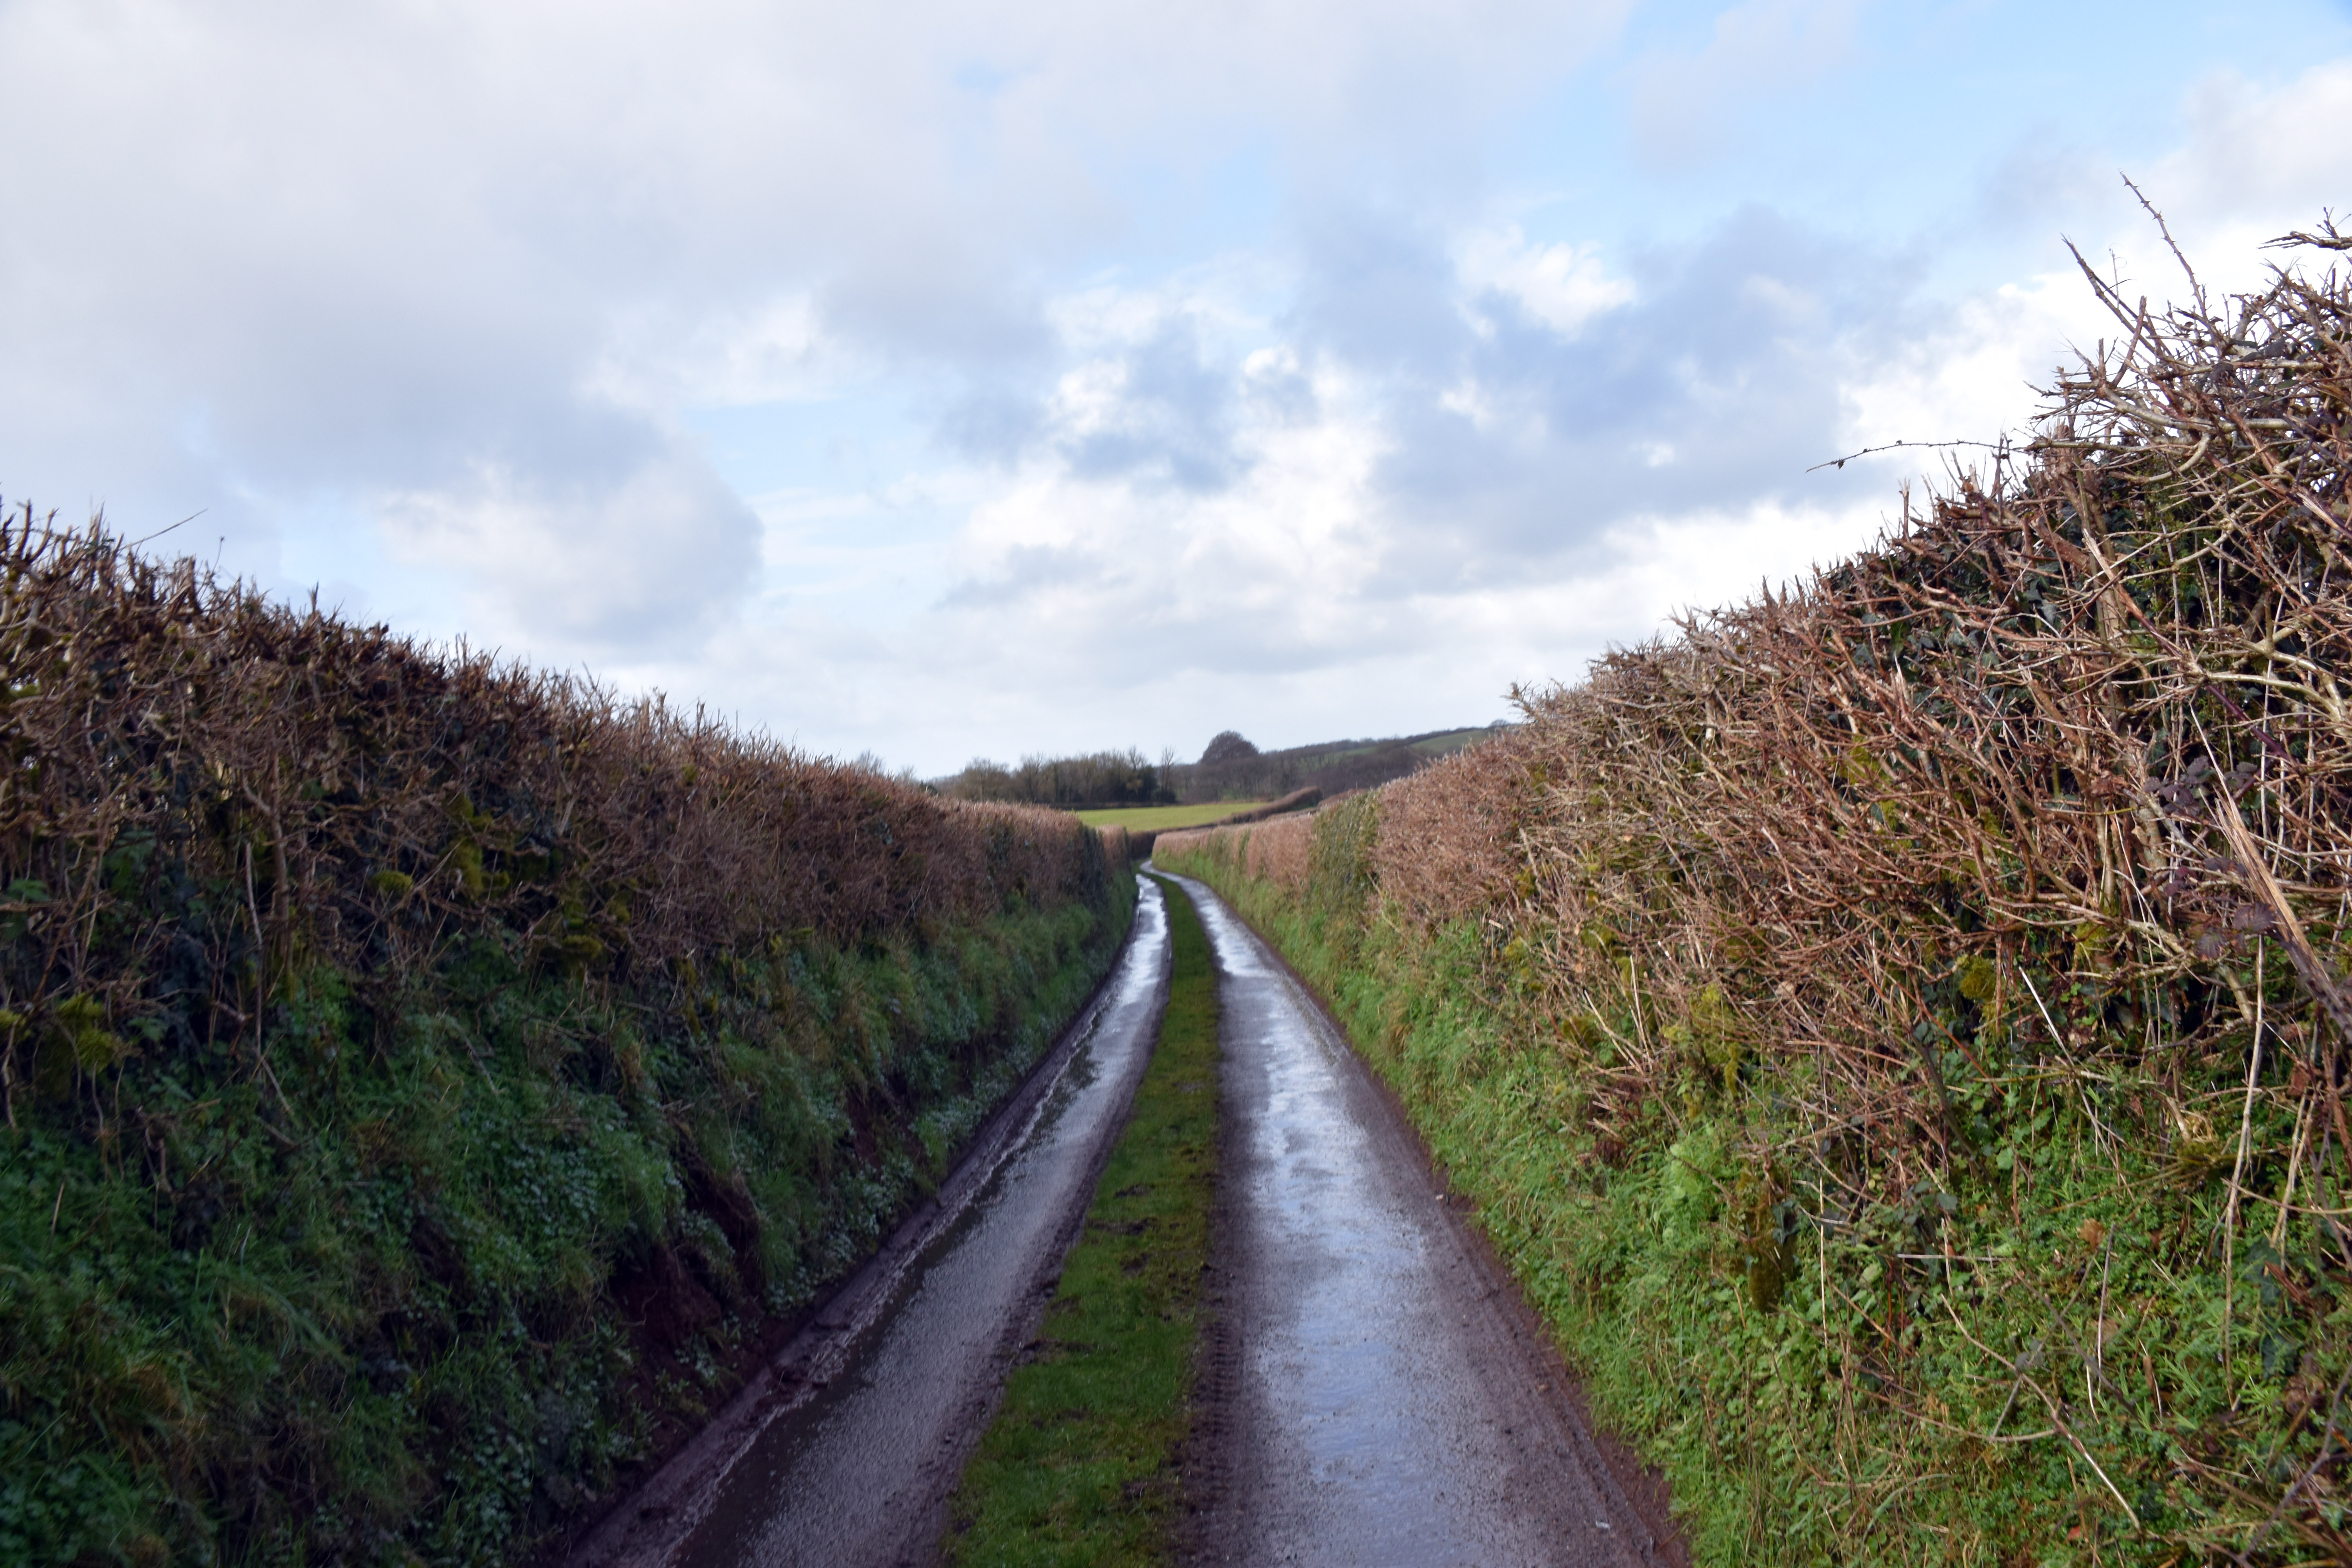
We walked through the village and past the Village Hall with a view to following a bridle trail to Honeychurch, but we have had so much rain of late the bridle path was just a muddy quagmire, so we backtracked and walked along pretty country lanes to Honeychurch instead.

St Mary’s in Honeychurch

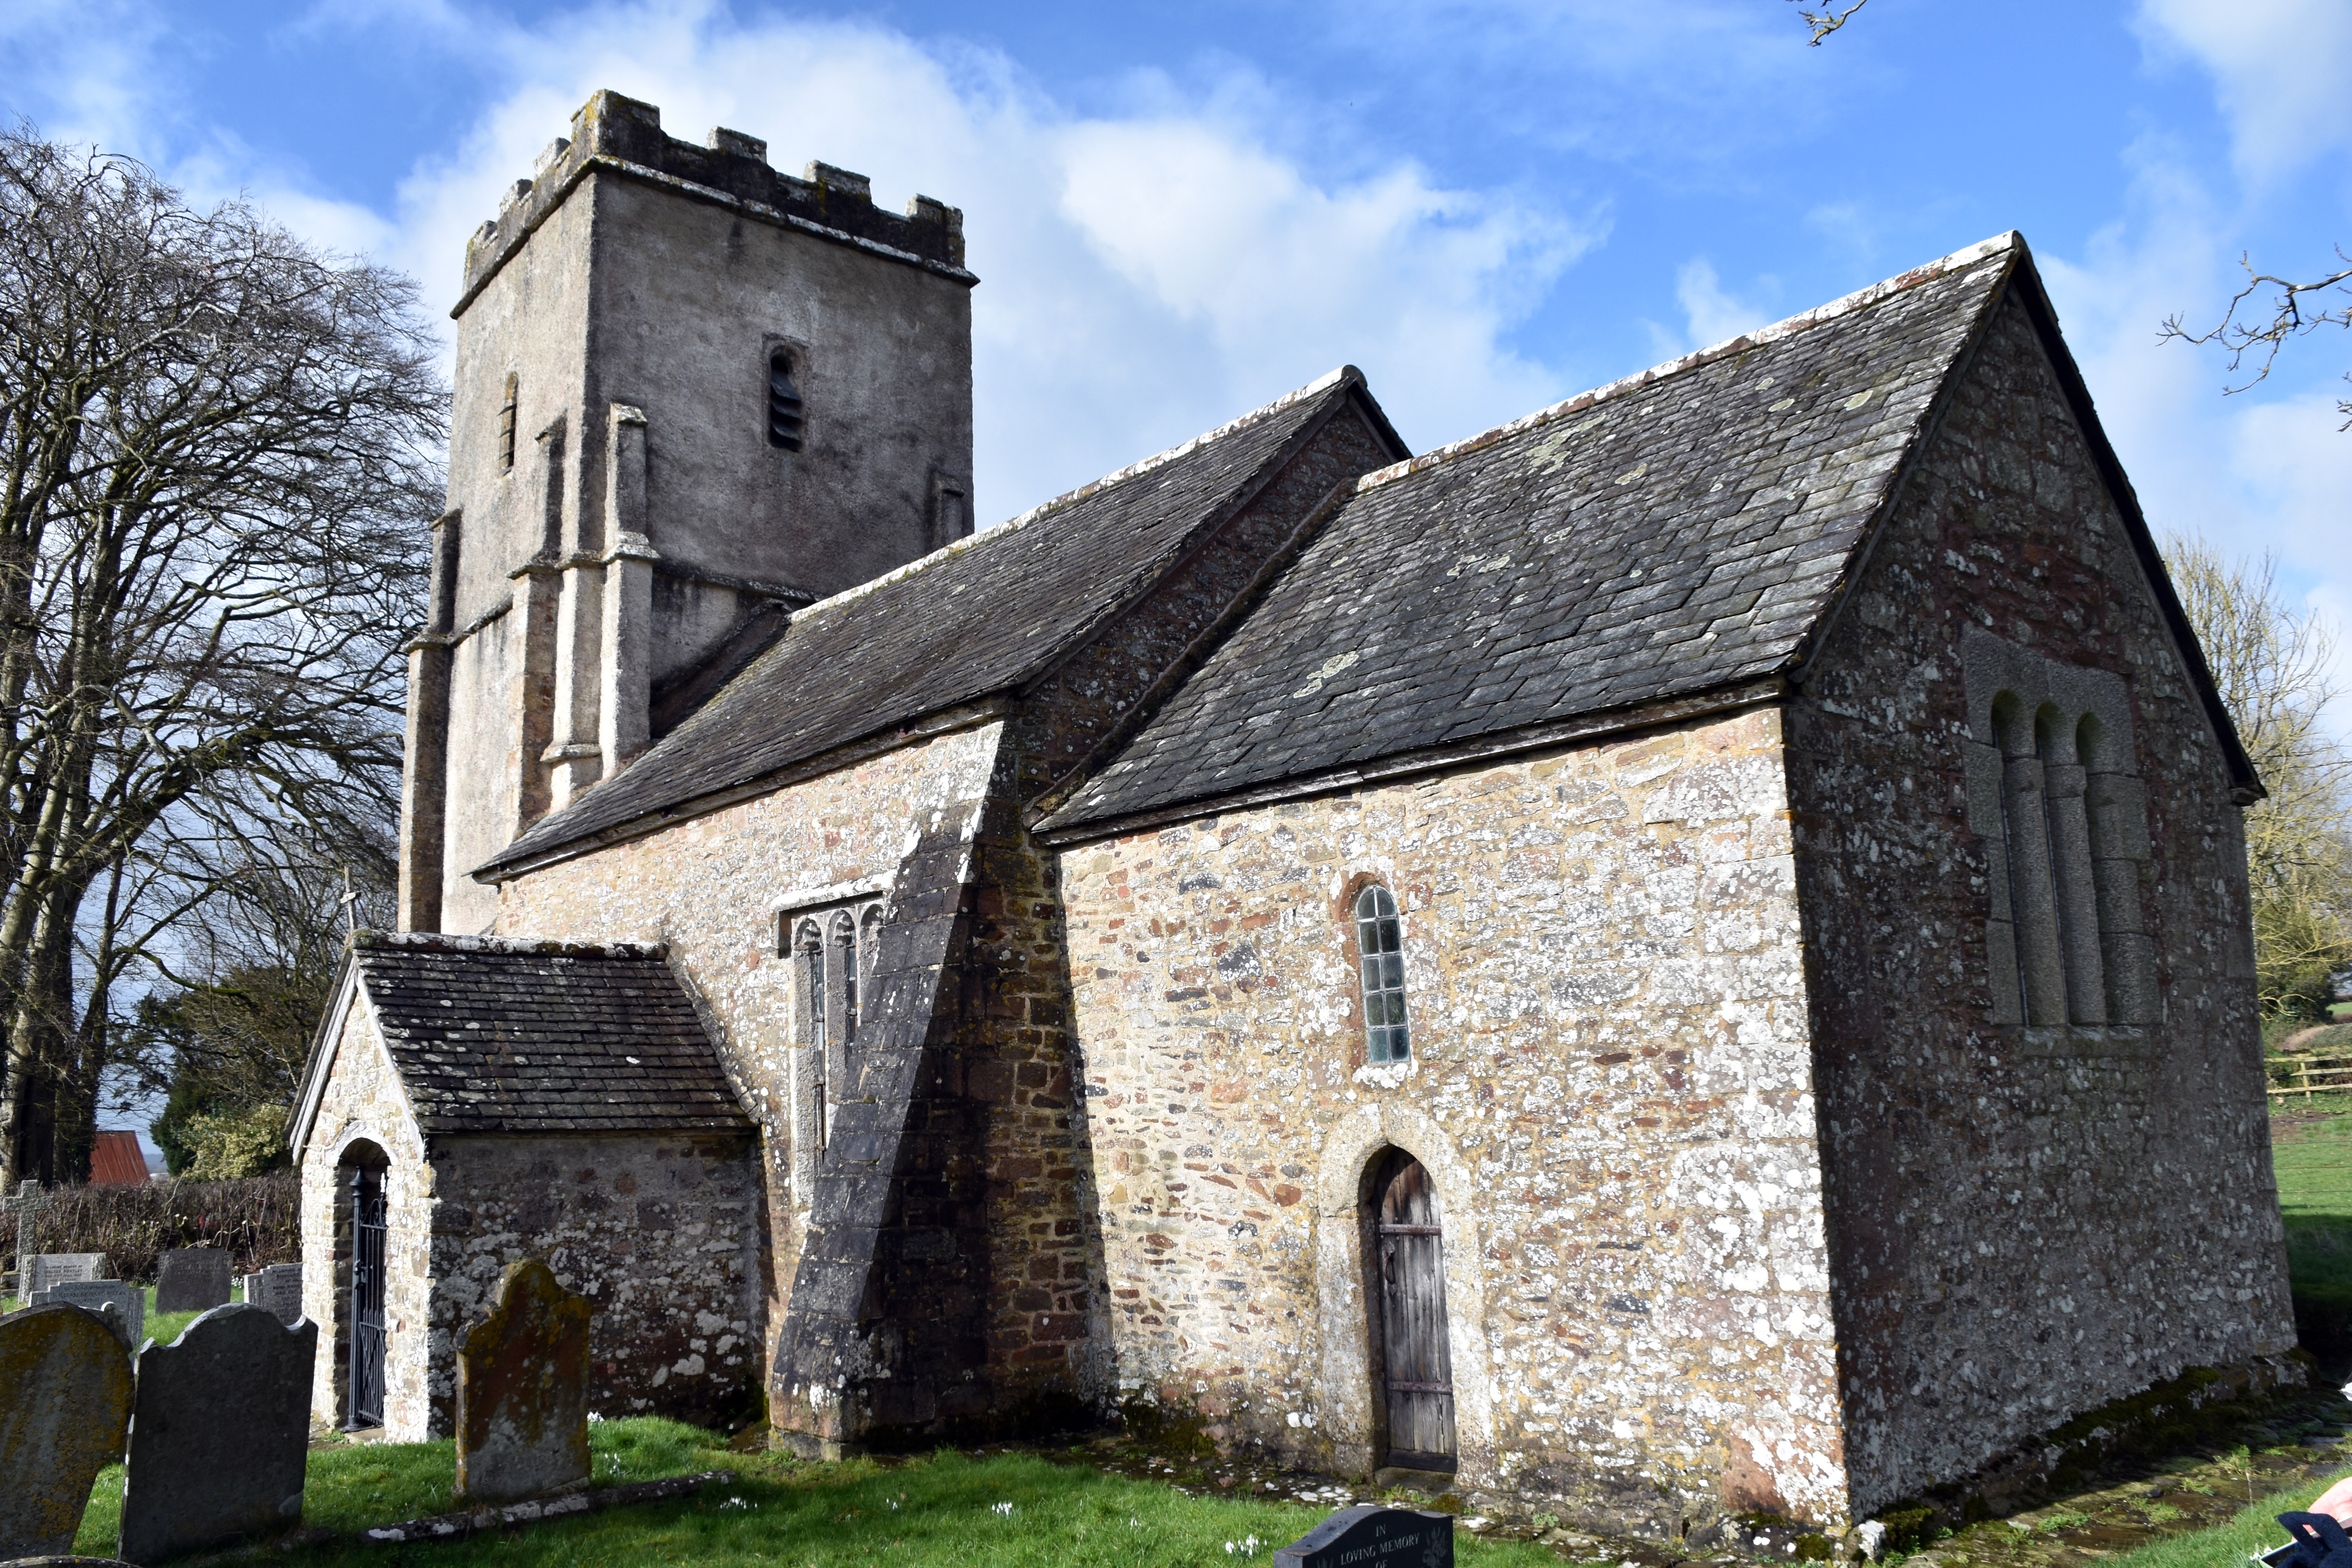
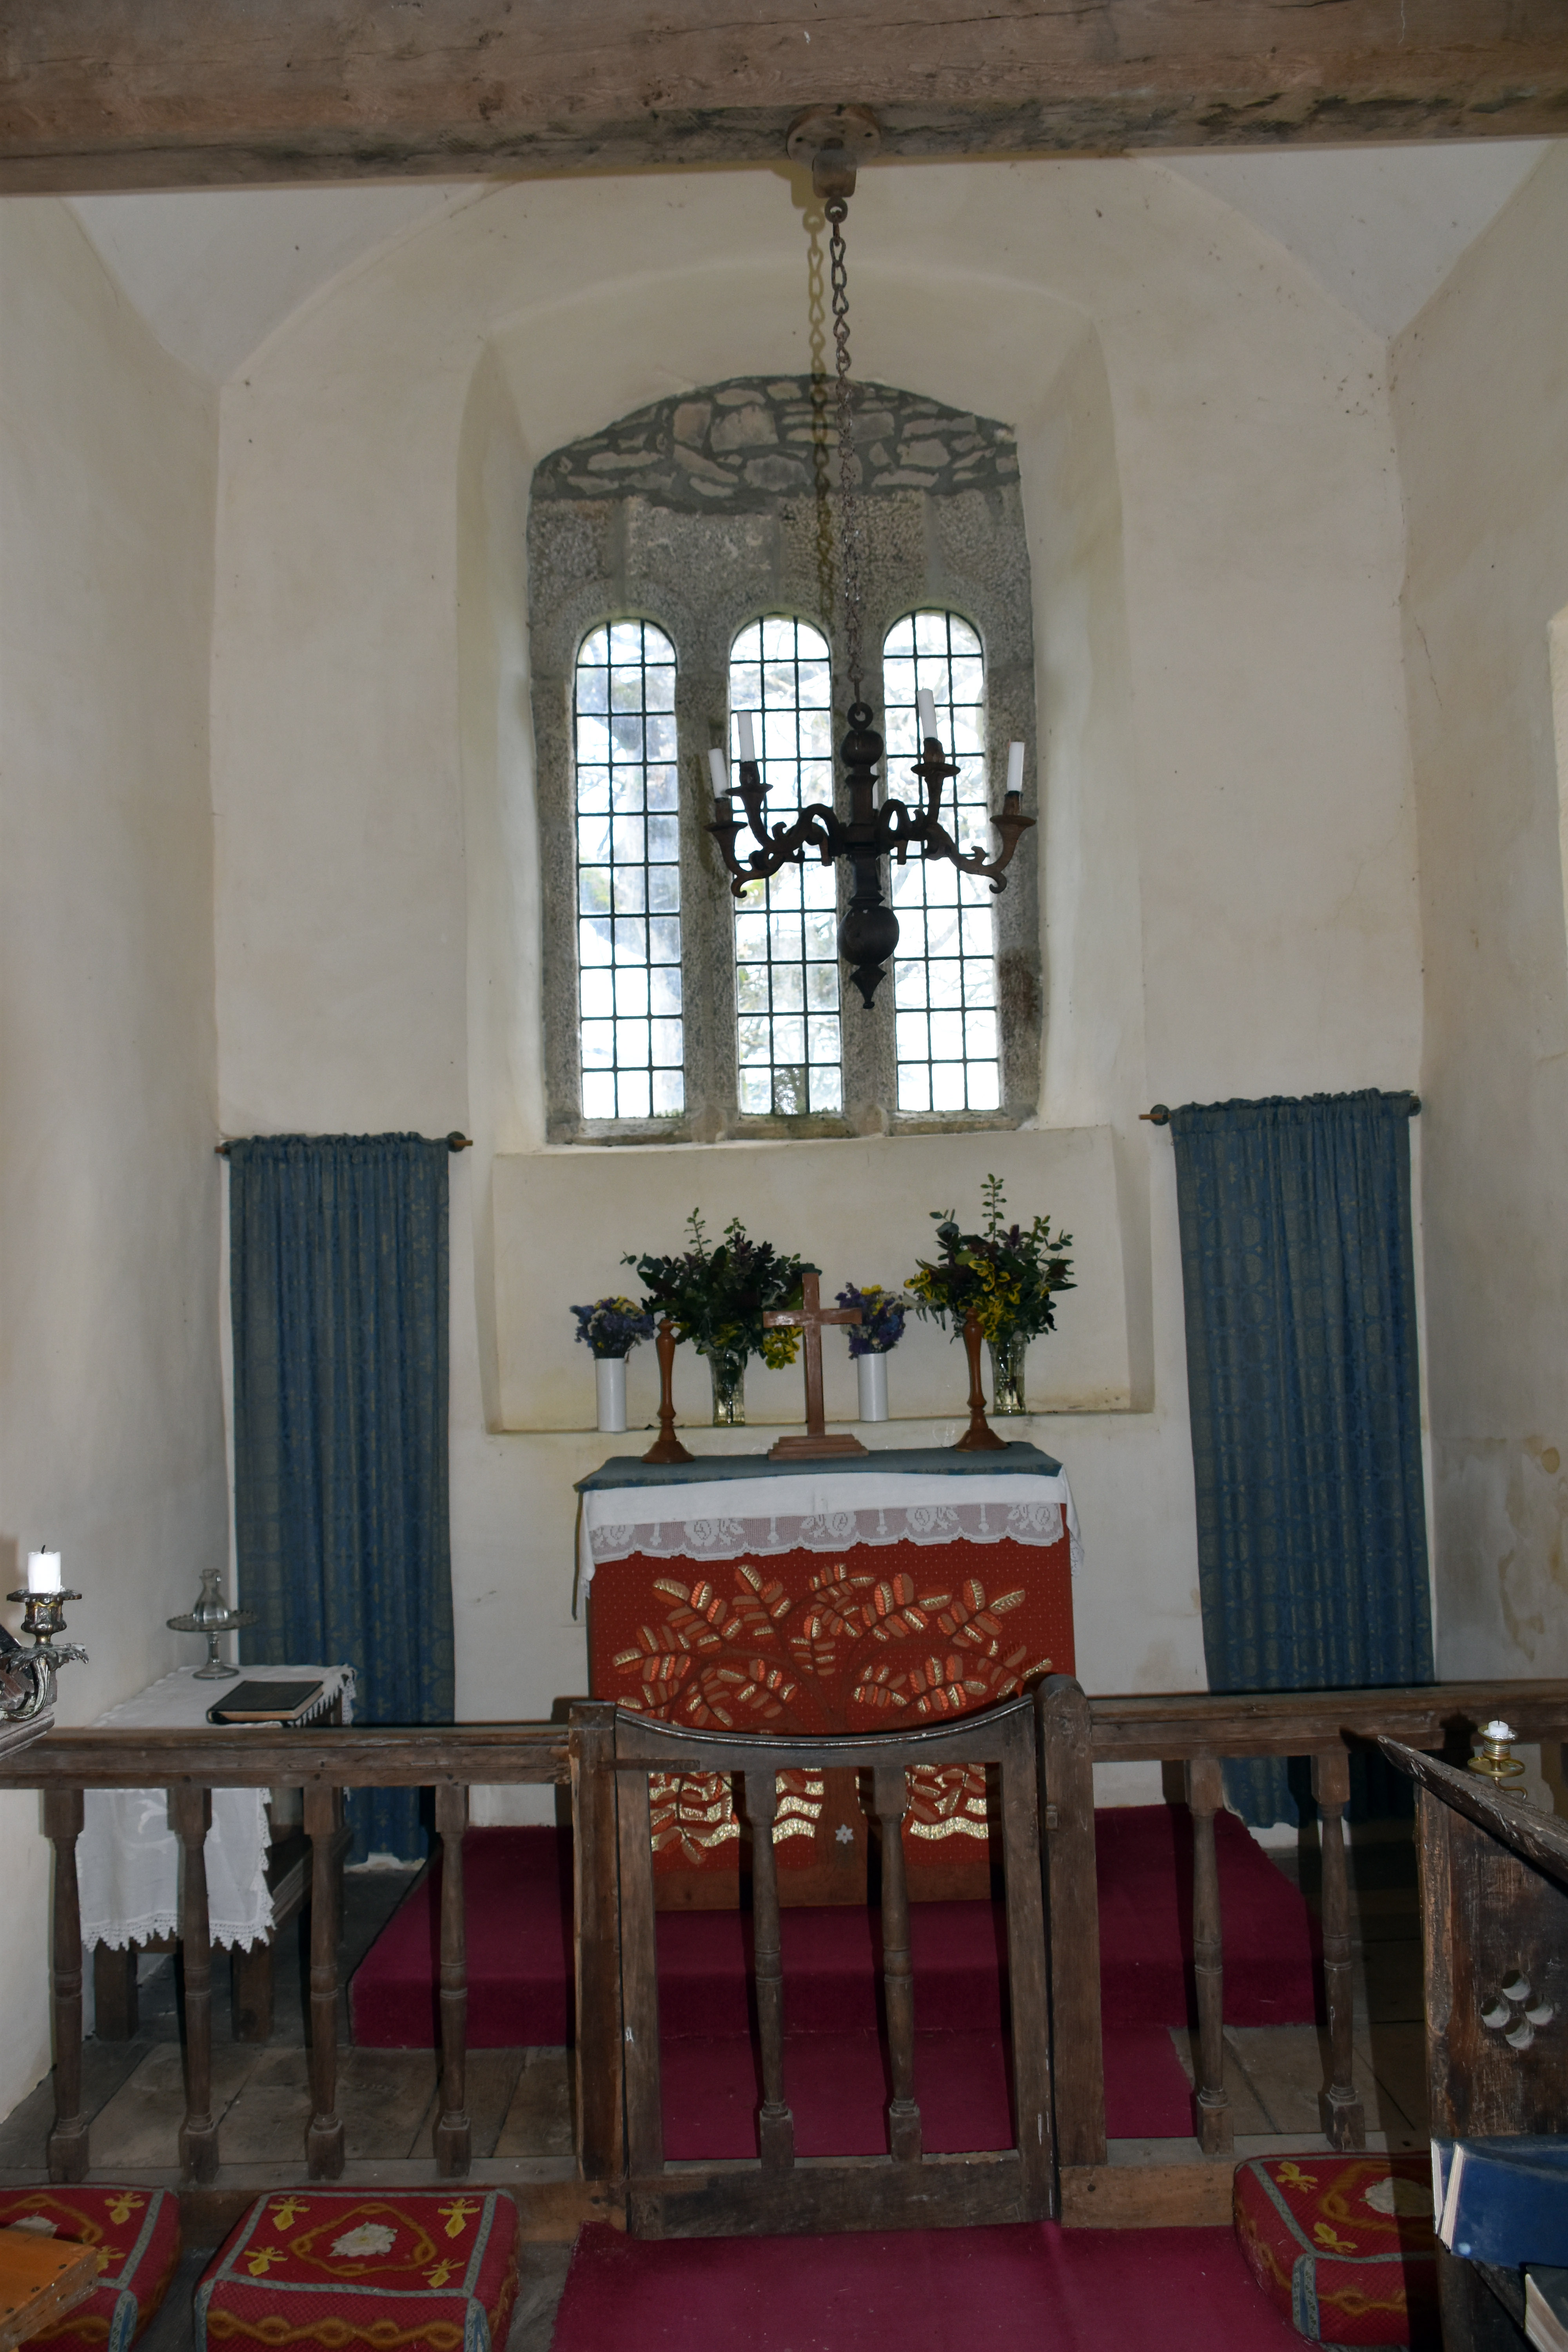
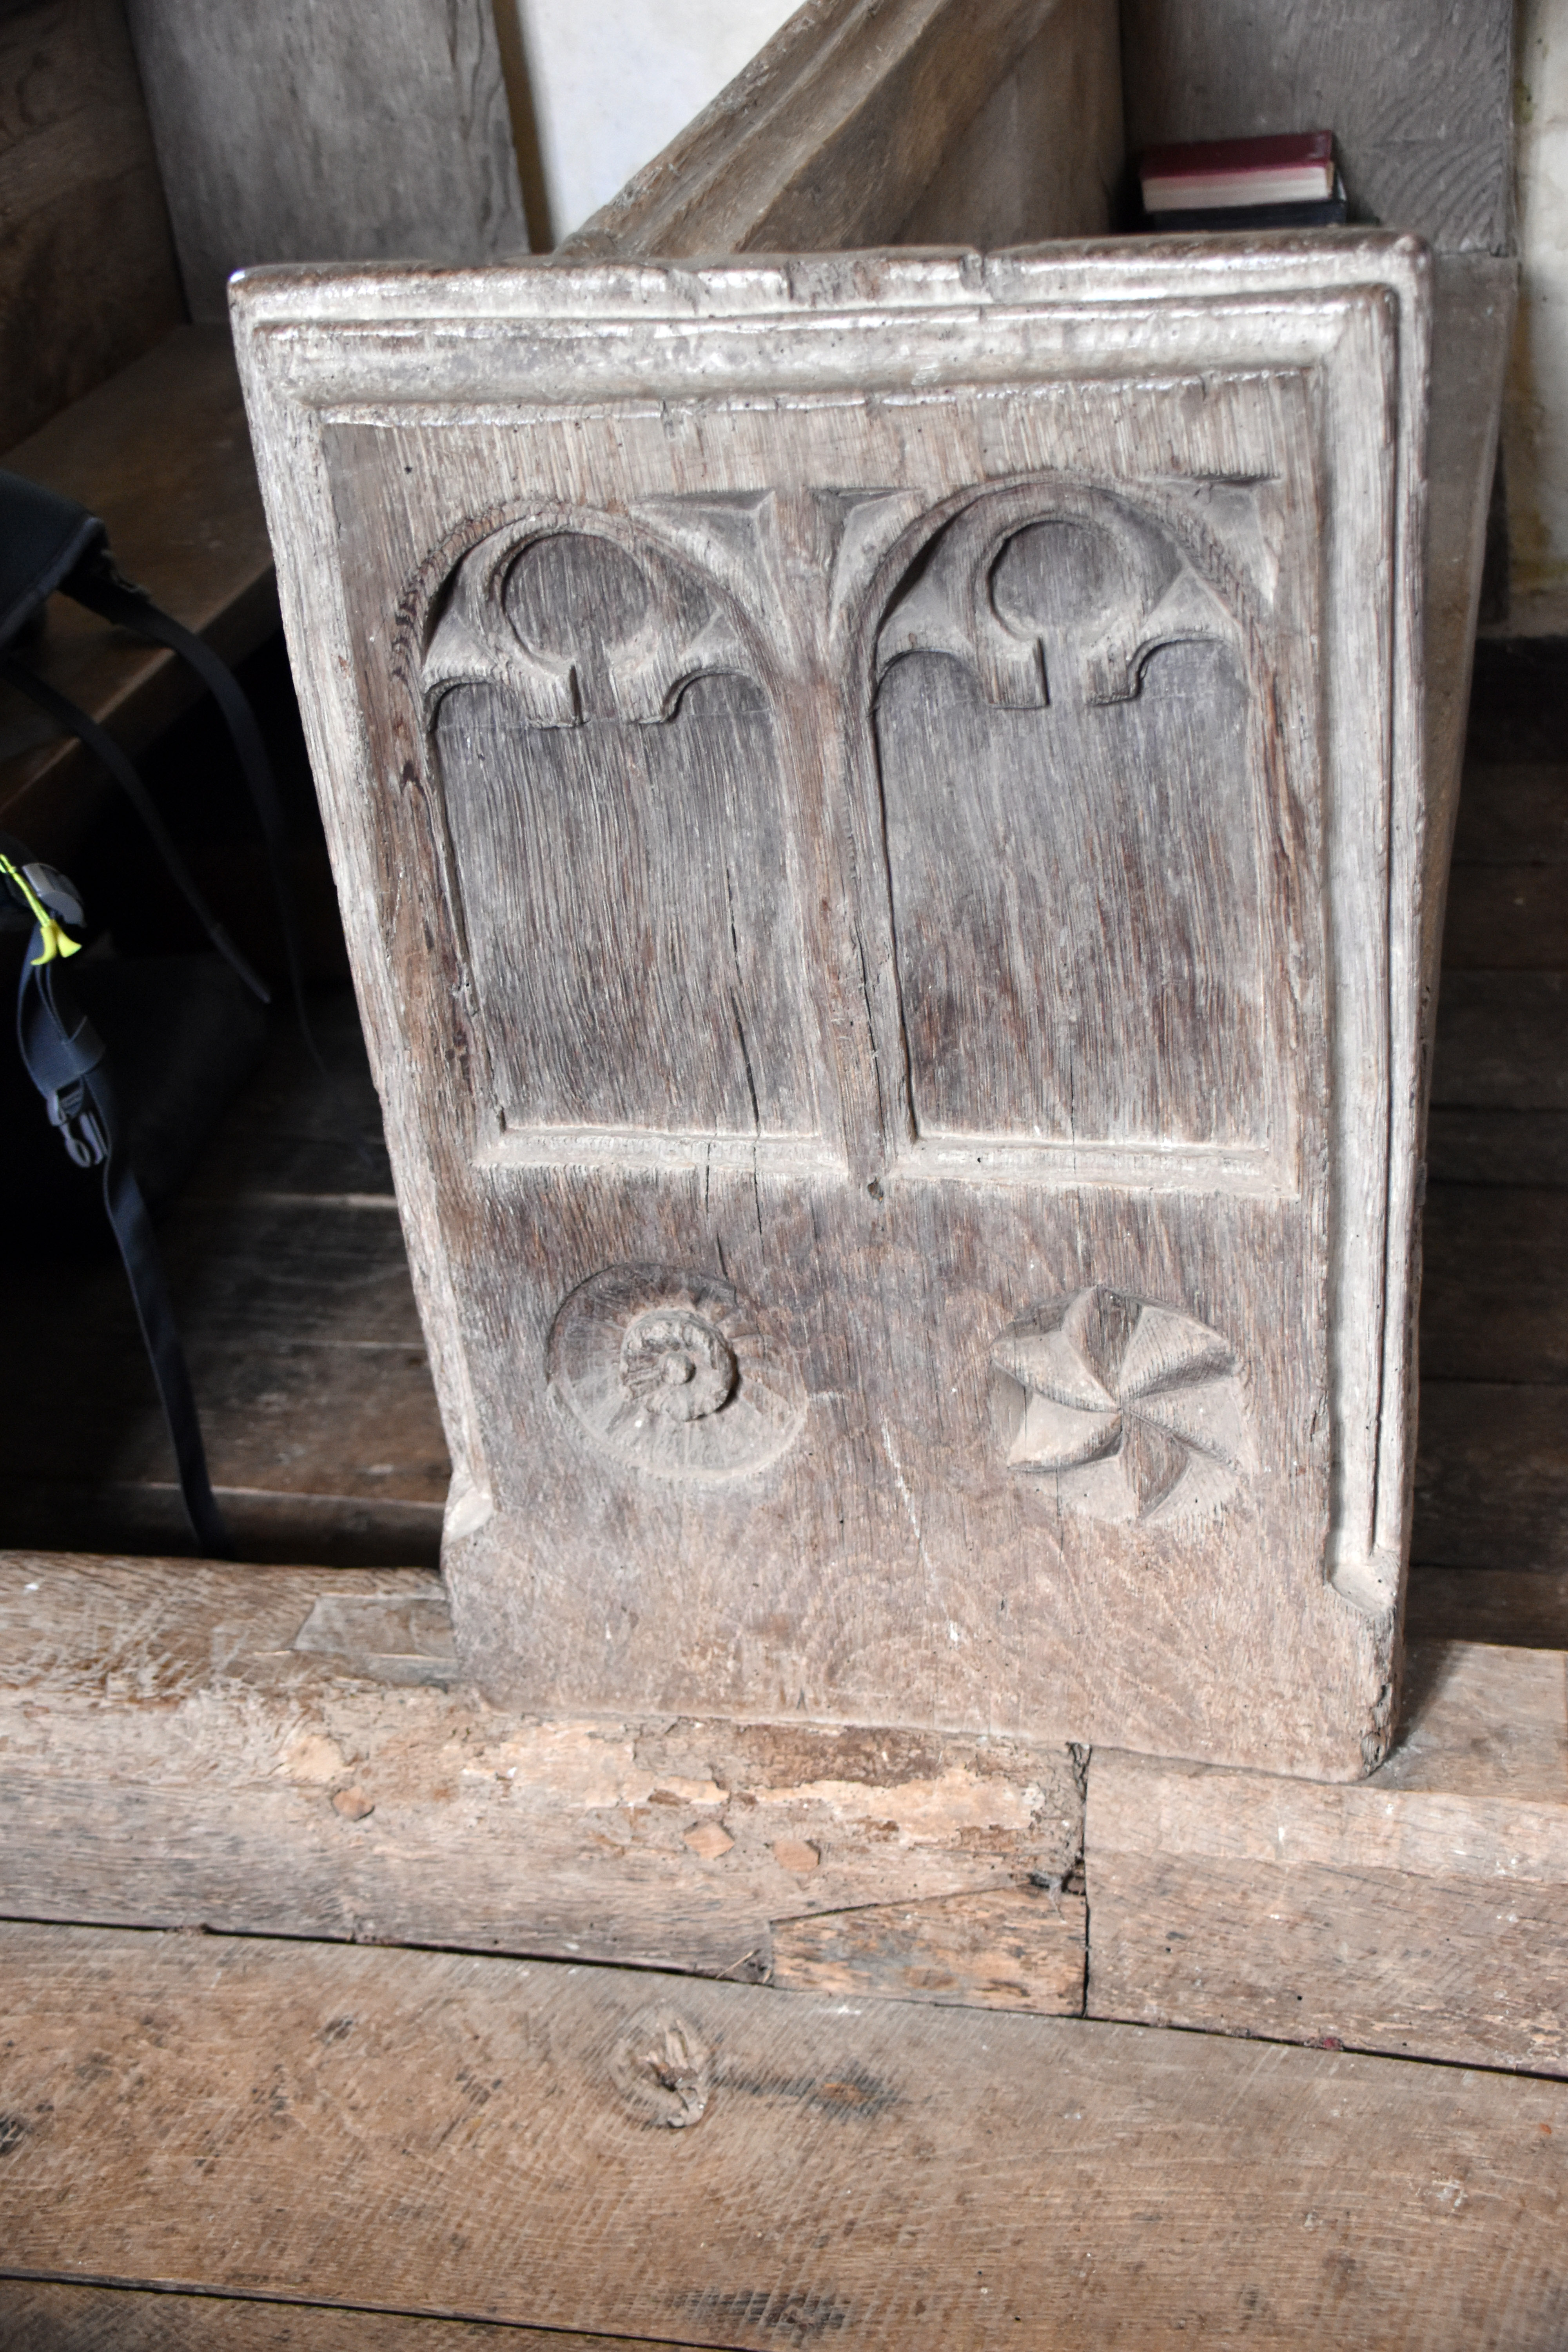
Now, you could not ask for a greater contrast in two neighbouring churches if you tried. St Andrew’s in Sampford Courtenay oozes the wealth of the wool trade in a thriving market town, in a largely 14th‑century church expanded and renovated beyond recognition over the centuries. St Mary’s in Honeychurch, on the other hand, is one of the best‑preserved nave‑and‑chancel Norman churches in the country. Having no local manor or squire with deep pockets to fashion the church with the latest architectural innovations, a humbler and simpler church it is hard to imagine. It really is a tiny capsule of history, with small ancient wooden pews pointing to a very basic altar table. There is only a single memorial within the church. Intriguingly, though, for such a tiny church there are no fewer than three dedications to the Crown. Two of these take the form of coat‑of‑arms plaques to Charles II and to George III. However, there is also a magnificent, if faded, painted coat of arms dedicated to Elizabeth I. Now, why might such a small church feel the need to display its loyalty to the Crown quite so ostentatiously? Perhaps it may well be connected to the nearby rebellions at Sampford Courtenay. This coat of arms would have been painted within living memory of those upheavals. In fact, they were not even a decade from Elizabeth’s accession—although the tumult of Mary I’s reign had to be endured before the return of a Protestant monarch. Tiny Honeychurch may well have had a personal connection to the rebellions; I note that one of the leaders of the rebels was a John Sloman—and in the tiny graveyard we stumbled across mention of the Sloman family. Usually you only find one coat of arms dedicated to the Crown—very occasionally two—but three? That is unusual indeed.

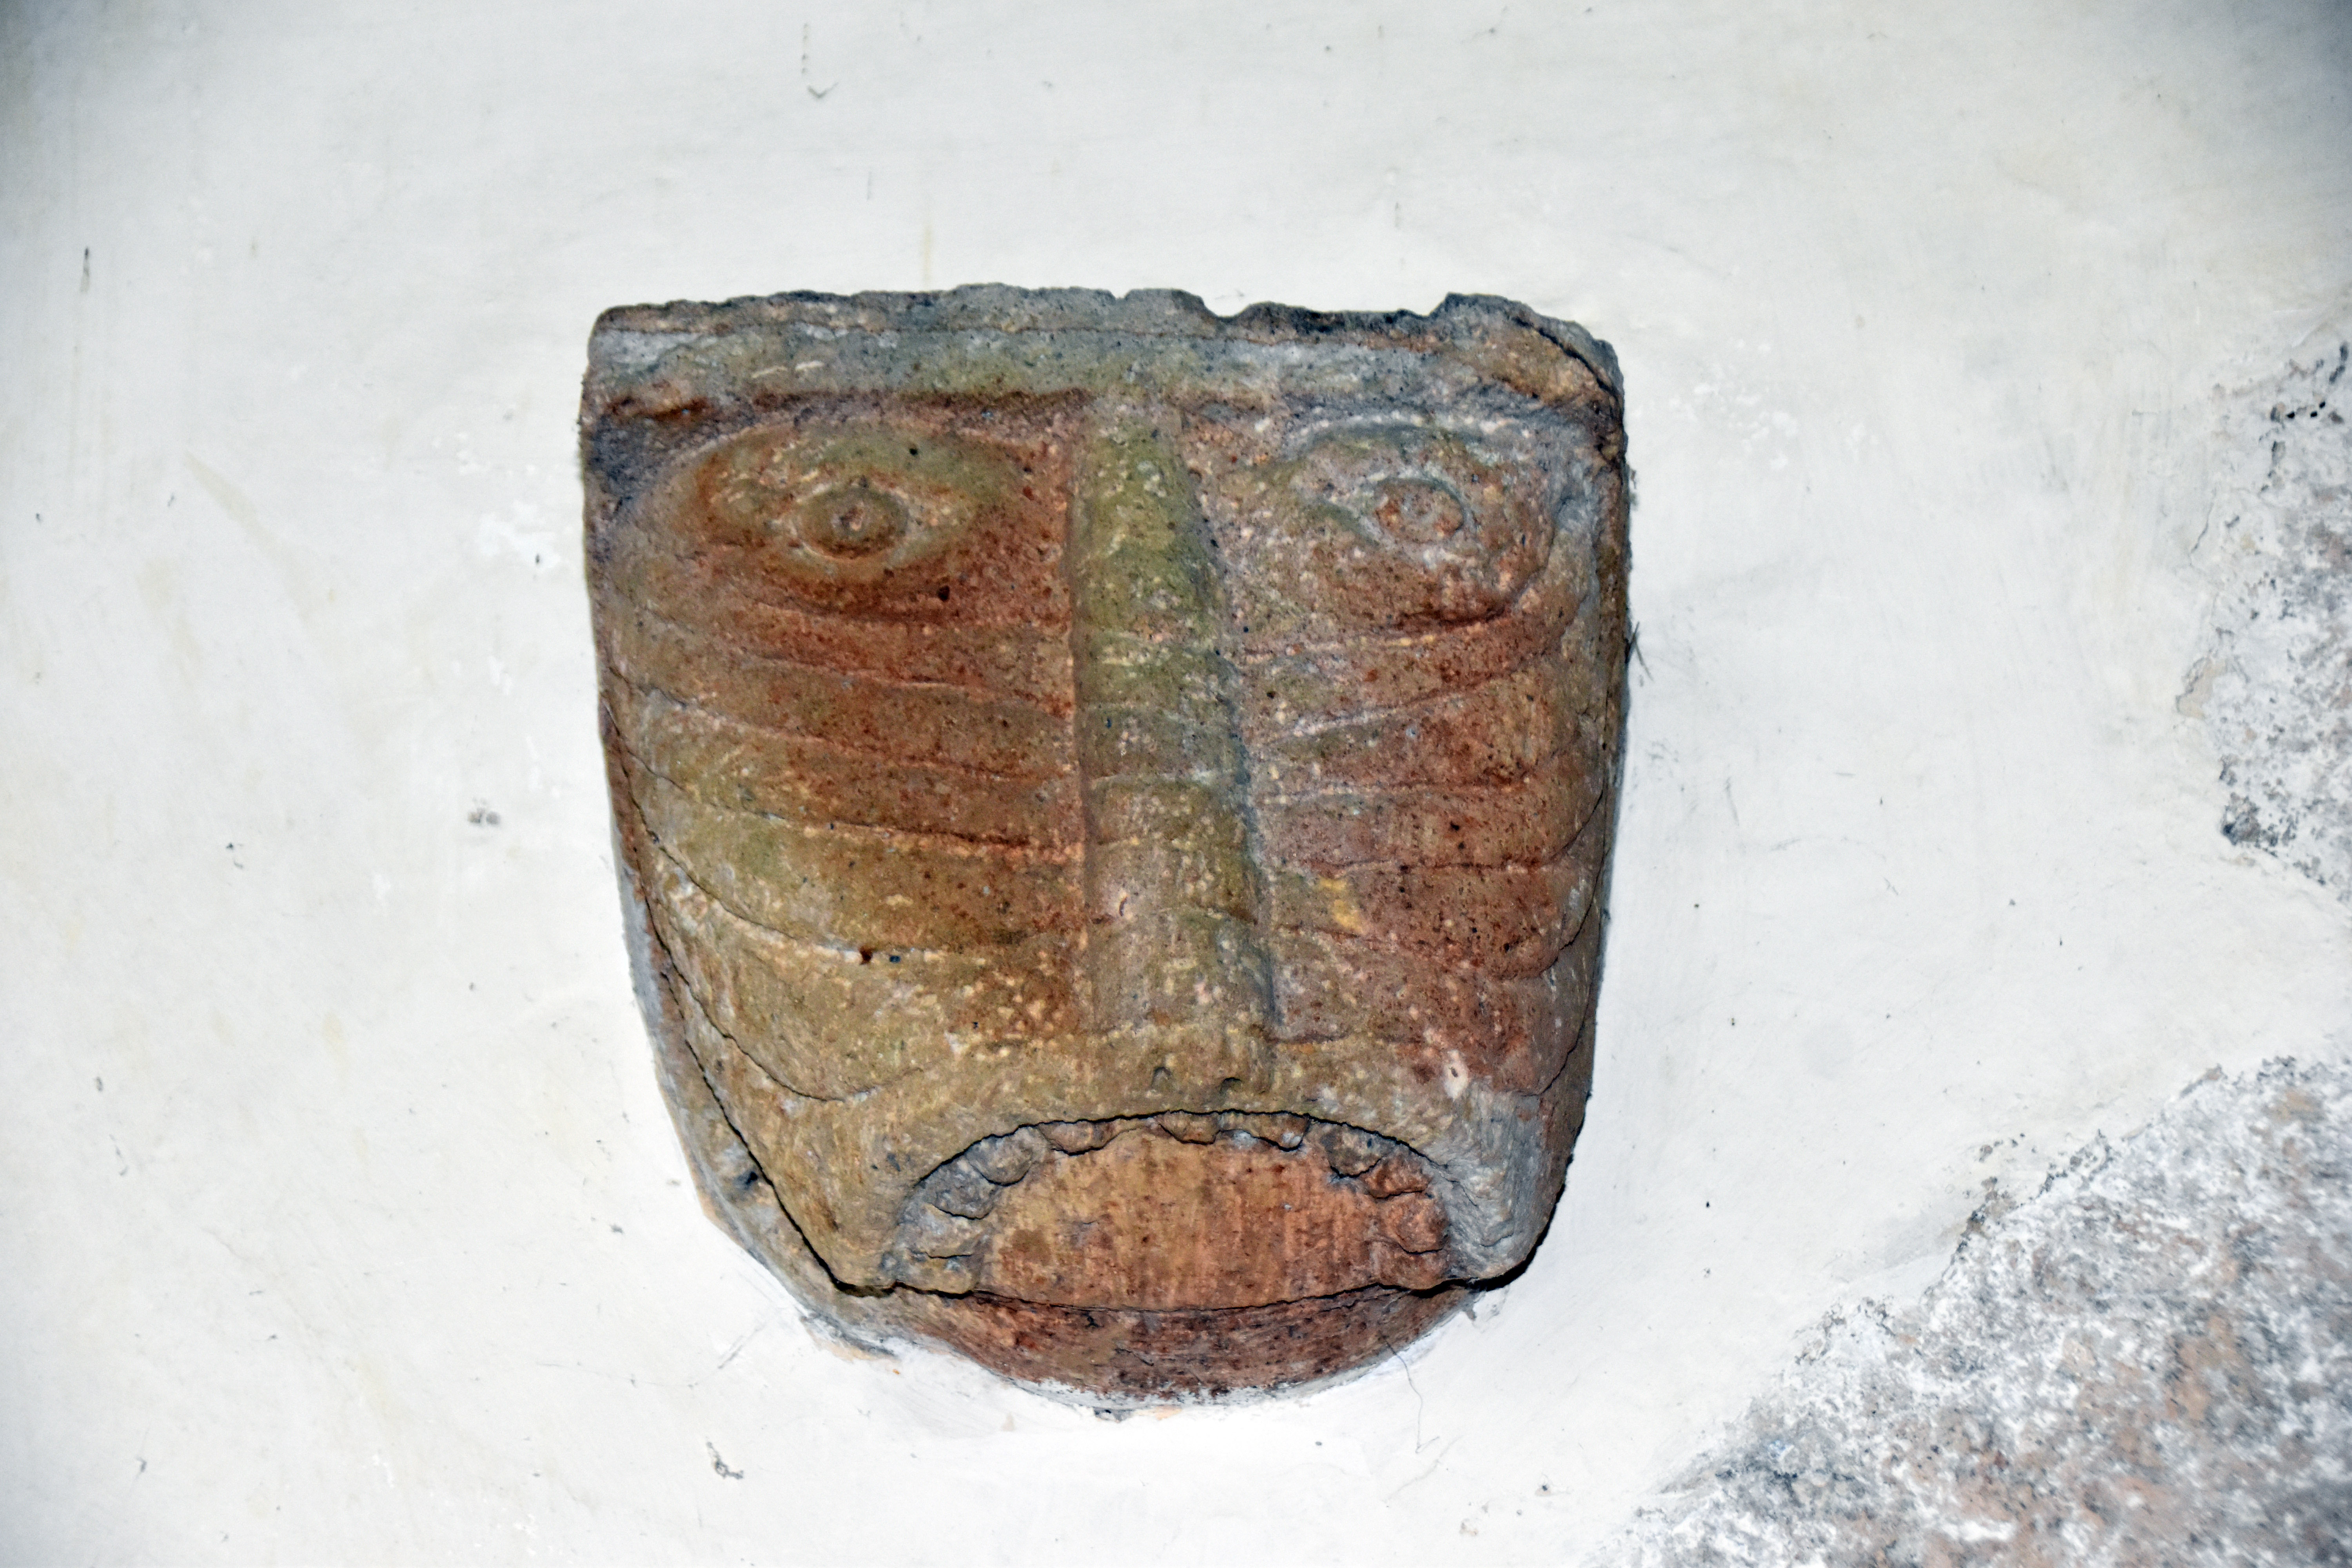
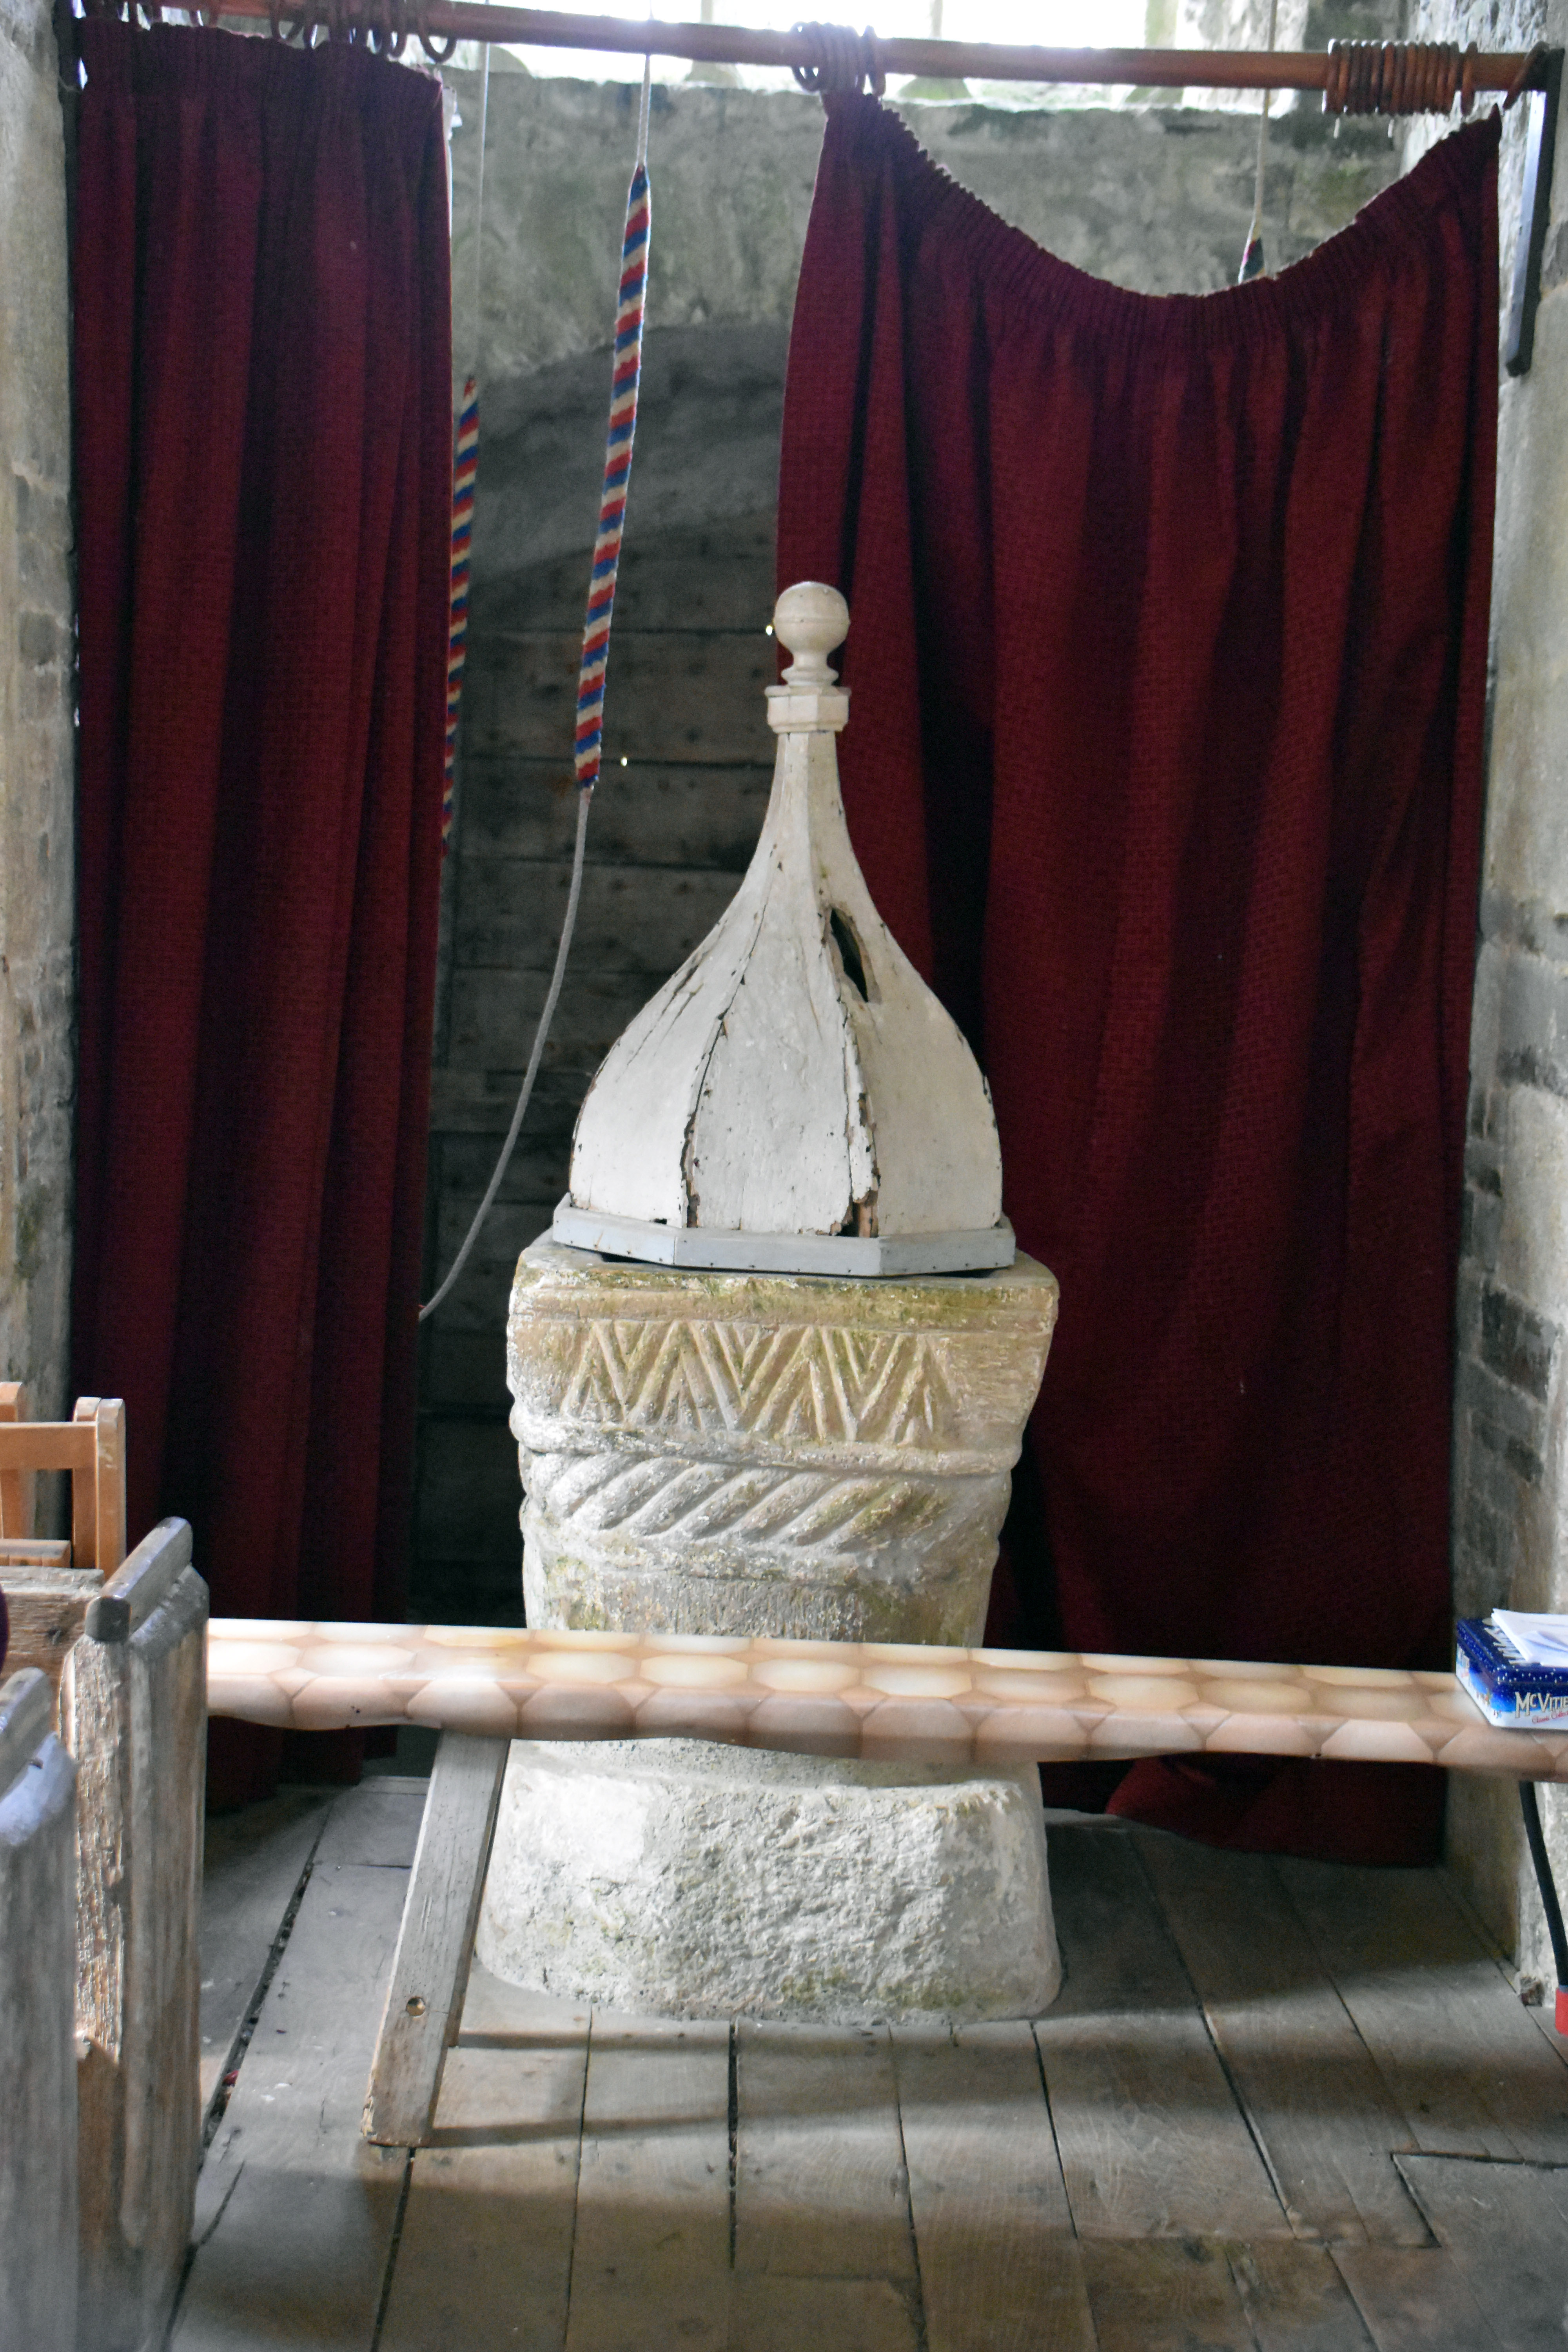
There is a beautiful 12th‑century font that is probably contemporaneous with the church being rebuilt in stone. There are also some interesting 12th‑century corbels either side of the door, which really connect you back to its original builders.

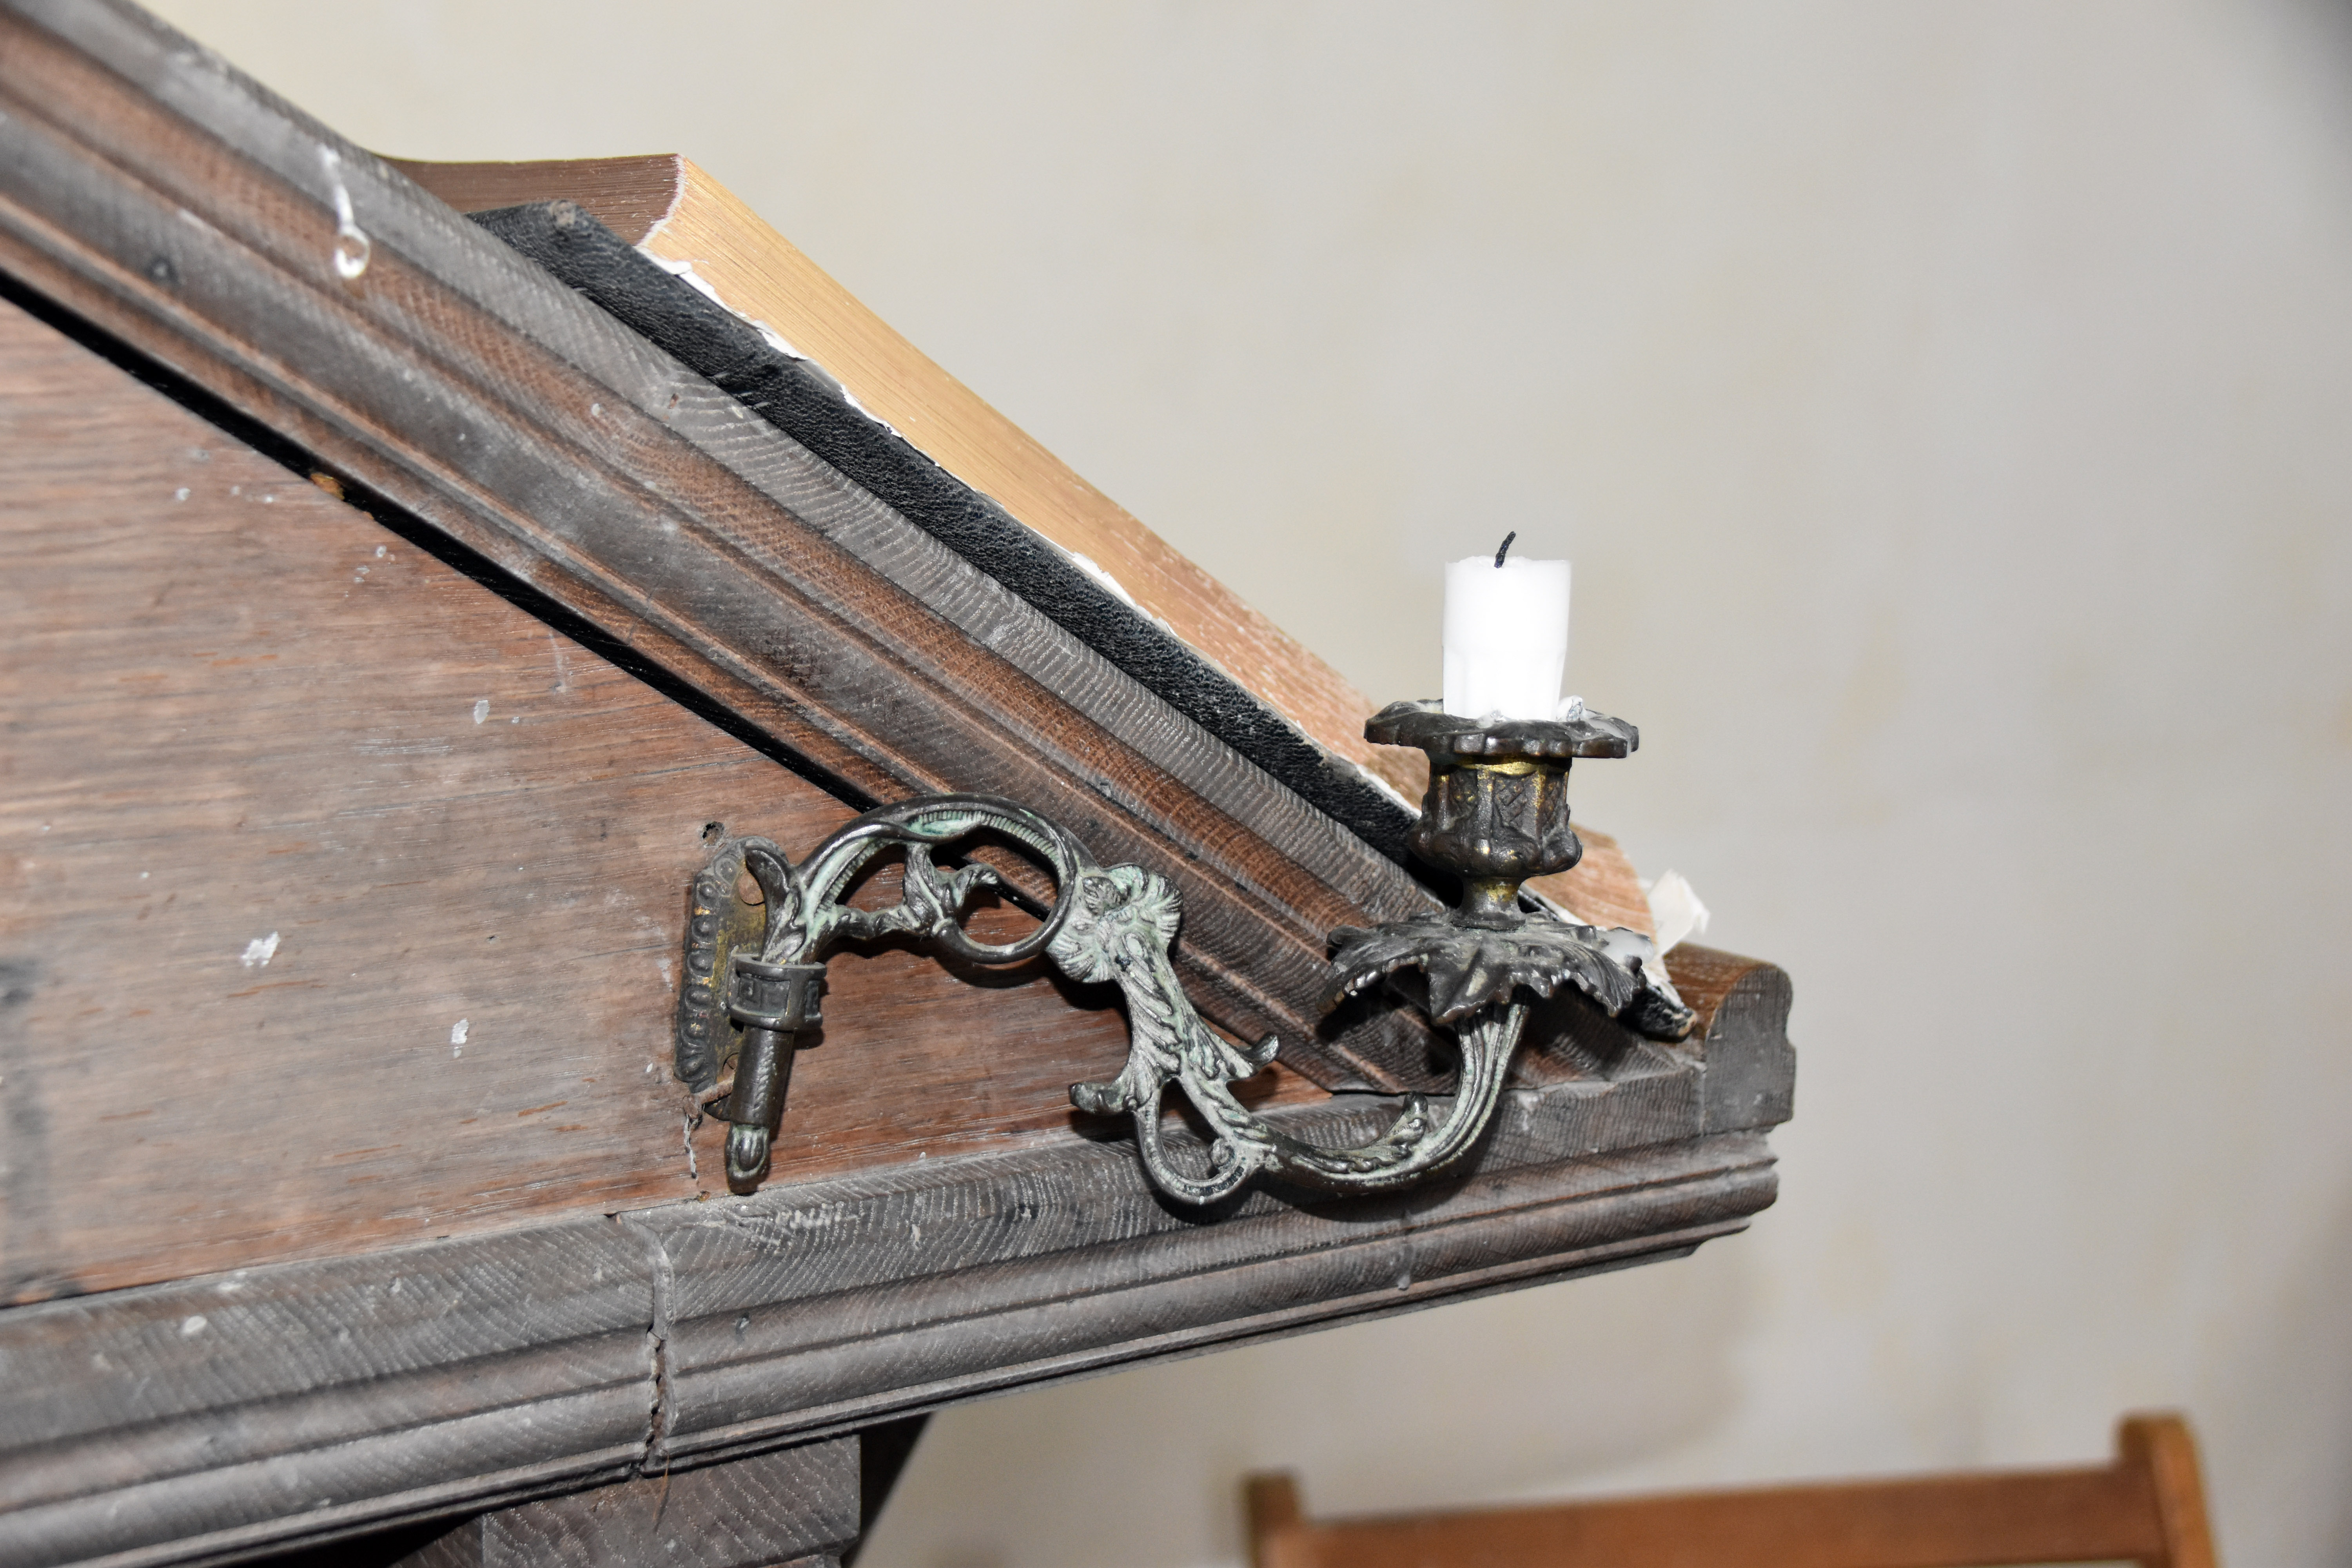
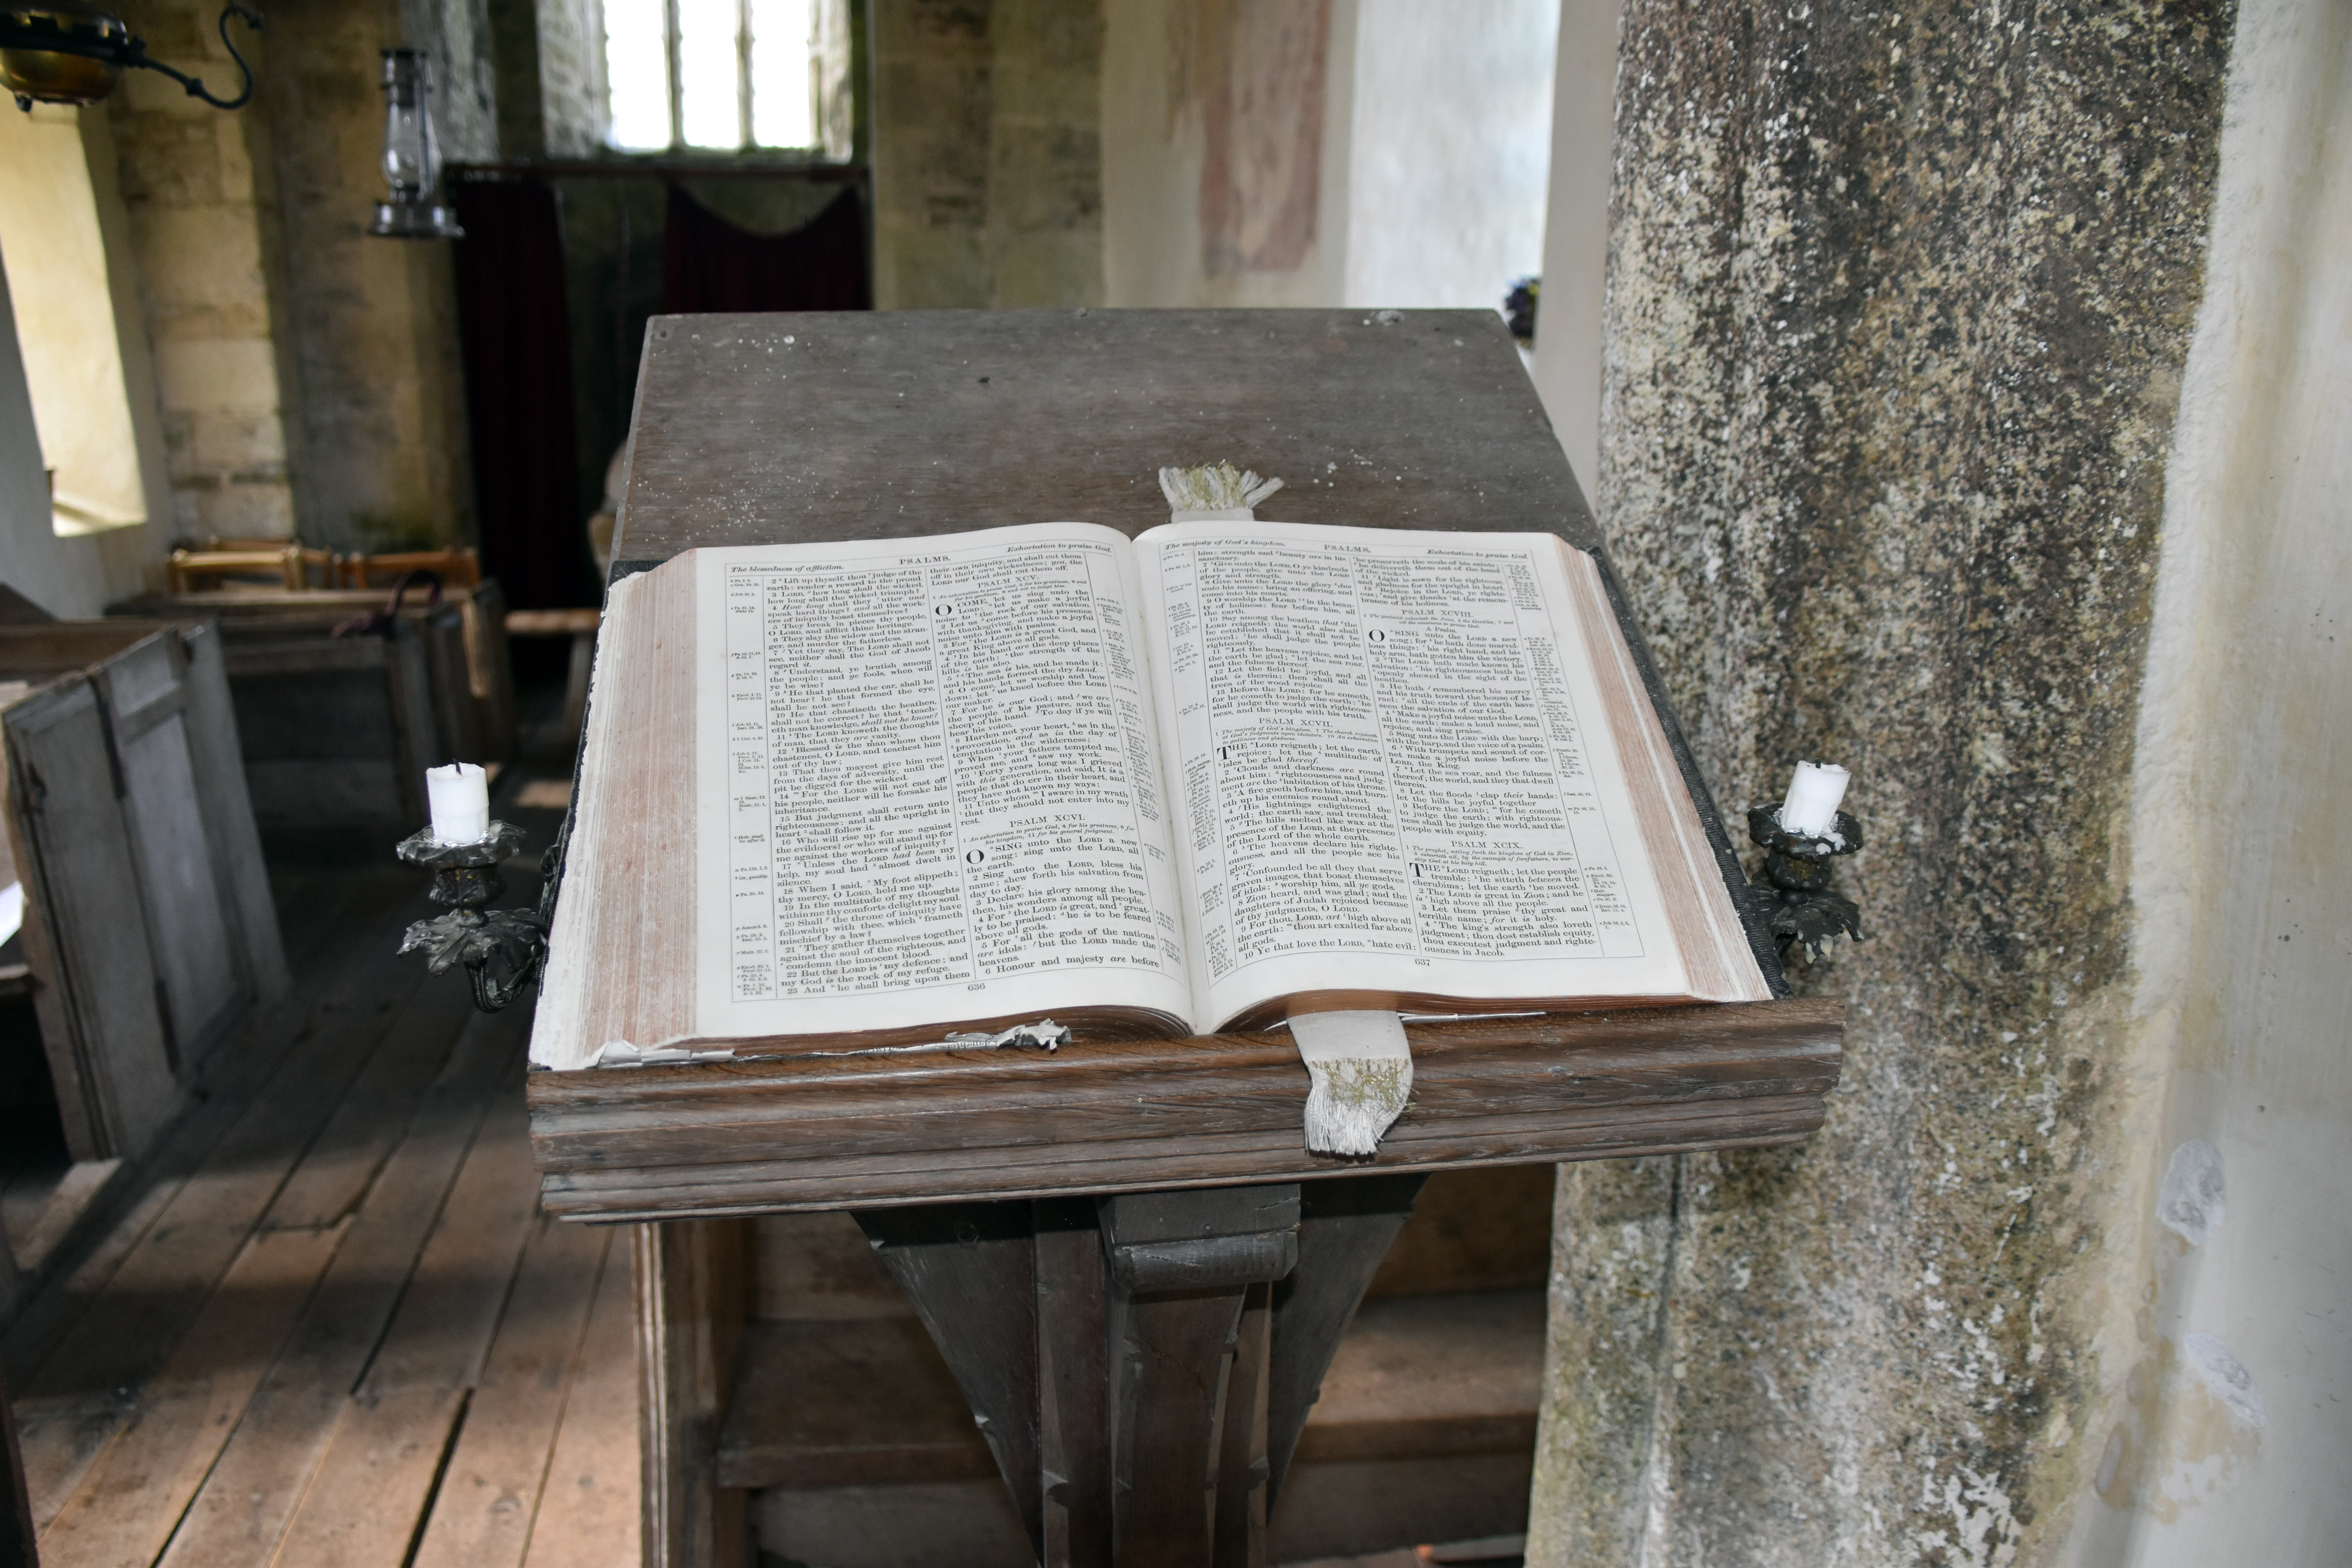
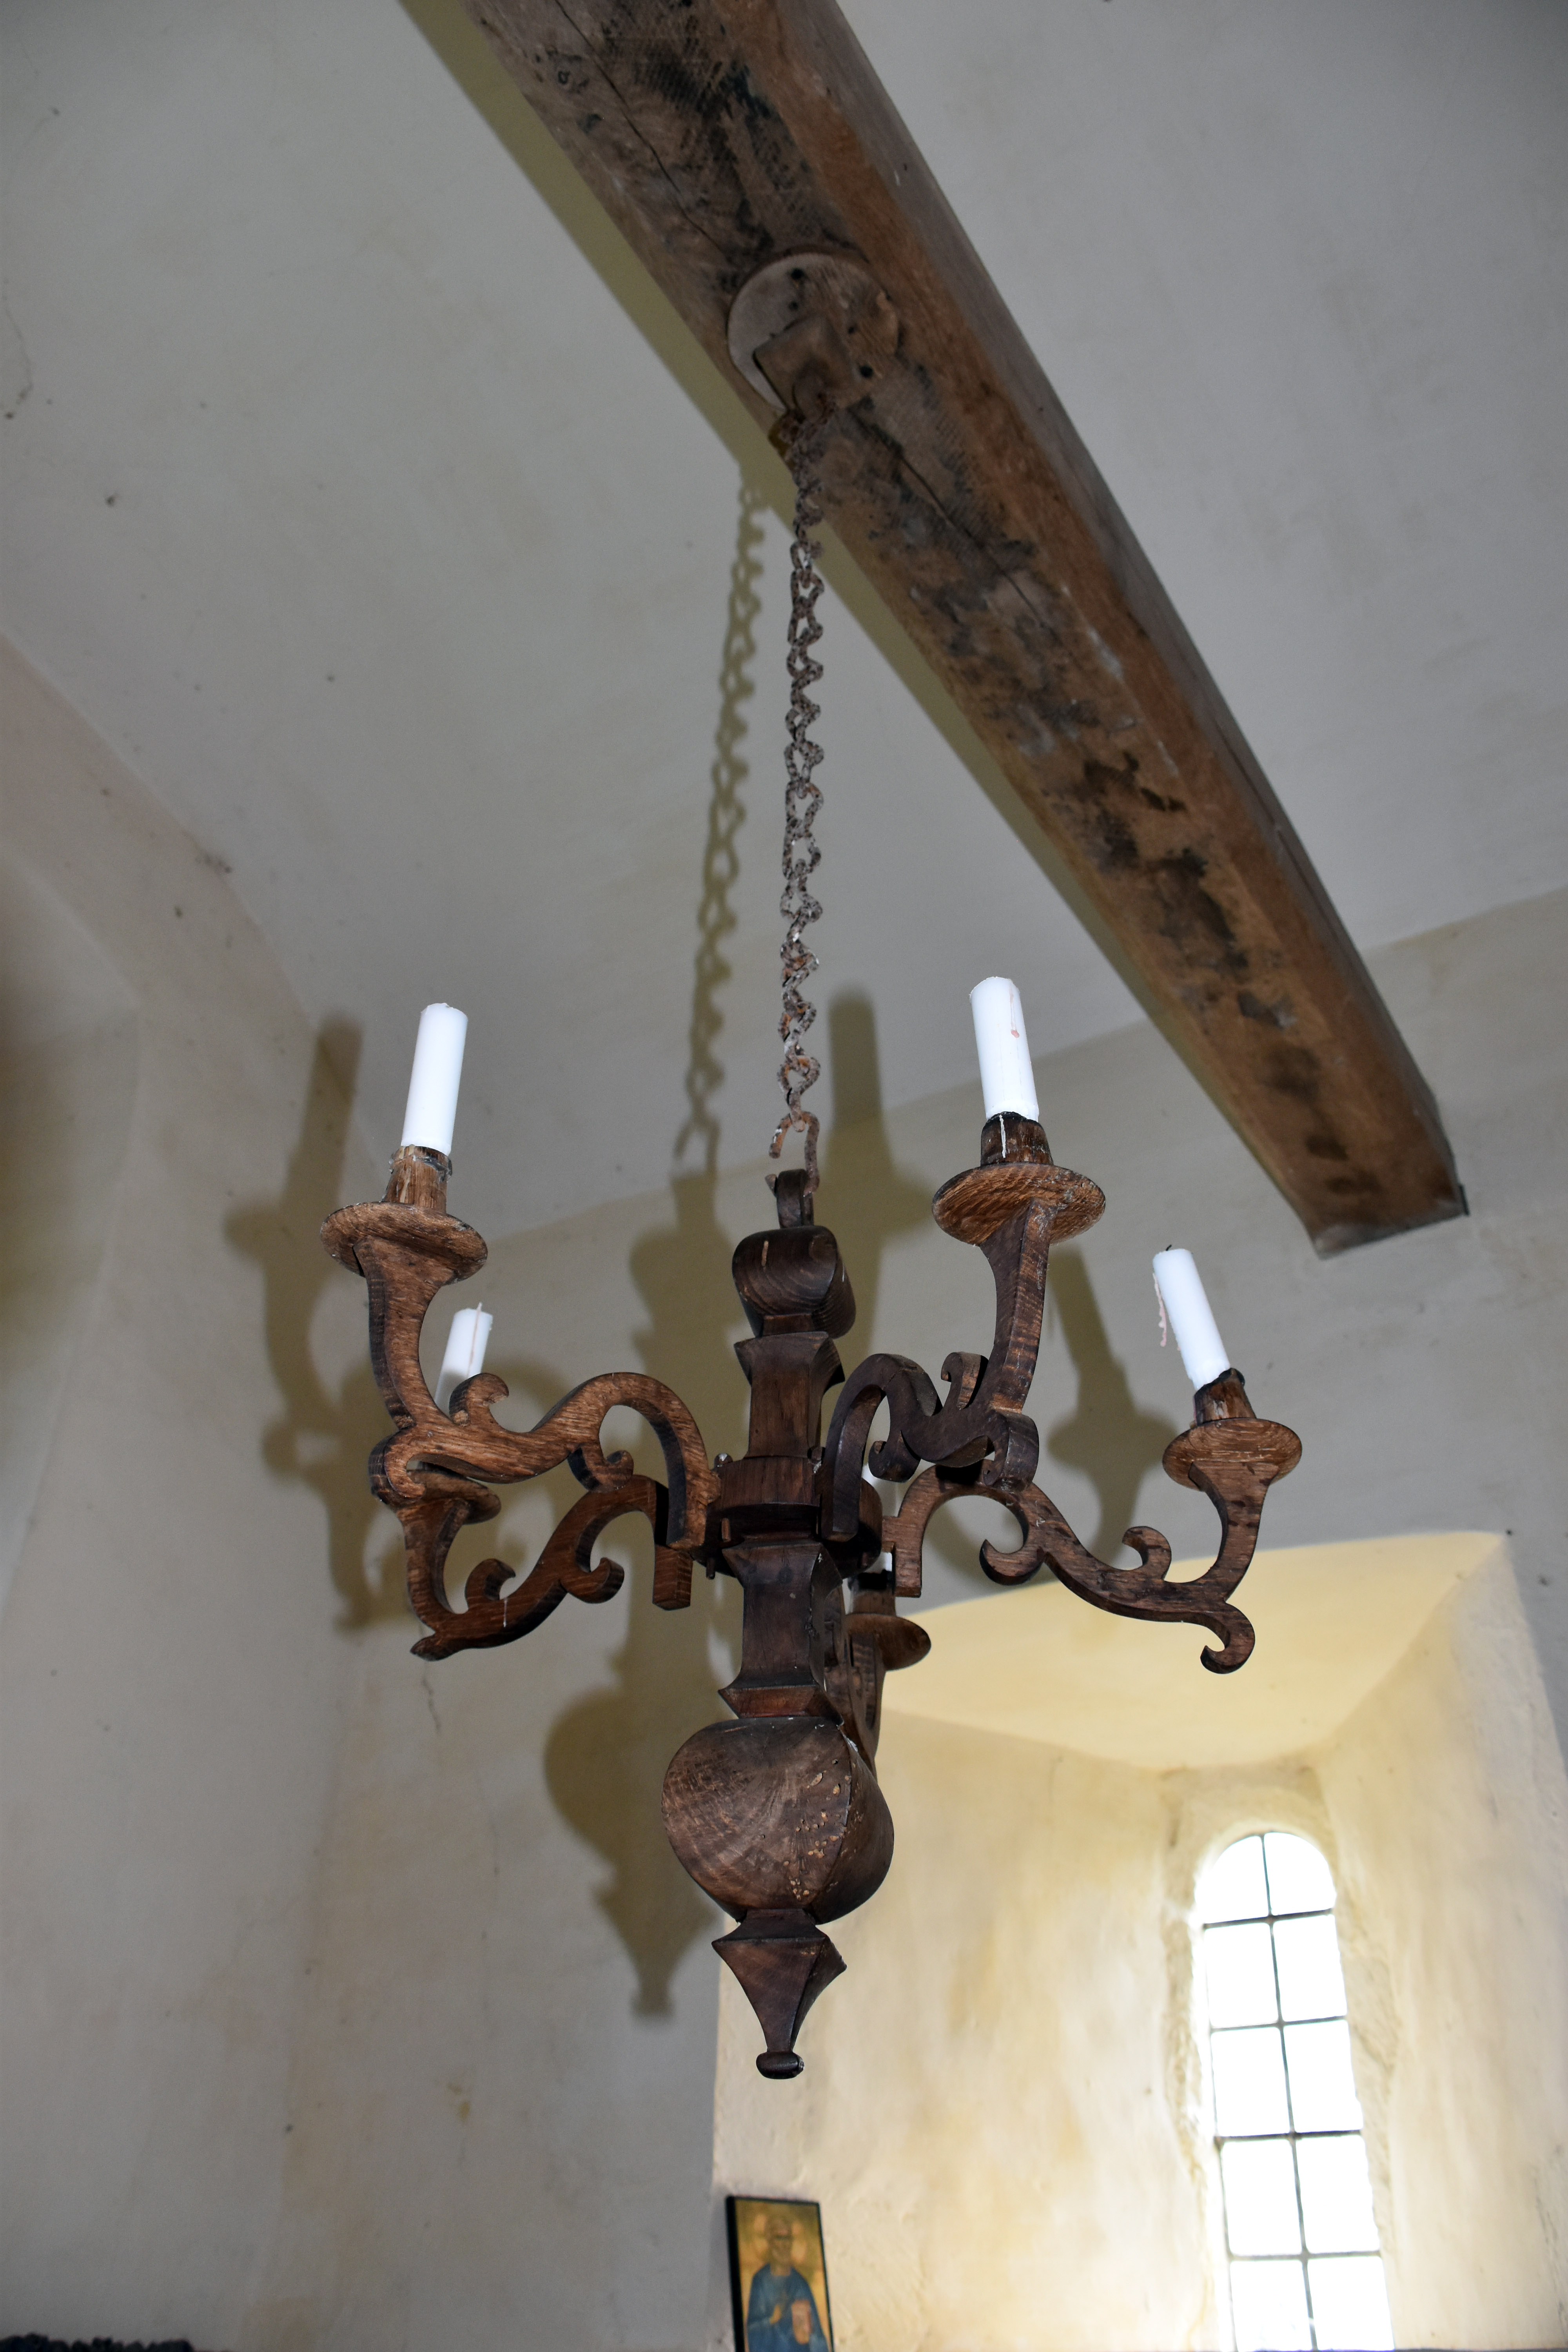
Inside there is a wooden chandelier for the candles (what could possibly go wrong). There are also beautiful metal candle stands that would be used on dark days to help read the Bible or a sermon. You really could imagine an intimate candlelit service in this tiny little church. The contrast with the vastness of St Andrew’s was hard to ignore.

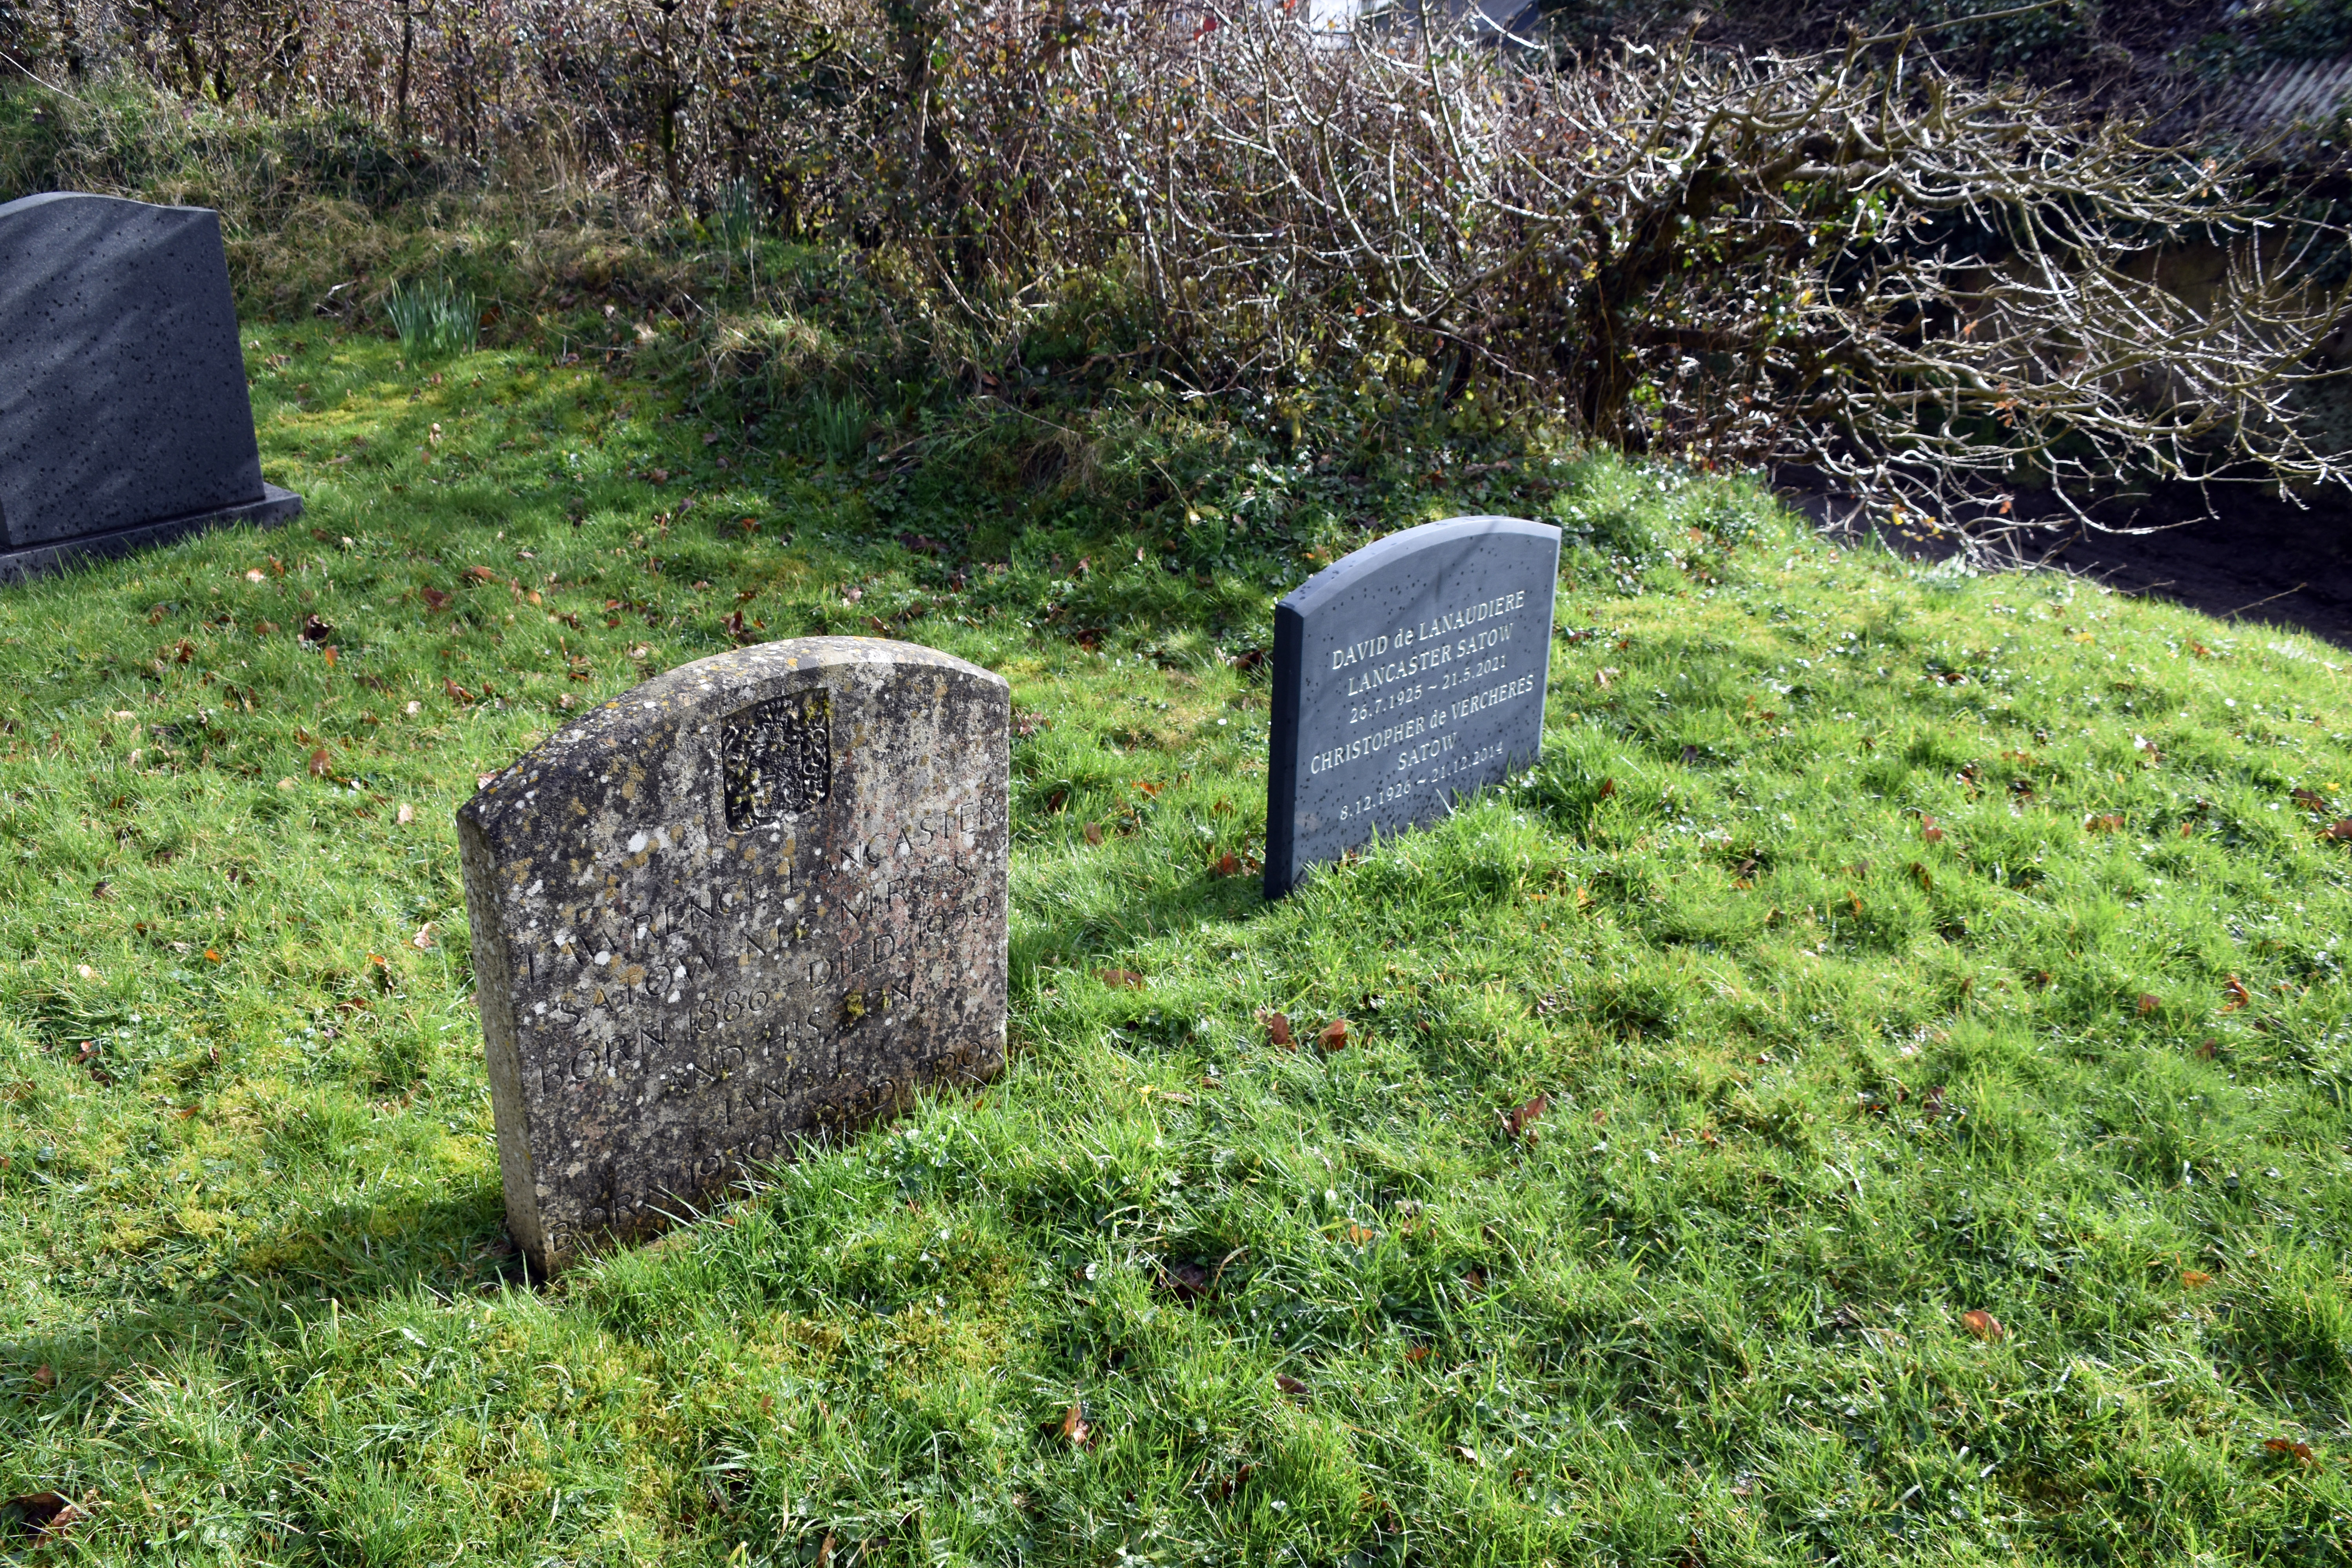
There was one more treat in the graveyard as we came across the unusual name of Lancaster Satow commemorated on headstones. Lawrence Lancaster Satow had been awarded a Military Cross in the First World War for his work in the Royal Army Medical Corps. His citation reads: “For conspicuous gallantry and devotion to duty. He established a dressing station within effective range of the enemy's position, where he attended to the wounded throughout the day and the following night under fire the whole time. It was entirely owing to his disregard of danger and his devotion to duty that many of the wounded were collected and evacuated.” Even the tiniest, most isolated churchyards can be connected to the First World War.

The weather was quite wild, with strong winds, showers blowing through, but bright sunshine peeking out whenever it could. We headed back towards Sampford Courtenay, but sadly kept to the roads due to all that groundwater. Daffodils were finally poking out, hinting that spring was arriving.

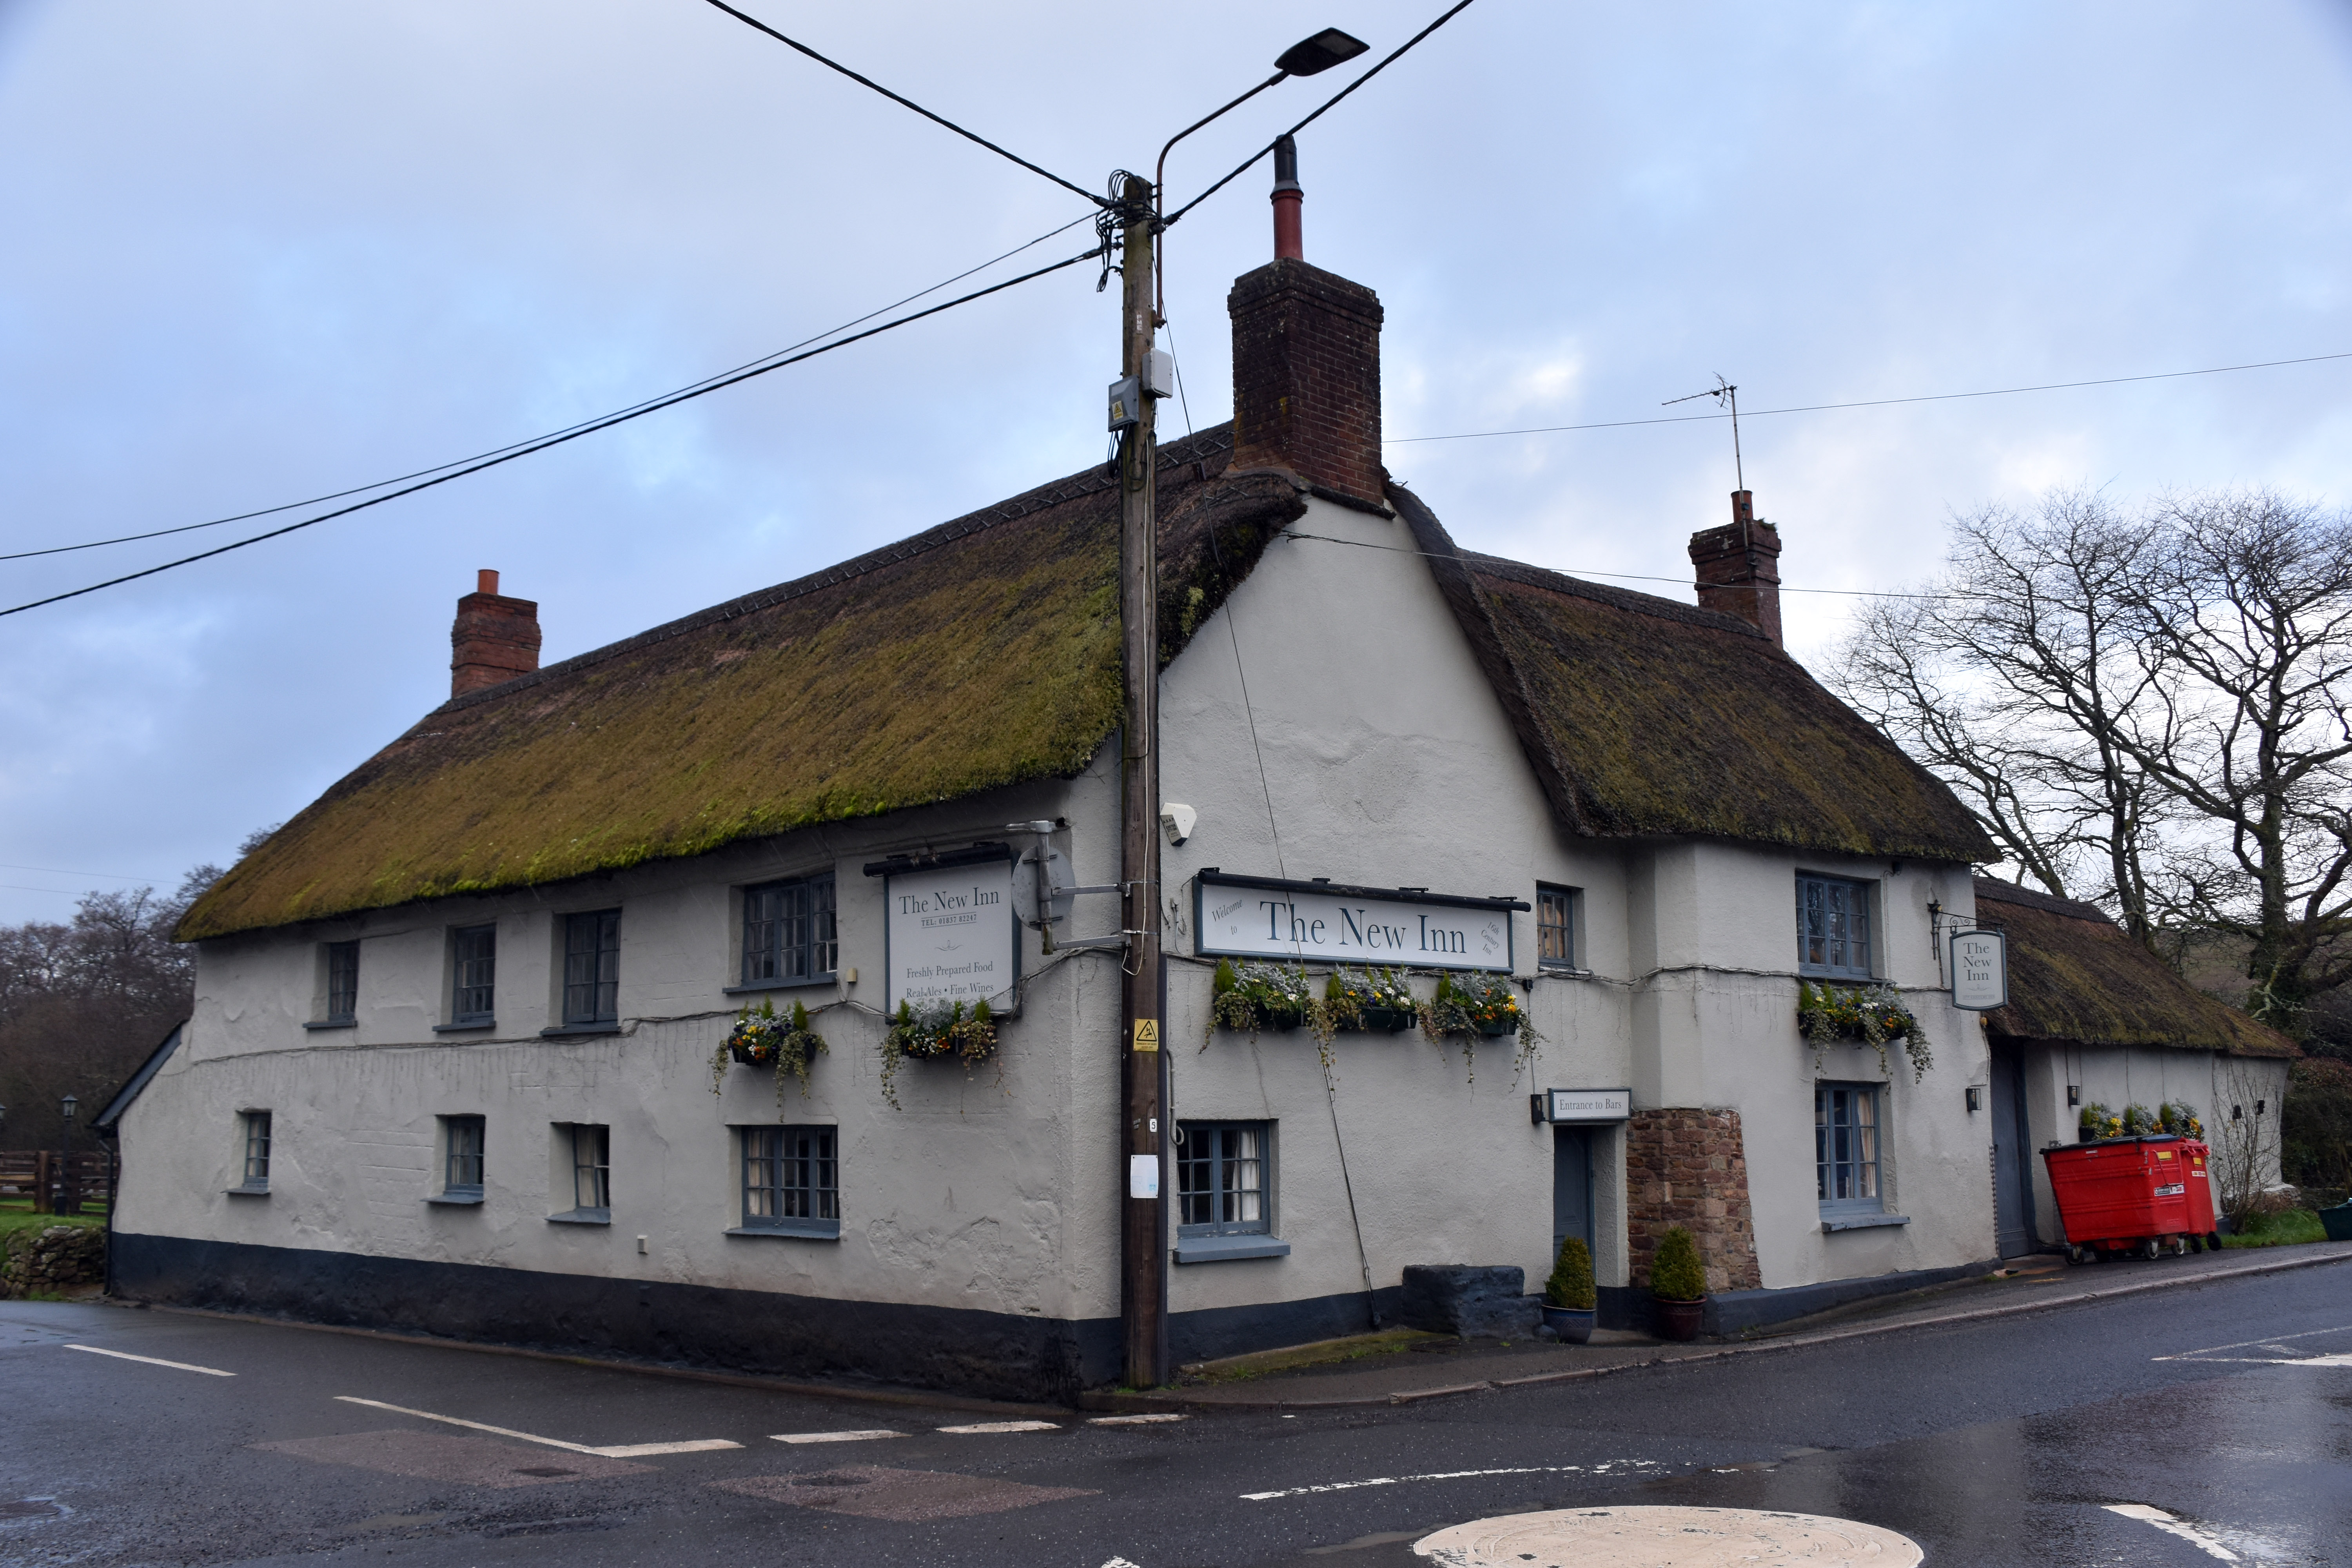
We had one more place to visit, and that was the New Inn at the southern end of Sampford Courtenay. Not so new, as I am sure. It was new in the 16th century when it was built! But it can be hard to change a name once everyone has got used to it.

The New Inn, Sampford Courtenay

The New Inn provided the setting for one of M. R. James’s ghost stories, Martin’s Close, written in 1911 and turned into a Christmas BBC ghost story by Mark Gatiss a few years back. In the story, the narrator uncovers the long‑forgotten case of George Martin, a young Devon gentleman executed in 1684 for murdering Ann Clark, a simple village girl he had mocked and mistreated. Through a recovered trial transcript, he learns that Martin was relentlessly haunted by Ann’s ghost, most vividly at the New Inn in Sampford Courtenay, where witnesses heard her unmistakable voice singing the tune he once used to tease her, saw a dripping figure slip into a closet, and watched wet footprints trail across the floor after the candles blew out. The same apparition later rose from the pond where her body was found, following Martin with the same excited arm‑waving Ann had shown in life. Even in prison he was disturbed by unseen visitations outside his cell. By the time he faced Judge Jeffreys, Martin was half‑broken with terror, and after his conviction he fainted when the judge coldly remarked that Ann Clark might visit him before his execution. The narrator ends by noting that the tune “Madam, will you walk, will you talk with me?” remains unlucky in Sampford Courtenay.

Even the most remote of Devon’s villages are packed with fascinating history. Sampford Courtenay’s is more interesting than most—indeed, one of the largest battles in Devon’s history took place in this tranquil and beautiful village. But if you do go to the magnificent church in the village, you must visit the tiny hamlet of Honeychurch and contrast it with the beautifully untouched church there. You really can appreciate the evolution of our churches when you see one of the few that has escaped the ravages of modernisation and updating. But it is no less interesting for its simplicity—indeed, it enhances it. These two churches and the pub provide a fascinating insight into our history of rebellion, loyalty, religious change and sacrifice.

Location of Walk

Click for OS Map of Area

Links

Historic England – St Andrew’s Church, Sampford Courtenay
Official Grade I listing with architectural details and medieval fabric relevant to 1549

Devon Church Land – St Andrew’s, Sampford Courtenay
Detailed architectural and historical description of the parish church

Historic England – The New Inn, Sampford Courtenay
Grade II listing for the historic inn featured in M. R. James’s Martin’s Close and central to village life

Devon & Dartmoor HER – Sampford Courtenay: Prayer Book Rebellion
Archaeological and historical summary of the 1549 rising centred on the village

Sampford Courtenay Parish Council
Local information, village history, and community resources

Historic England – St Mary’s Church, Honeychurch
Grade I listing for one of Devon’s best-preserved Norman churches

Devon & Dartmoor HER – Honeychurch
Overview of the tiny medieval settlement and its church

Devon Church Land – St Mary’s, Honeychurch
Detailed architectural and historical description of this exceptionally preserved Norman church

Battlefields of the Prayer Book Rebellion
Accessible overview of the causes and course of the 1549 Western Rising

What was the Prayer Book Rebellion that happened in 1549?
Devon Life Article

Cornish Prayer Book Rebellion (PDF)
A Report for Devon County Council Glenn Foard & Alex Hodgkins,1 University of Leeds, 2009

Suggested Reading

Cornwall, Julian – Revolt of 1549: The Prayer Book Rebellion
Frank Cass, 1977

Duffy, Eamon – The Voices of Morebath: Reformation and Rebellion in an English Village
Yale University Press, 2001

Fletcher, Anthony – Tudor Rebellions
Routledge, 1983

Hoskins, W. G. – Devon
Collins, 1954

Loades, David – Edward VI
Amberley, 2012

Stoyle, Mark – Murderous Midsummer: The Western Rising of 1549
Yale University Press, 2022

Whiting, Robert – The Reformation of the English Parish Church
Cambridge University Press, 2010

More Walks

Walks by the Westcountry Walker

Green Hill, site of the final battle of 1549 St Andrew’s Church, Sampford Courtenay 1934–35 Rover 12 parked outside Church House Commemorative plaque marking the start of the Prayer Book Rebellion
Green Hill — the site of the final battle of the 1549 Prayer Book Rebellion, where the King’s army defeated the remaining rebel forces outside the village. St Andrew’s Church — the medieval parish church overlooking the landscape in which both the rising and its final defeat unfolded. Rover 12 at Church House — a 1934–35 Rover parked beside Church House, the historic building associated with the Whit Monday 1549 killing of William Hellyons, the act that sparked the village’s involvement in the rebellion. Rebellion plaque — marking Whit Monday 1549, when William Hellyons was killed and the people of Sampford Courtenay chose to join the Cornish in the Prayer Book Rebellion.
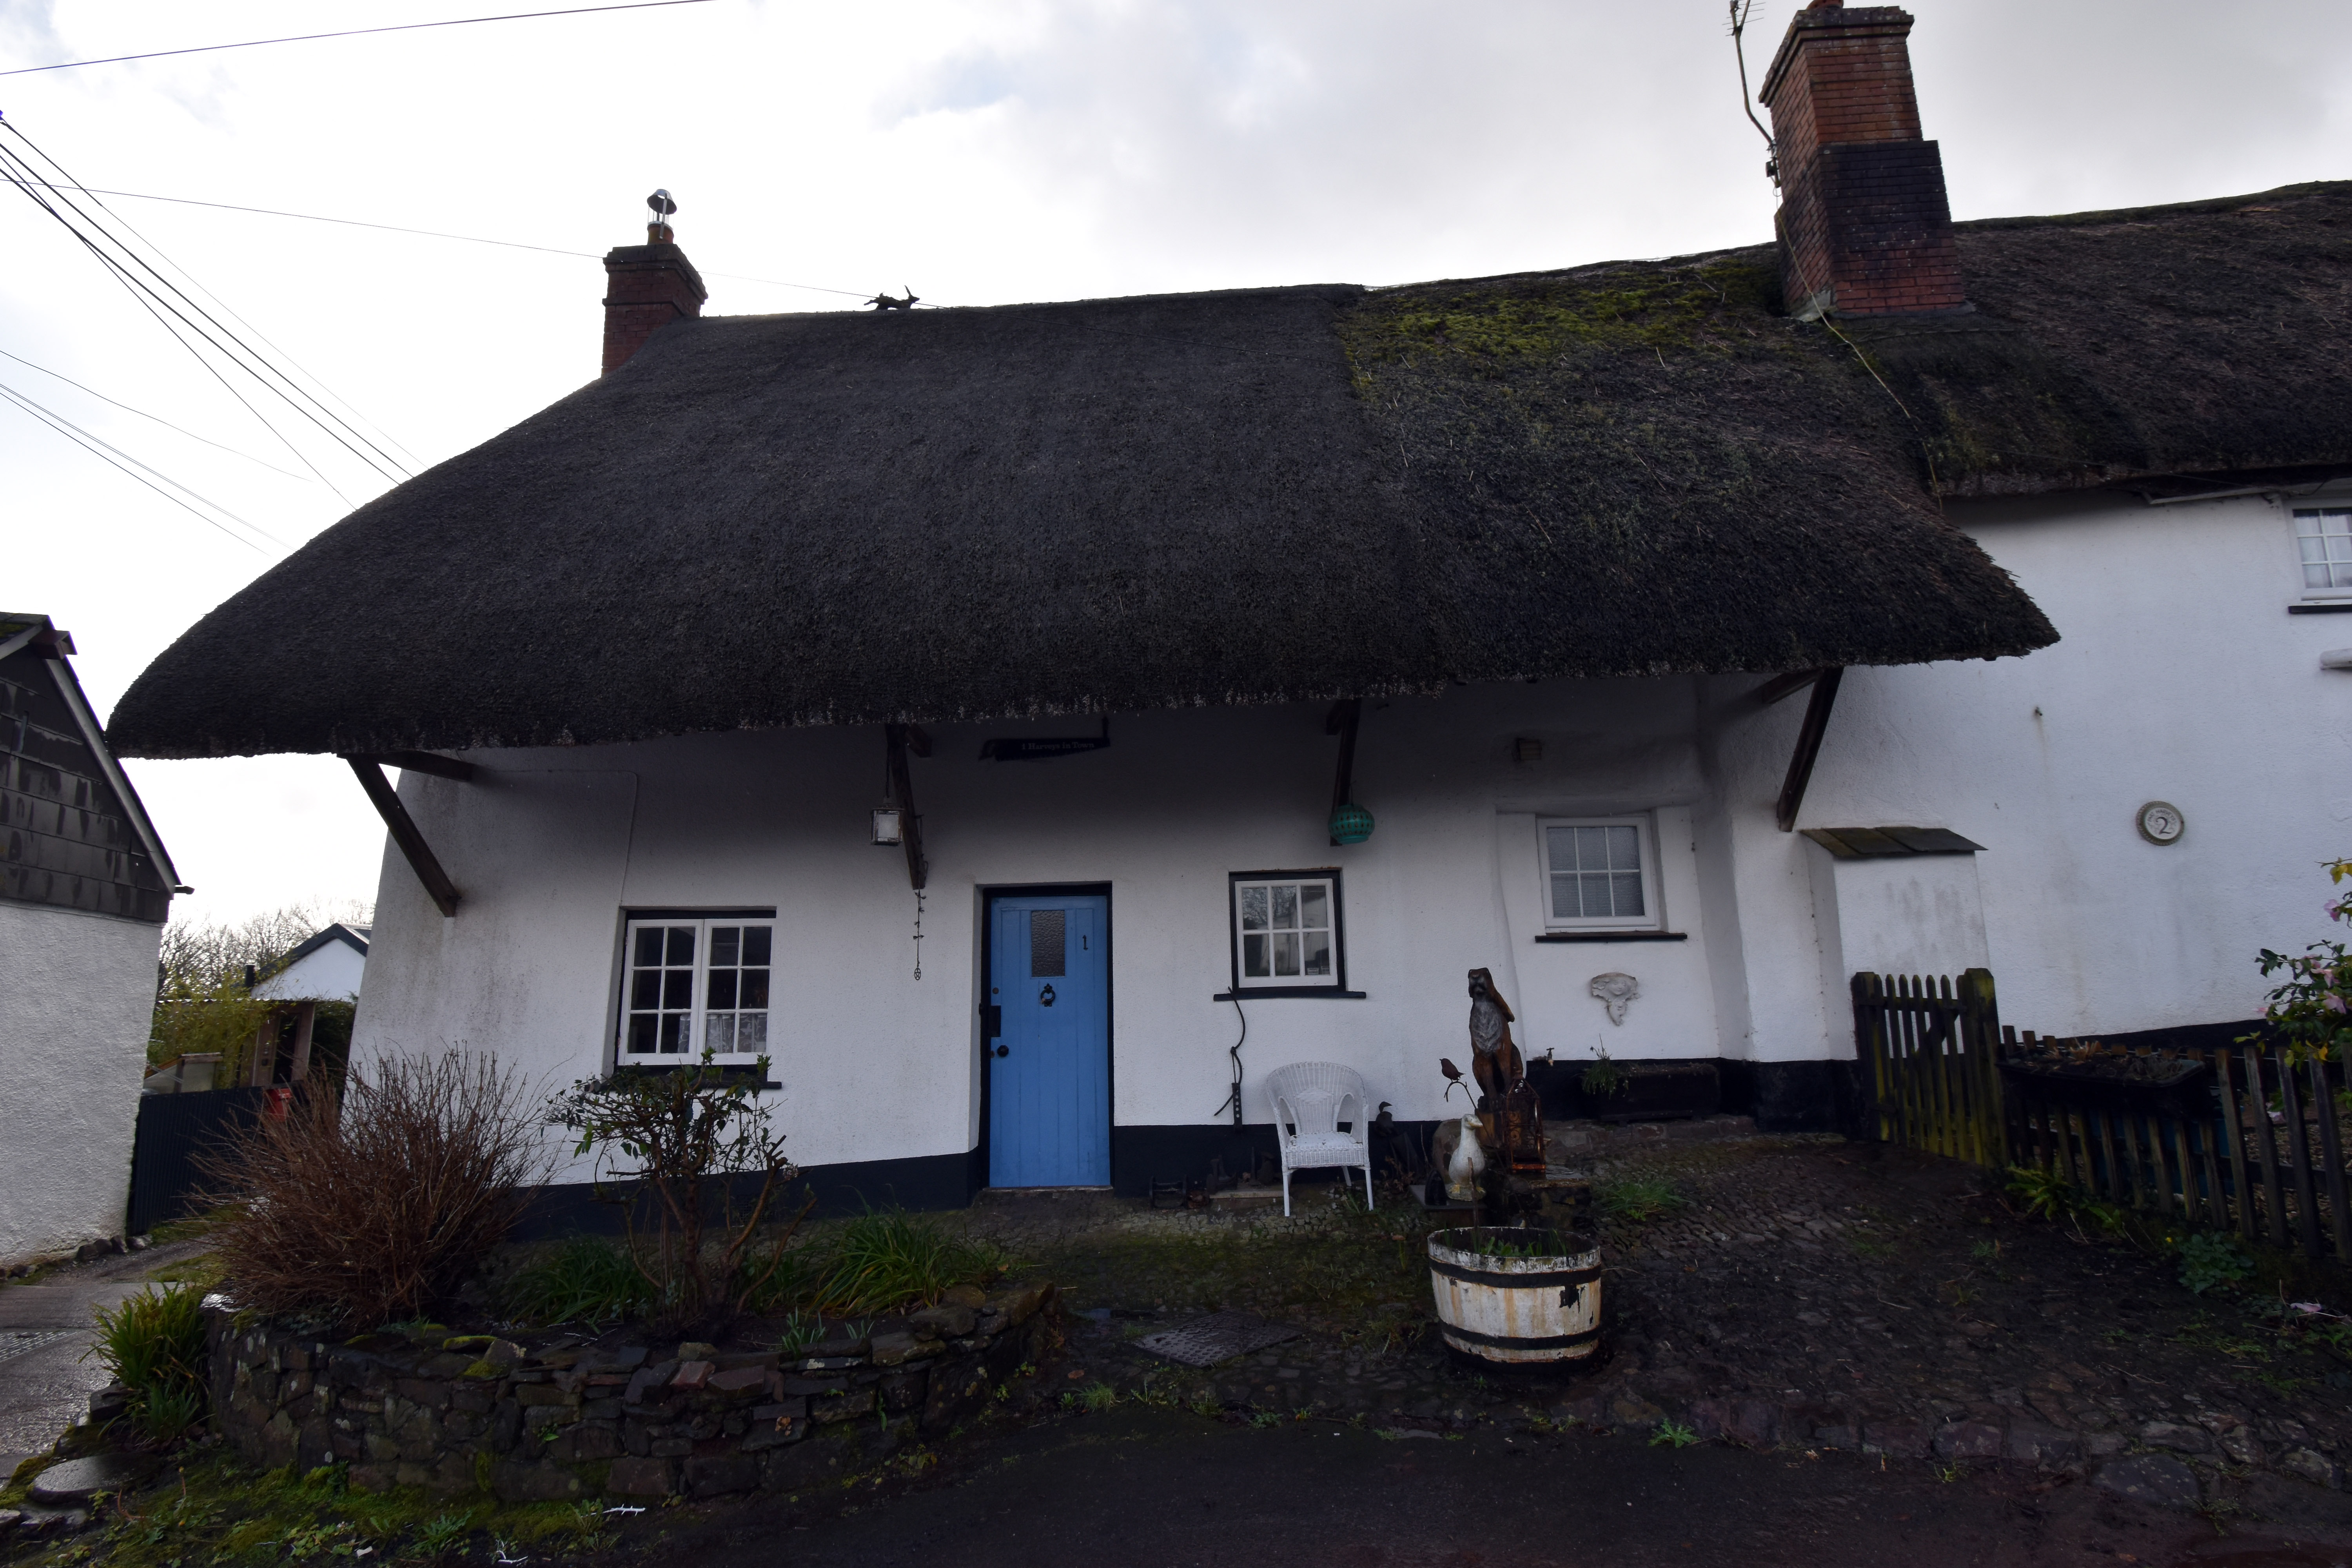
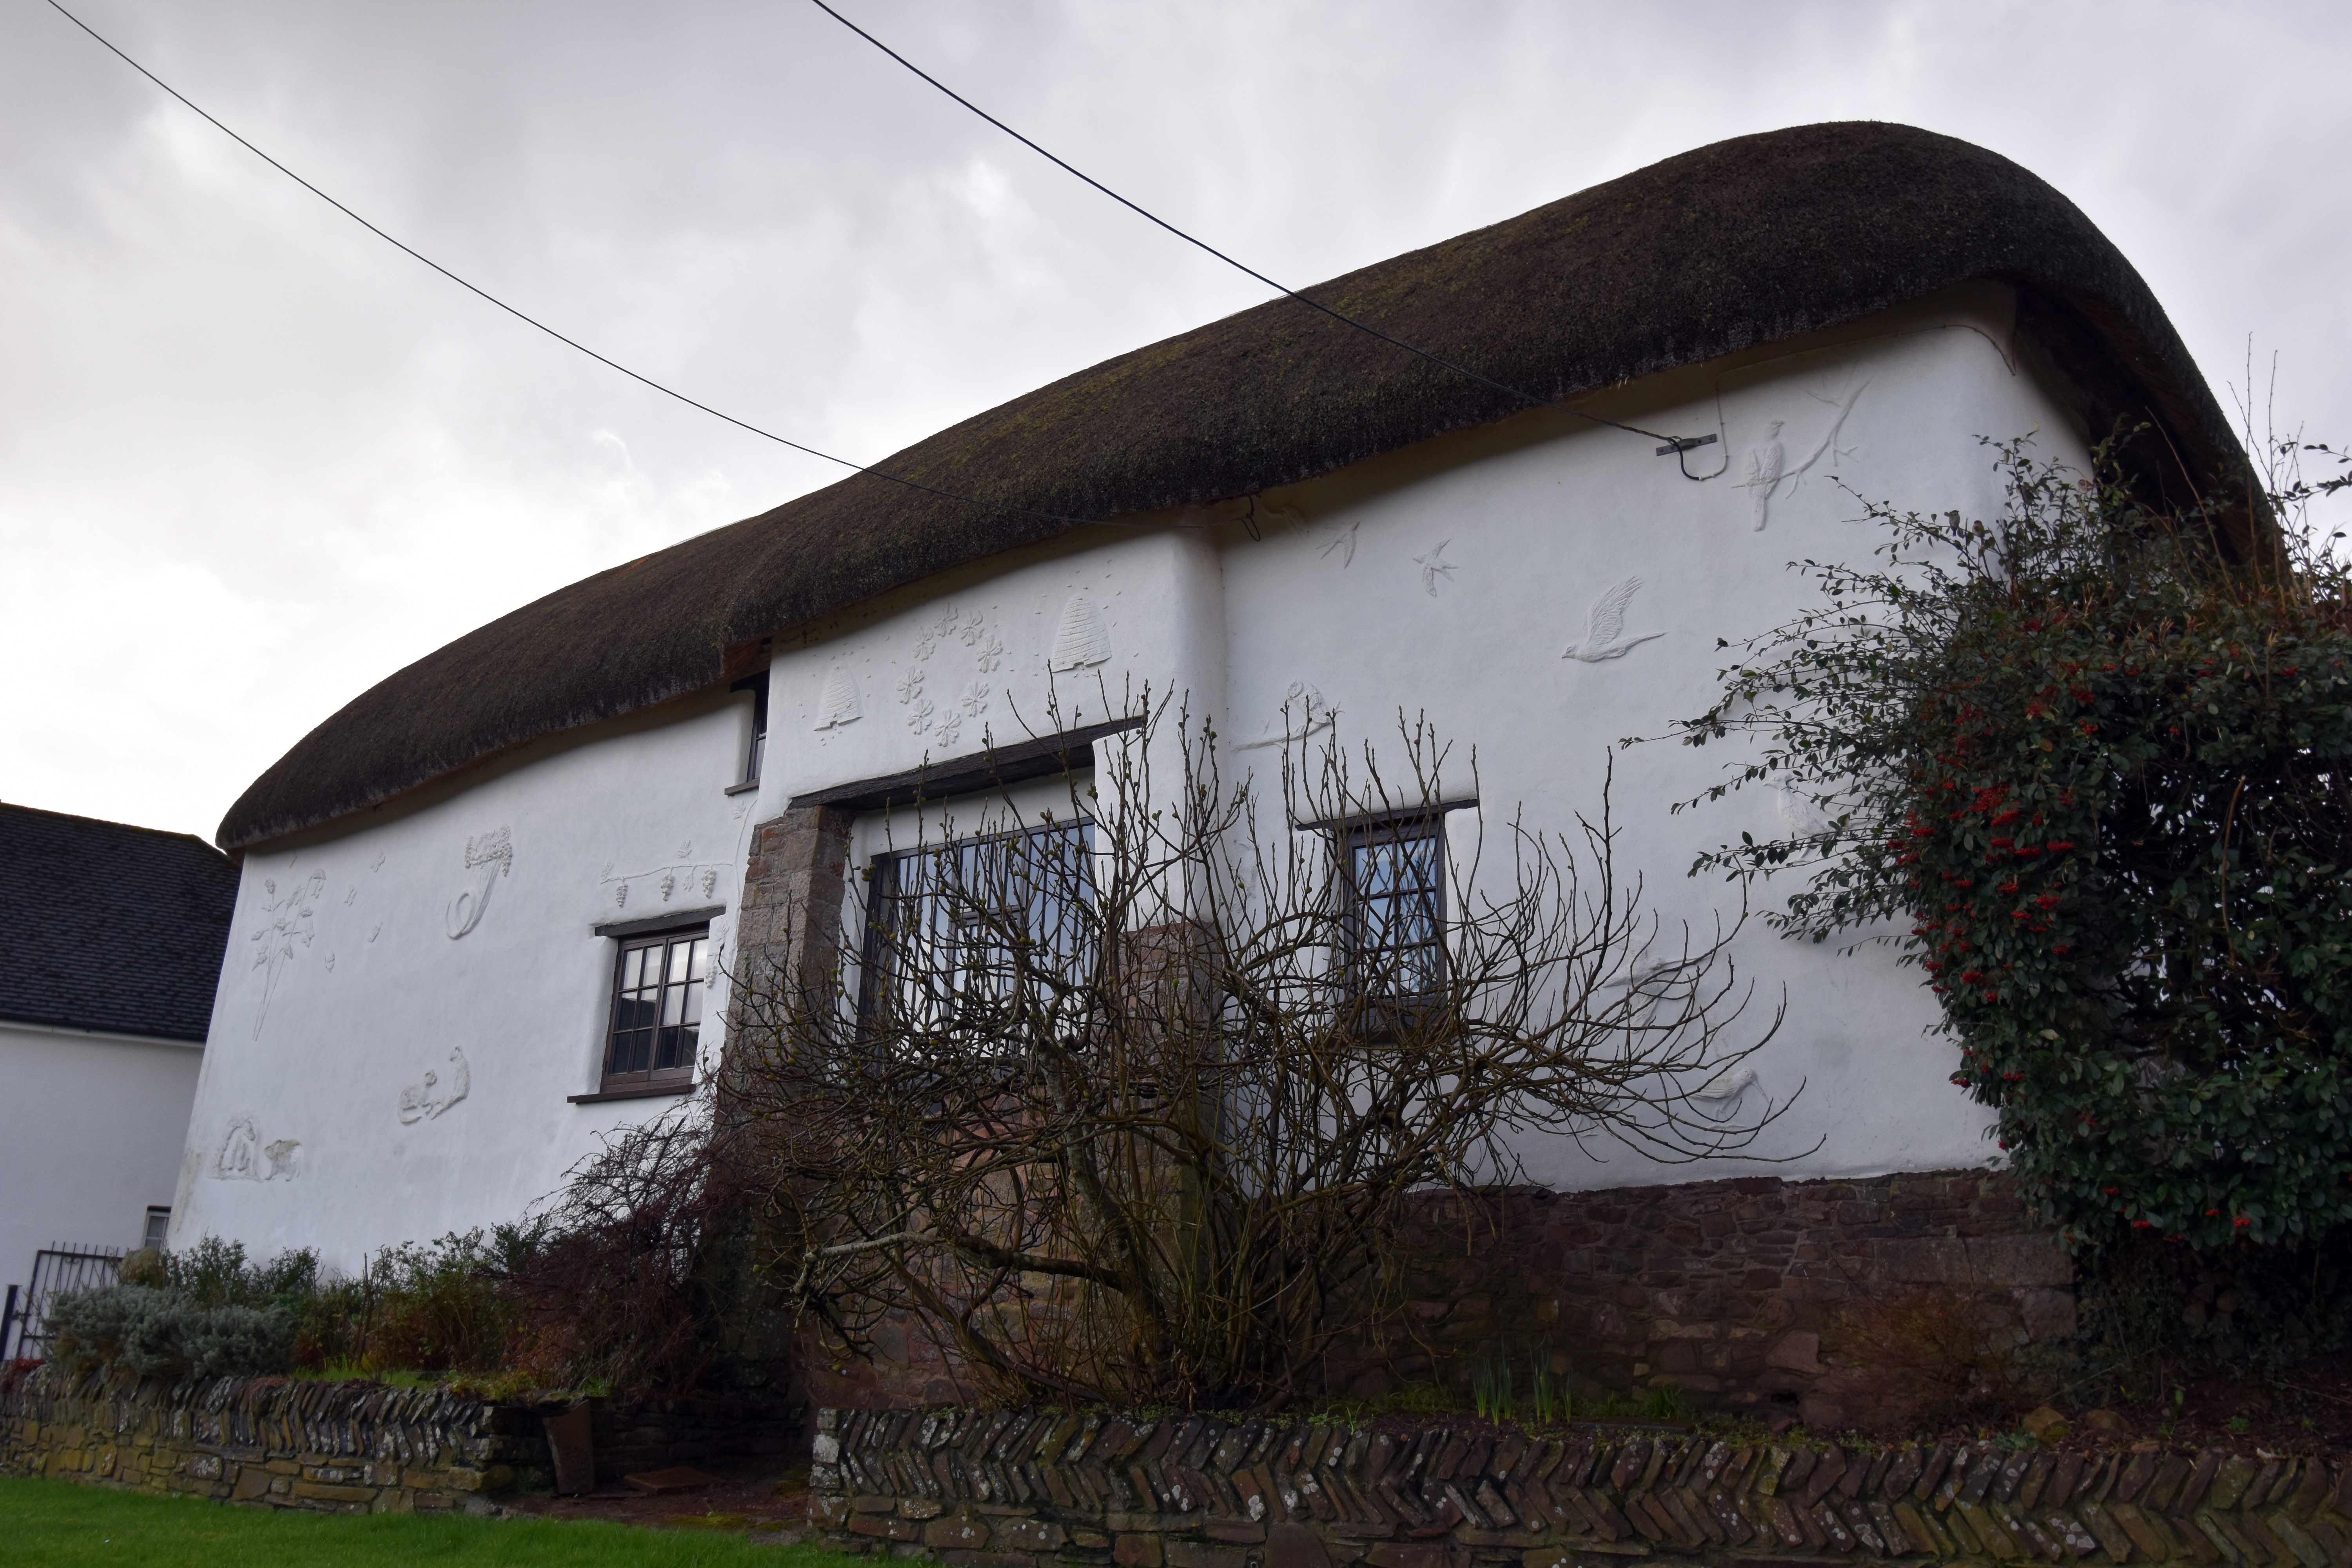
Sampford Courtenay WWI memorial plaque with poppy wreaths Sampford Courtenay WWI and WWII memorial plaque with poppy wreaths Traditional Devon thatched cottage with blue door Thatched cottage with sculpted nature-themed wall reliefs
The village’s First World War memorial, listing the men of Sampford Courtenay who served and died, marked each year with poppy wreaths. A second memorial panel records those lost in both world wars — a reminder of how far the reach of conflict extended, even into small rural parishes. A typical Devon thatched cottage in the heart of the village, complete with whitewashed walls and a weathered roofline shaped by centuries of local craft. One of Sampford Courtenay’s more distinctive cottages, its exterior decorated with carved reliefs of birds, trees and a beehive — a striking piece of vernacular art.
Glebe house beside the path leading down to St Andrew’s Entrance door to St Andrew’s Church Medieval font inside St Andrew’s Church Rood loft stairway and doorway inside St Andrew’s
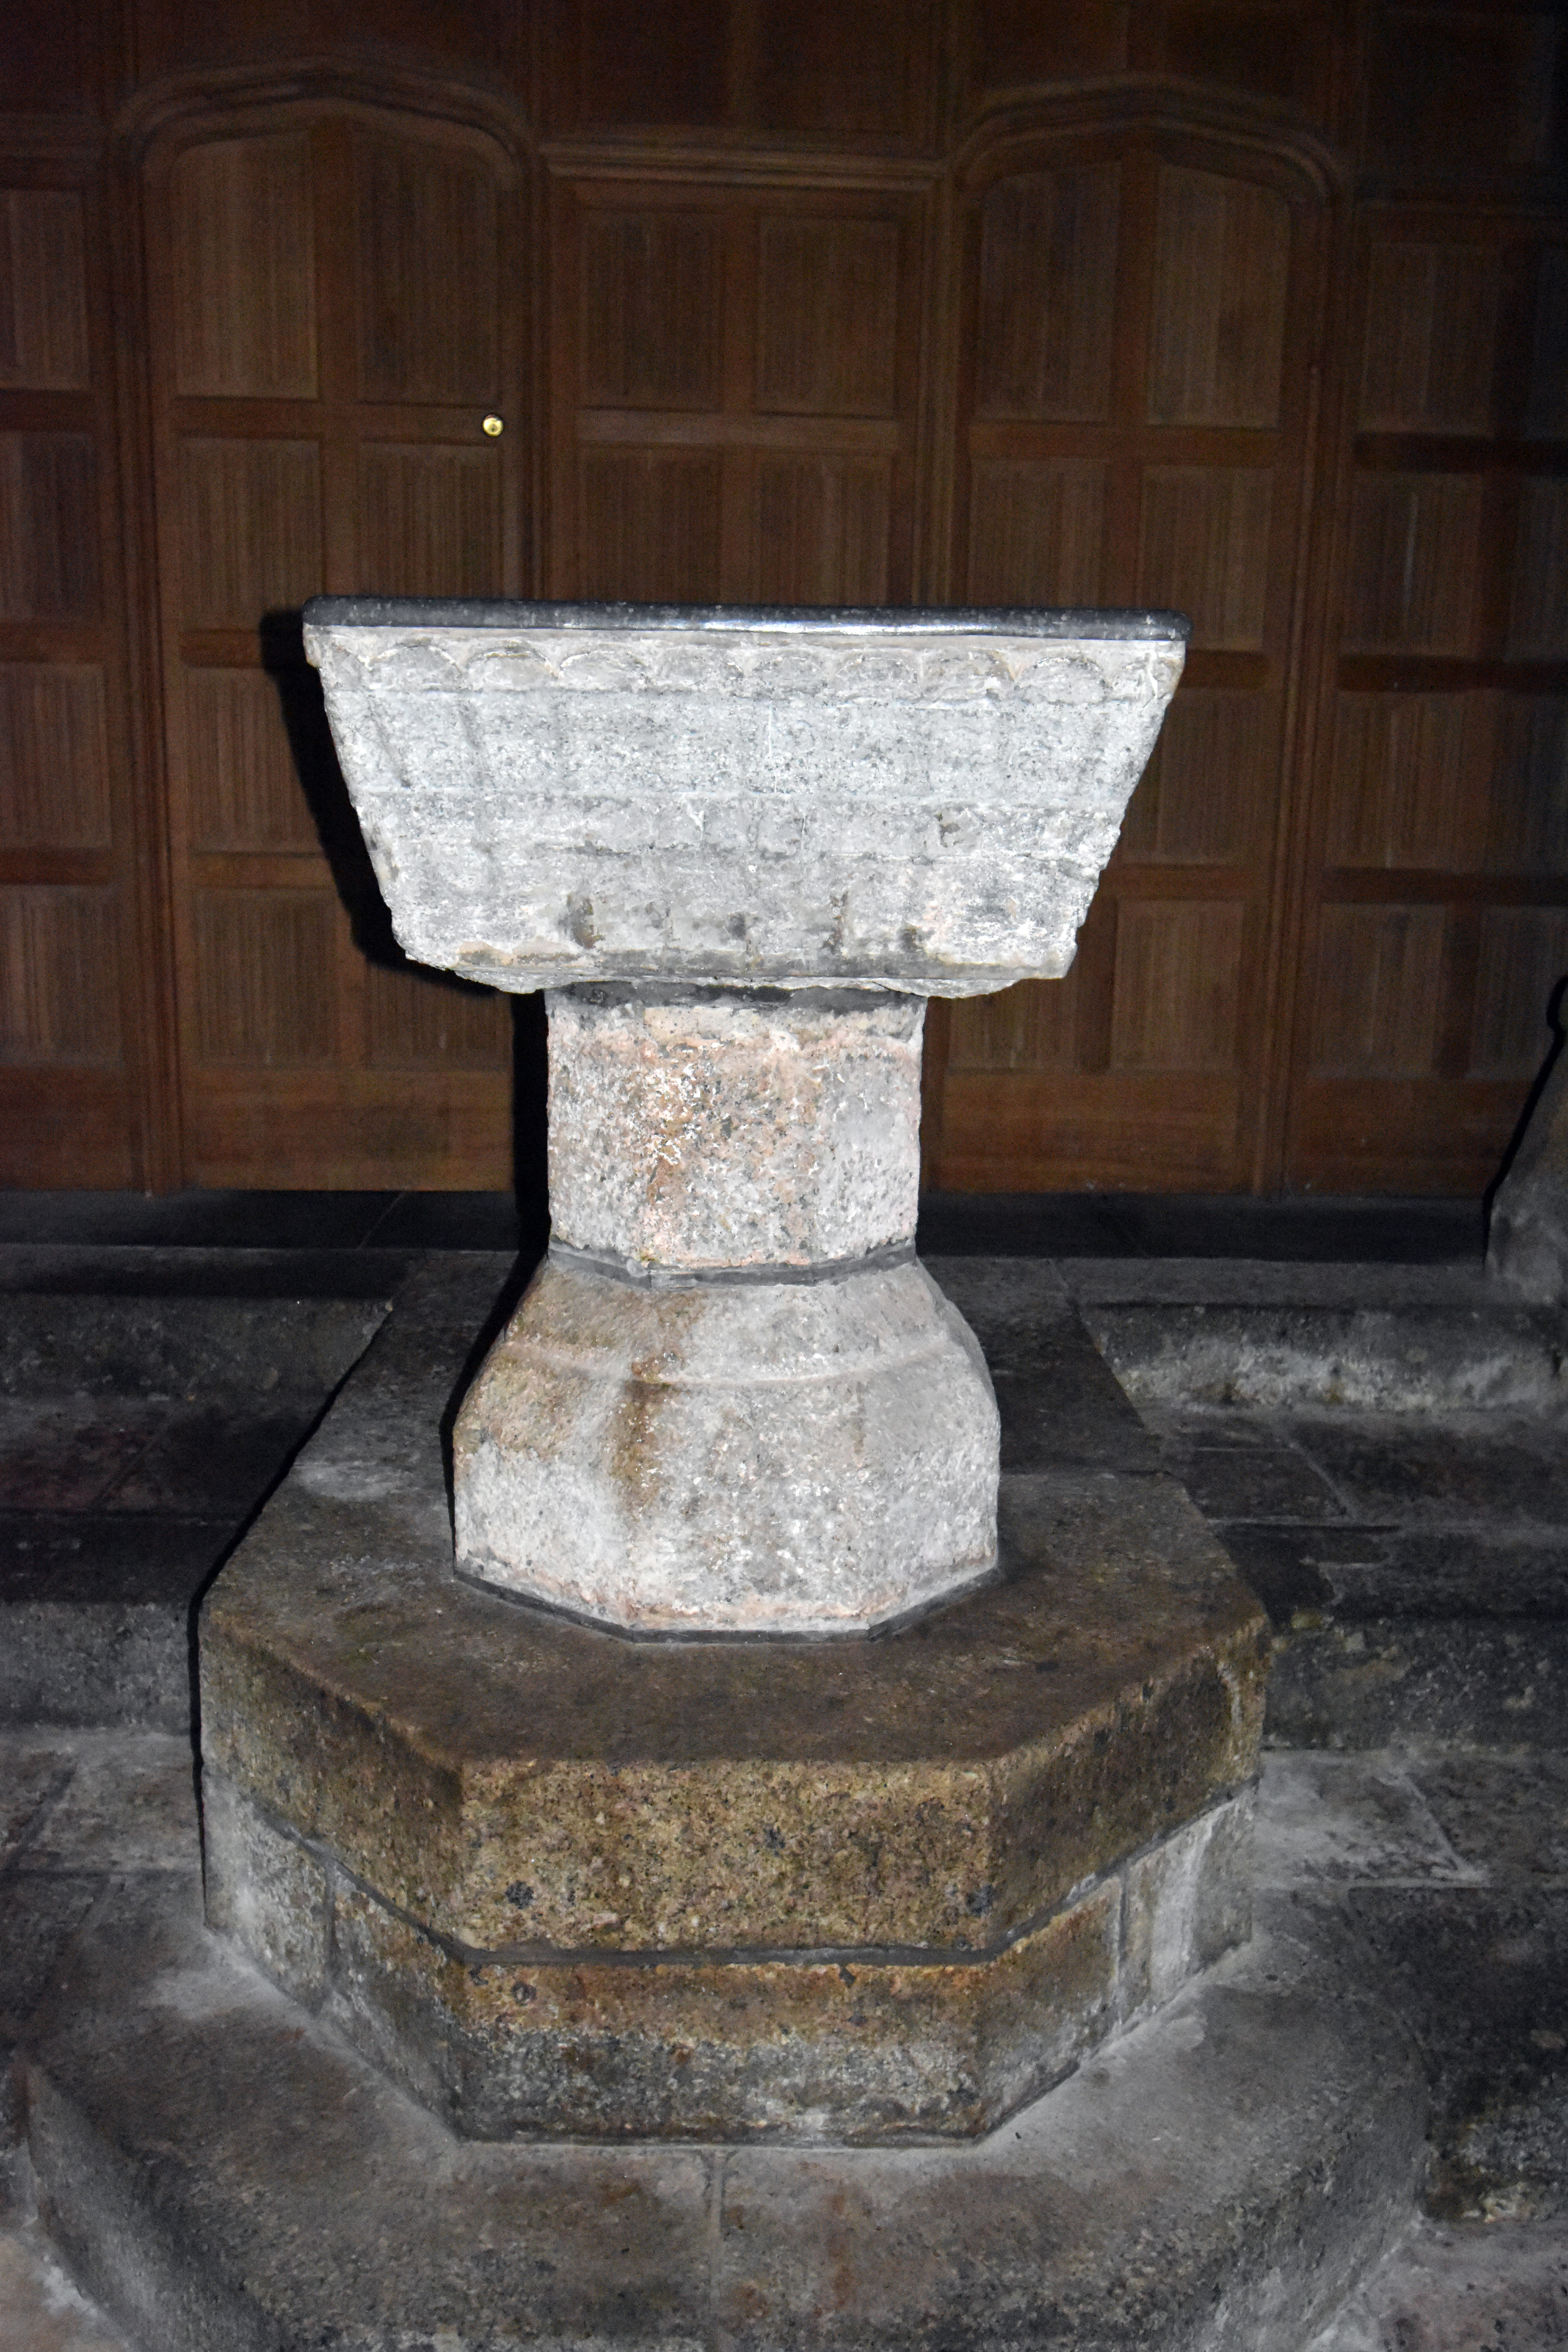
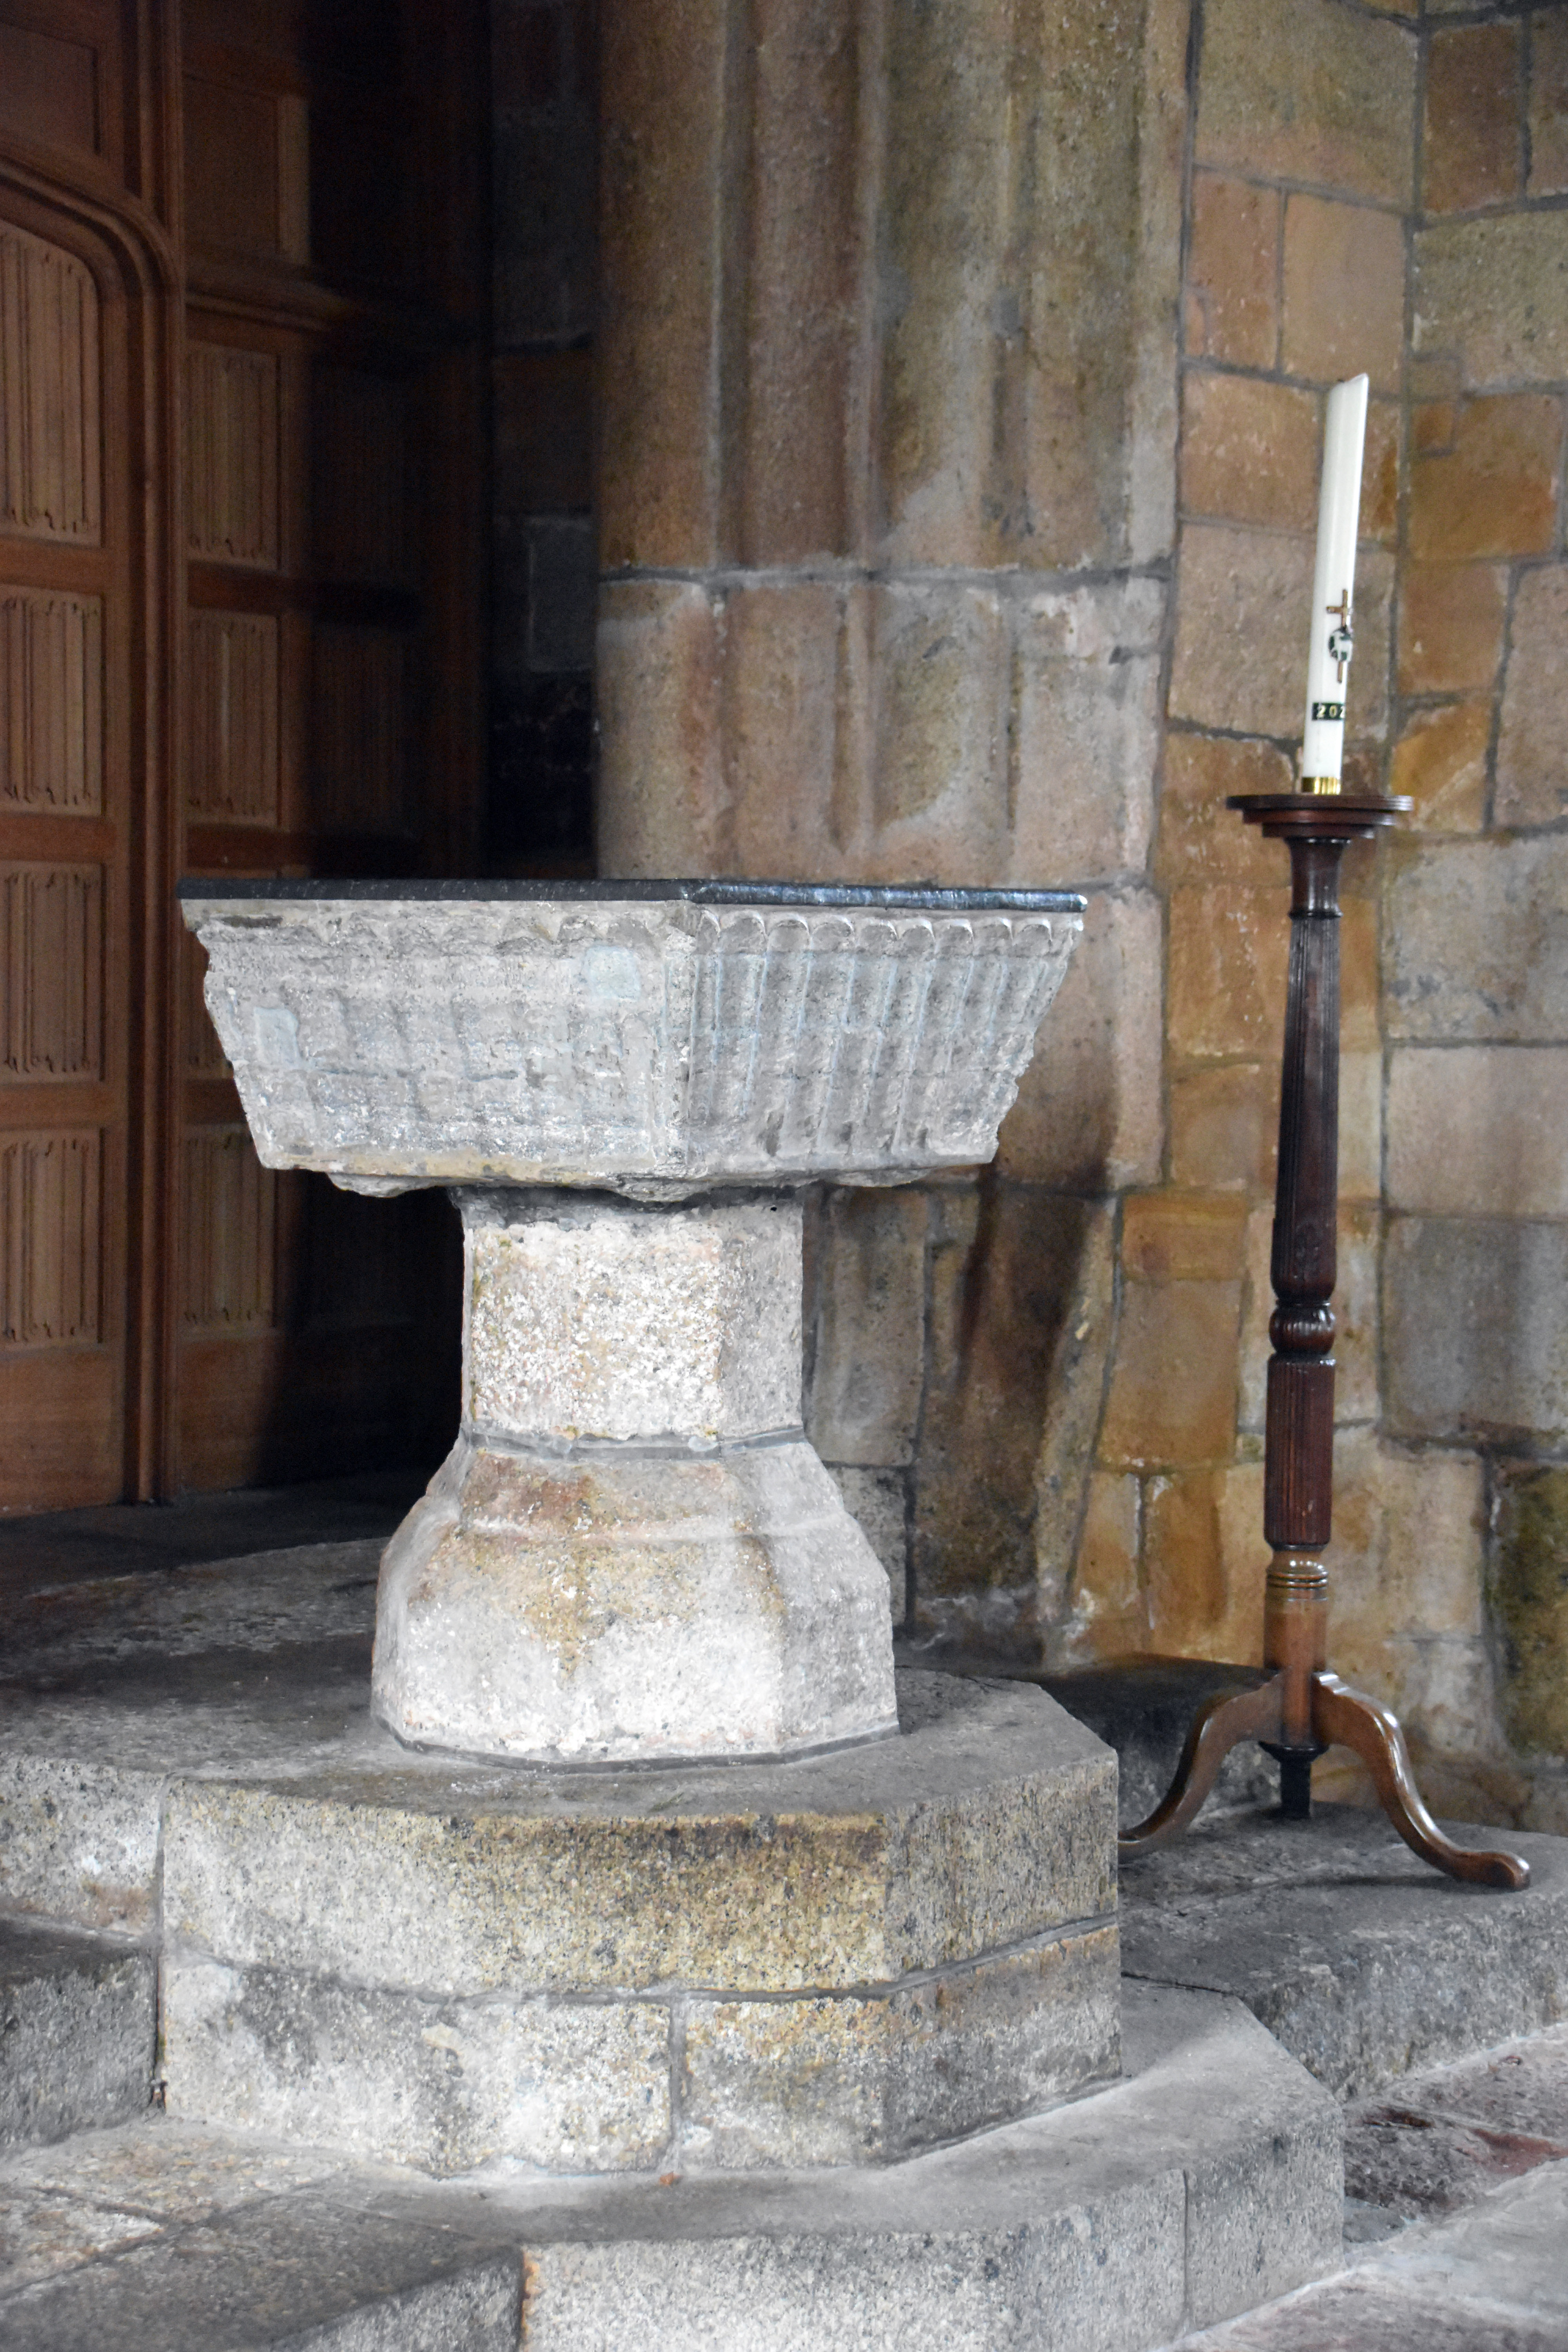
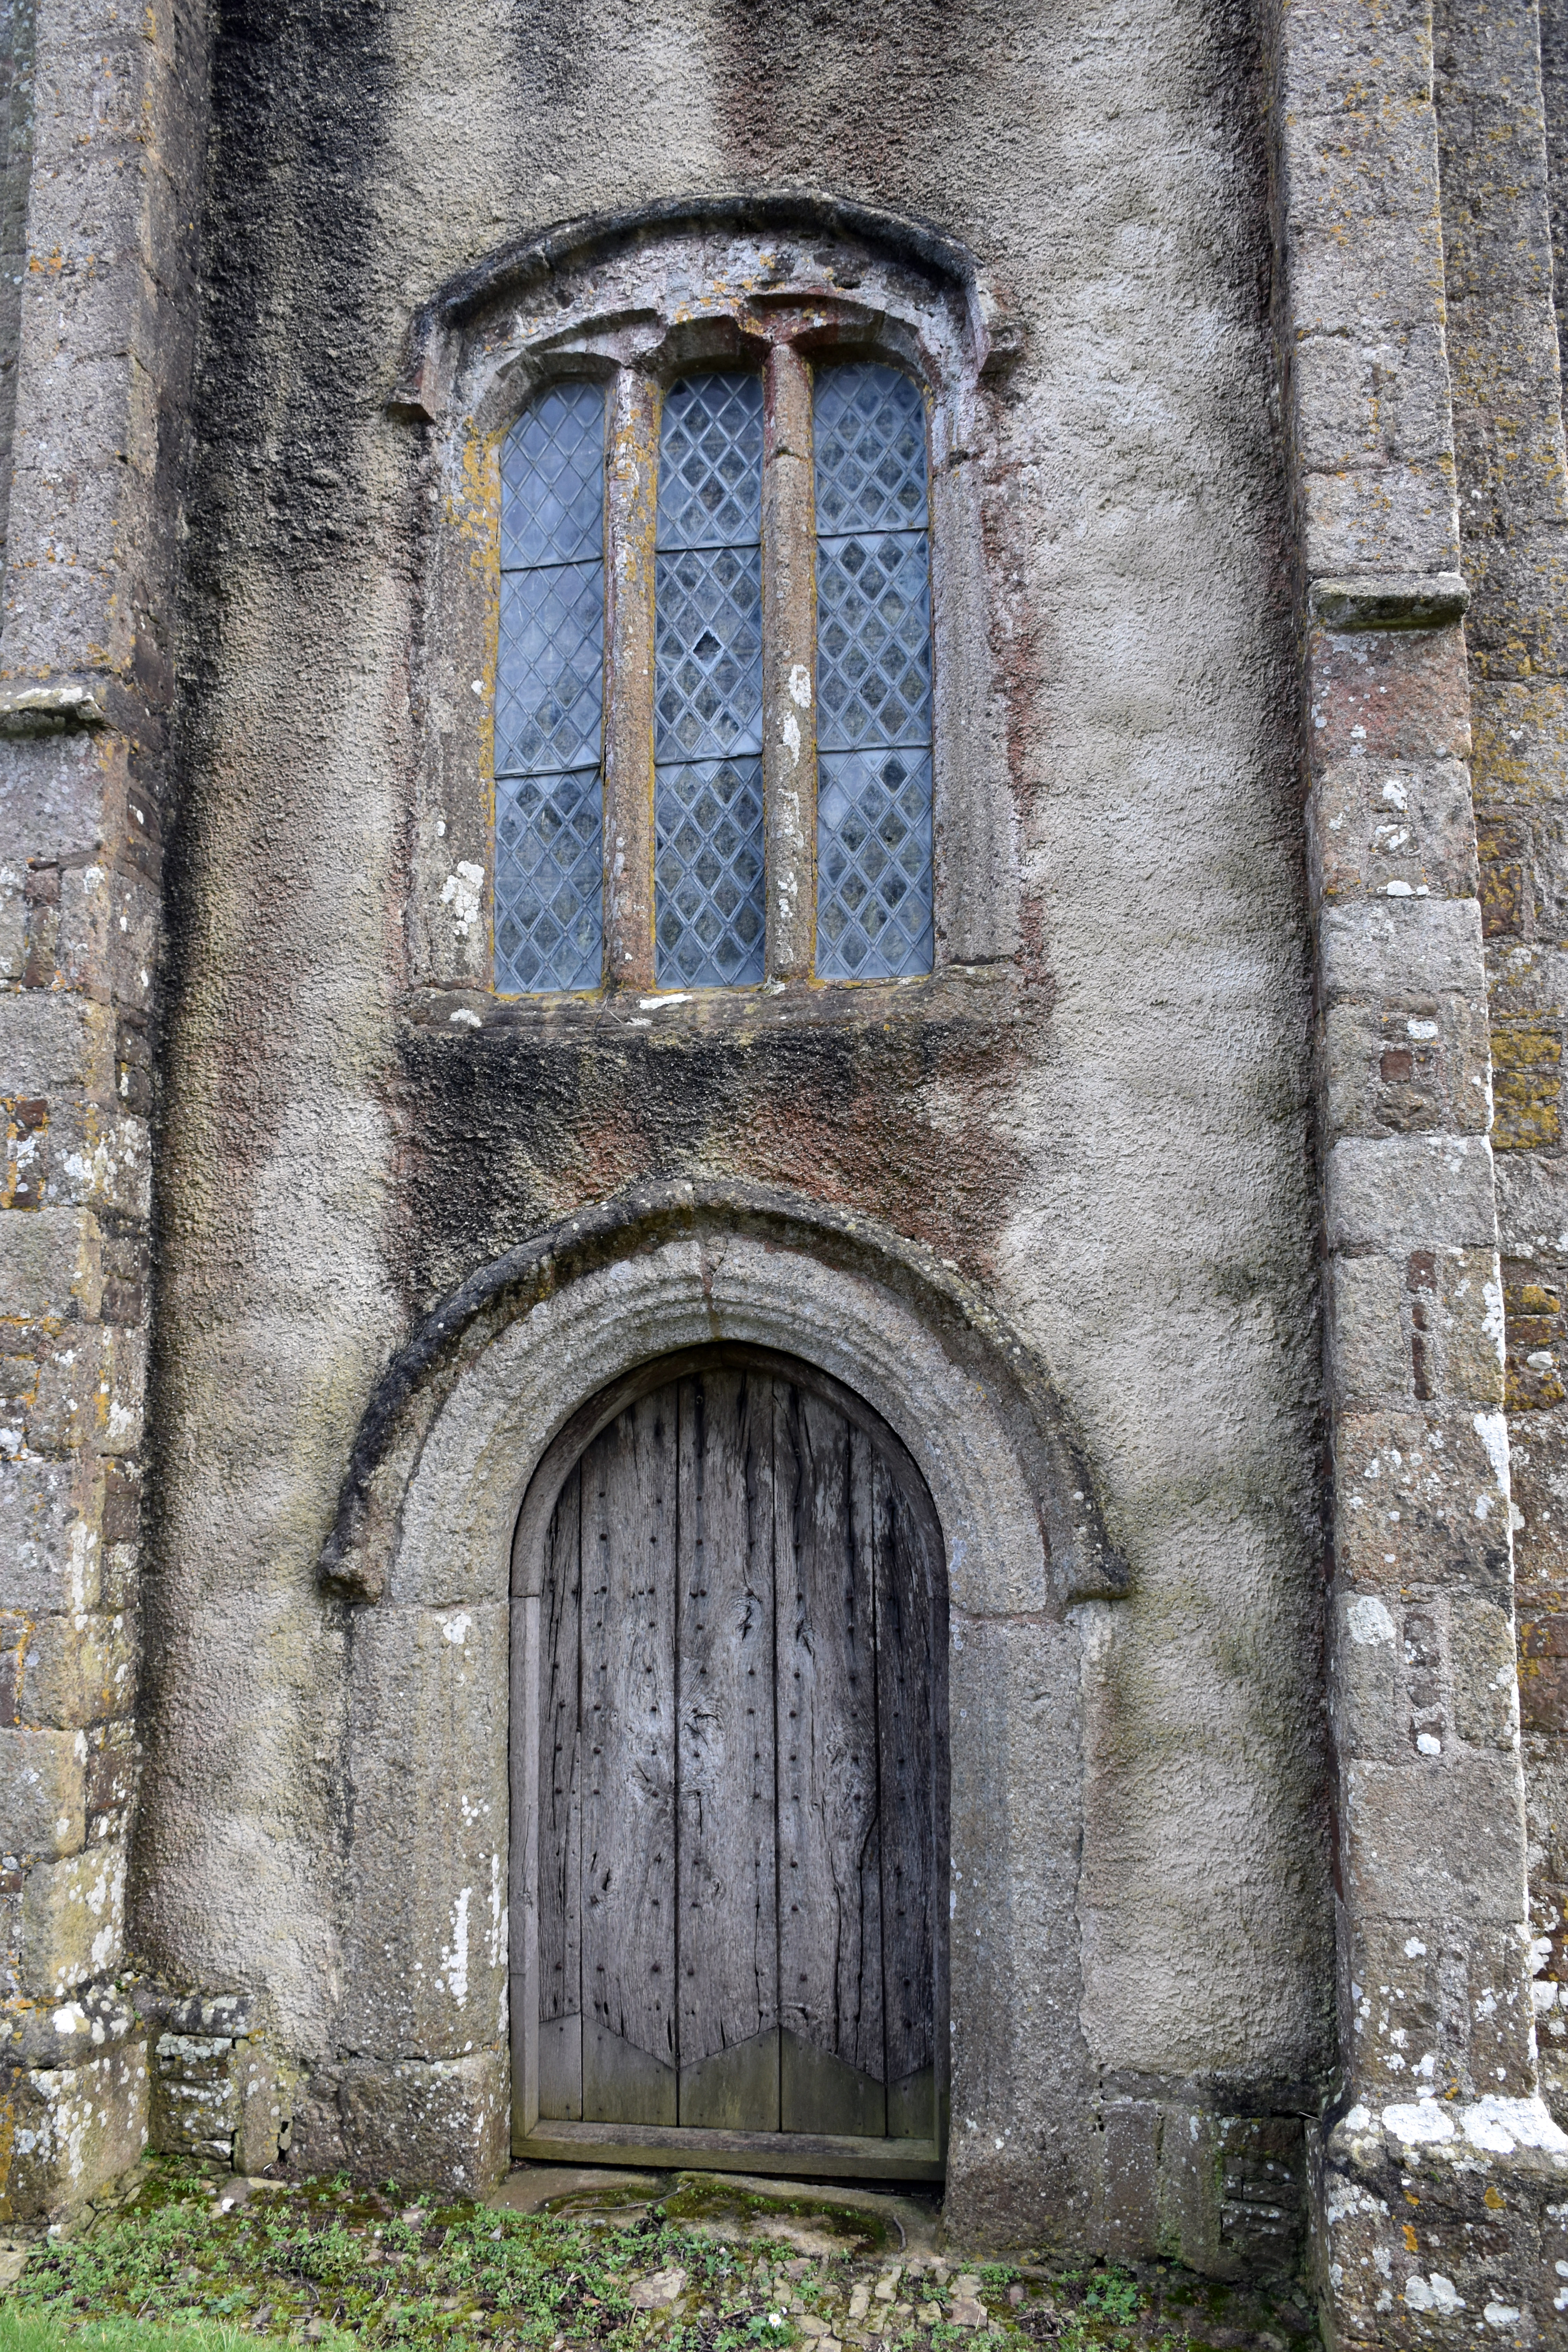
A glebe house on the path leading down to St Andrew’s and the village play area - the scene of fighting in 1549. The church’s south doorway: a two‑centred granite arch with double roll‑and‑fillet moulding, fitted with a substantial two‑part oak door and its original oversized wooden lock. The church’s 12th‑century Purbeck marble font, a square tub with arcading on each face, now set on a later granite pedestal. The stairway and doorway to the former rood loft — the loft itself removed in Elizabeth I’s reign, but the medieval access survives intact.
Rood screen remains inside St Andrew’s Church Memorial plaque to Edwin John, 1918 Memorial plaque to John Arscott, 1824 Westaway family memorial plaques
The surviving section of the medieval rood screen — rebuilt in part, but still carrying traces of its original colouring and giving a sense of how the nave and chancel were once divided. Memorial to Edwin John, aged 20, who died of wounds in France in October 1918 — a personal reminder of the war’s reach into even the smallest Devon parishes. The plaque to John Arscott, Paymaster of the 3rd Dragoon Guards, who died in 1824 — a neat Regency tablet marking his burial within the church. The Westaway family memorials — commemorating William and Elizabeth Westaway and their son John of Coscombe (Corscombe) House.
Green Man roof boss in St Andrew’s Church Three Hares roof boss in St Andrew’s Church Green Man roof boss with carved foliage Green Man roof boss with serpentine foliage
One of several Green Man bosses in the church — a reminder of the medieval habit of blending Christian and older folkloric imagery in roof carvings. The Three Hares boss, a motif found across Devon and beyond: three animals running in a circle, sharing only three ears between them — long associated here with the Holy Trinity. Another Green Man, this one framed by tight foliage — part of the church’s rich collection of late‑medieval roof bosses. A further Green Man boss, its face emerging from curling leaves and tendrils, typical of the craftsmanship found in the nave and chancel roofs.
Carved angel boss or corbel inside St Andrew’s Memorial tablet to Rev. Richard Edwards and the three infants Stone font inside St Andrew’s Church Floor memorial slab to William Westaway of Coscombe
A carved angel set into the roof structure — one of the many late‑medieval figures that animate the interior of St Andrew’s. The memorial raised by Jane Edwards to her husband, the Rev. Richard Edwards (d.1797), and to the three infants the couple lost — a quietly moving 18th‑century tablet. The church’s medieval font, set on a later base — still used today, and one of the most recognisable fixtures of the building’s long liturgical life. A floor memorial to William Westaway of Coscombe — an early slab now heavily worn, but still identifiable by the surviving lines of its inscription.
View from the chancel looking back towards the nave Pipe organ in St Andrew’s Church Royal Arms of George III inside St Andrew’s Rupert at the pulpit in St Andrew’s
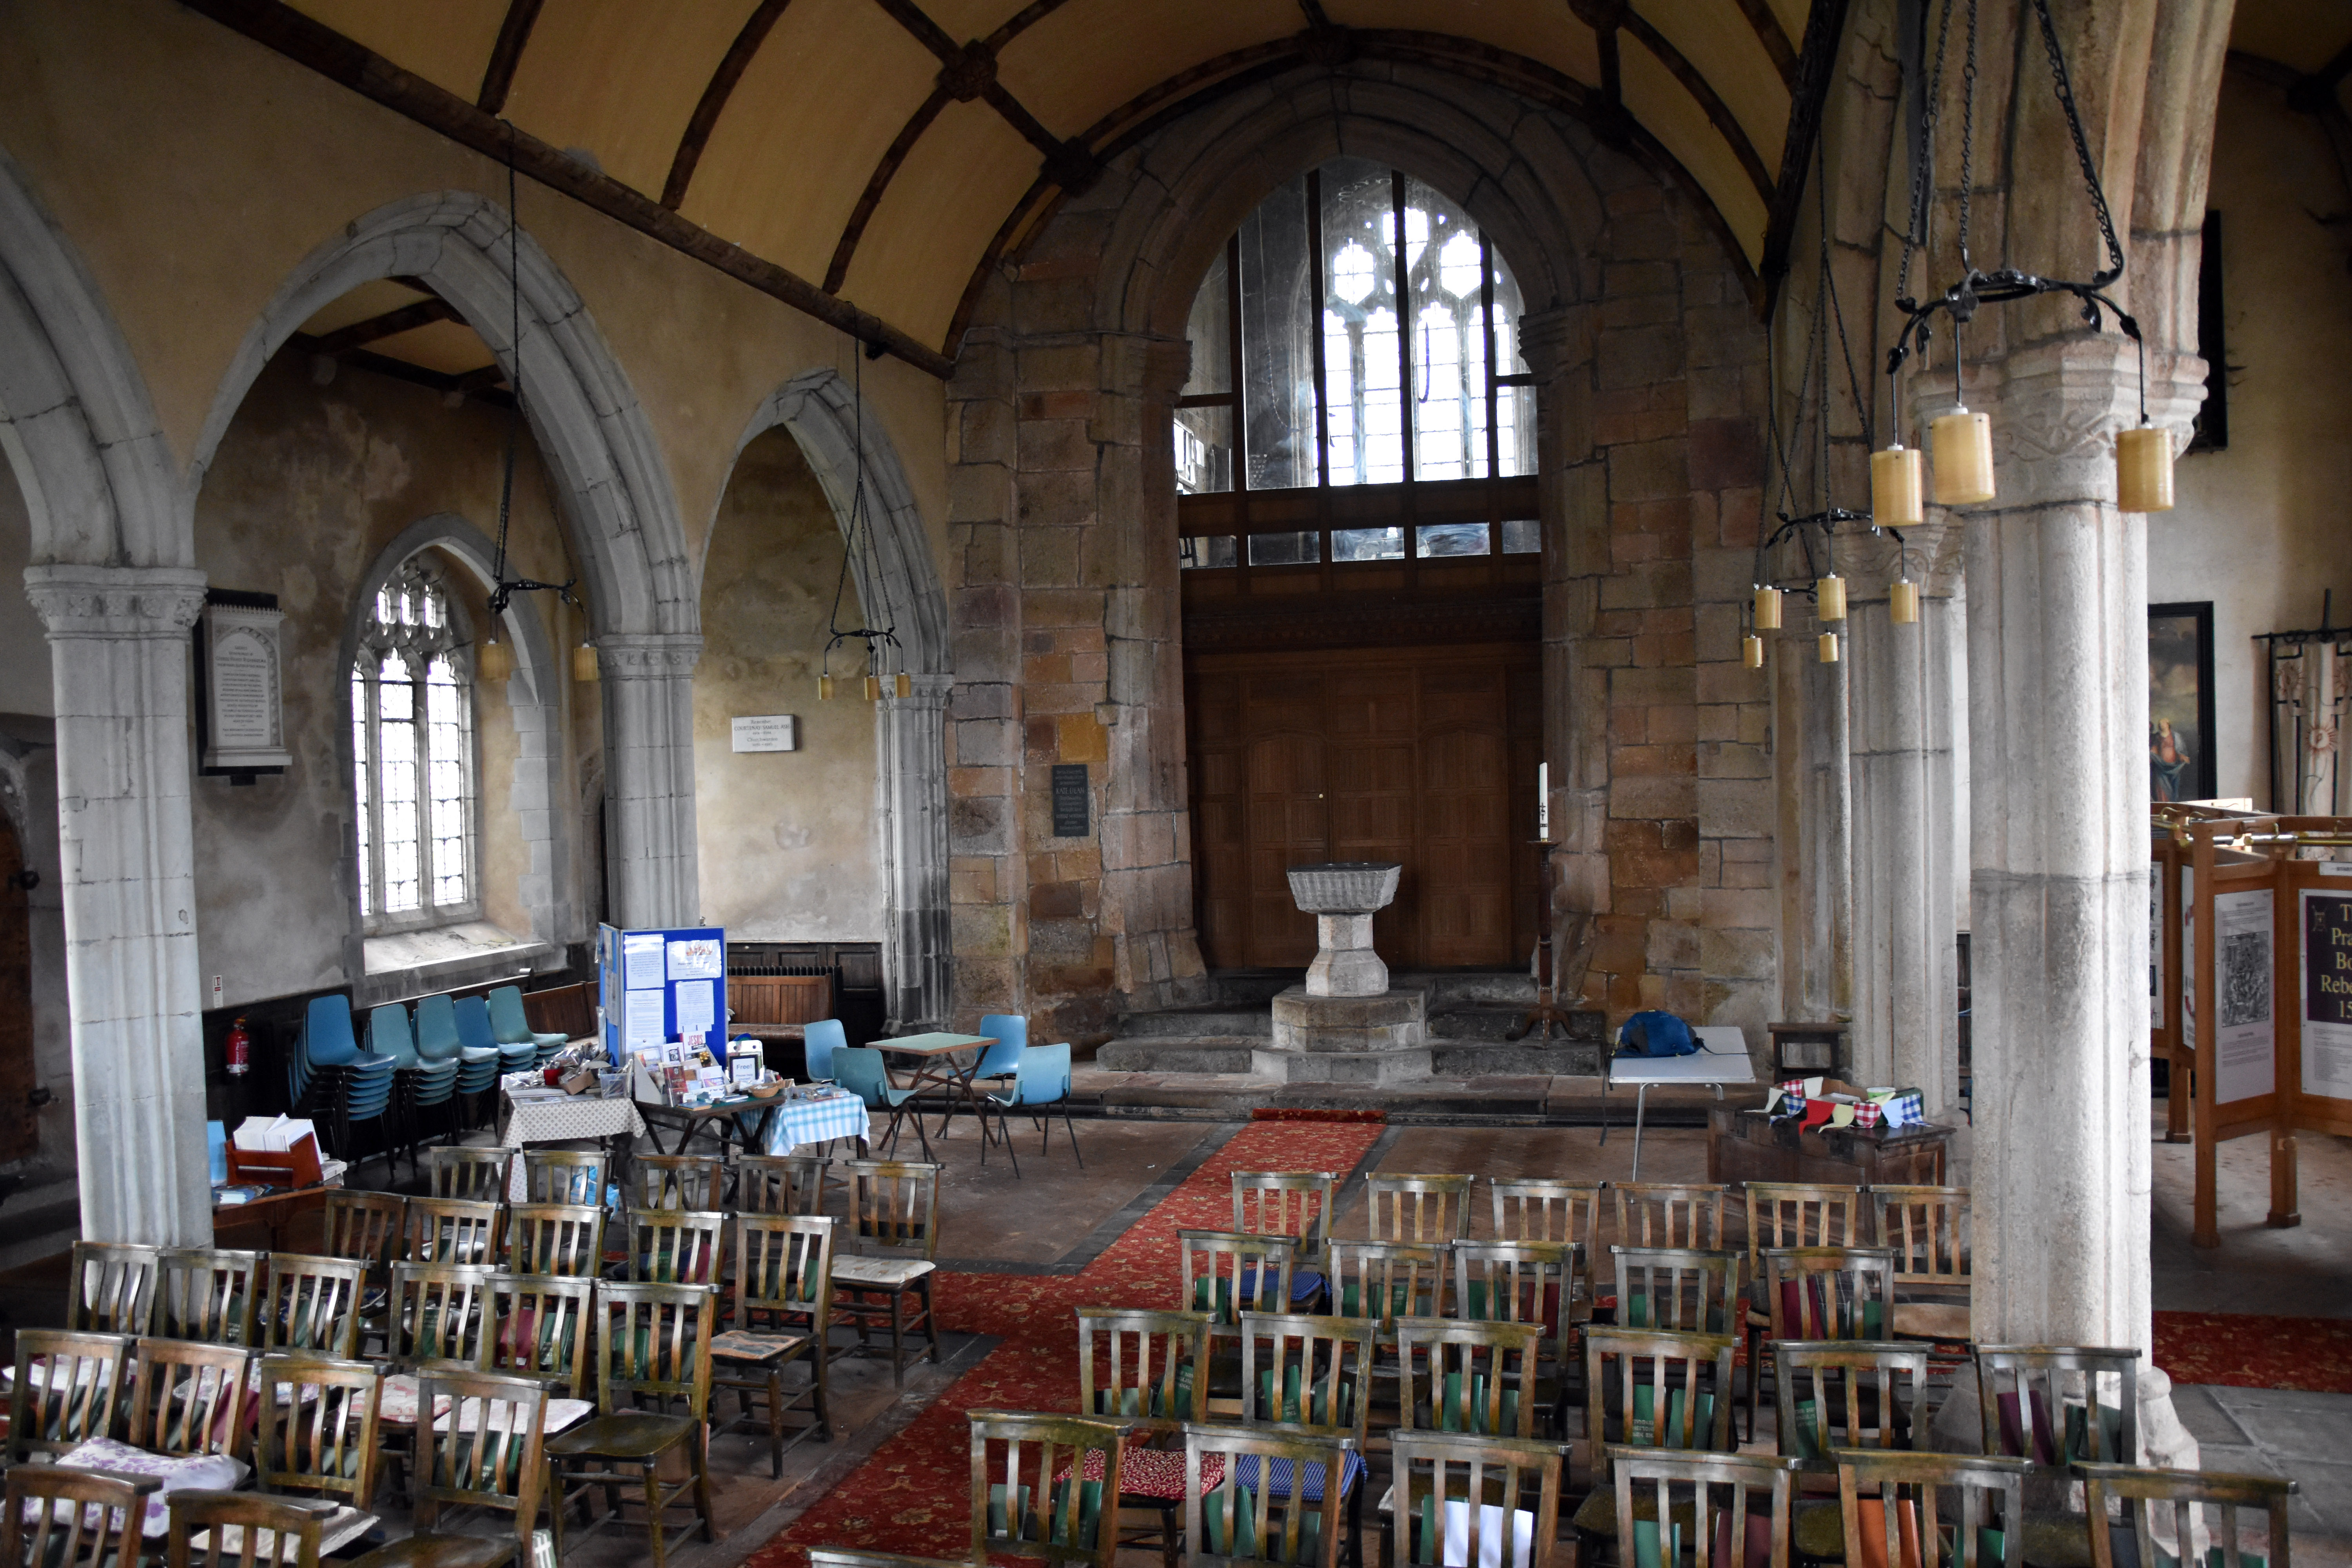
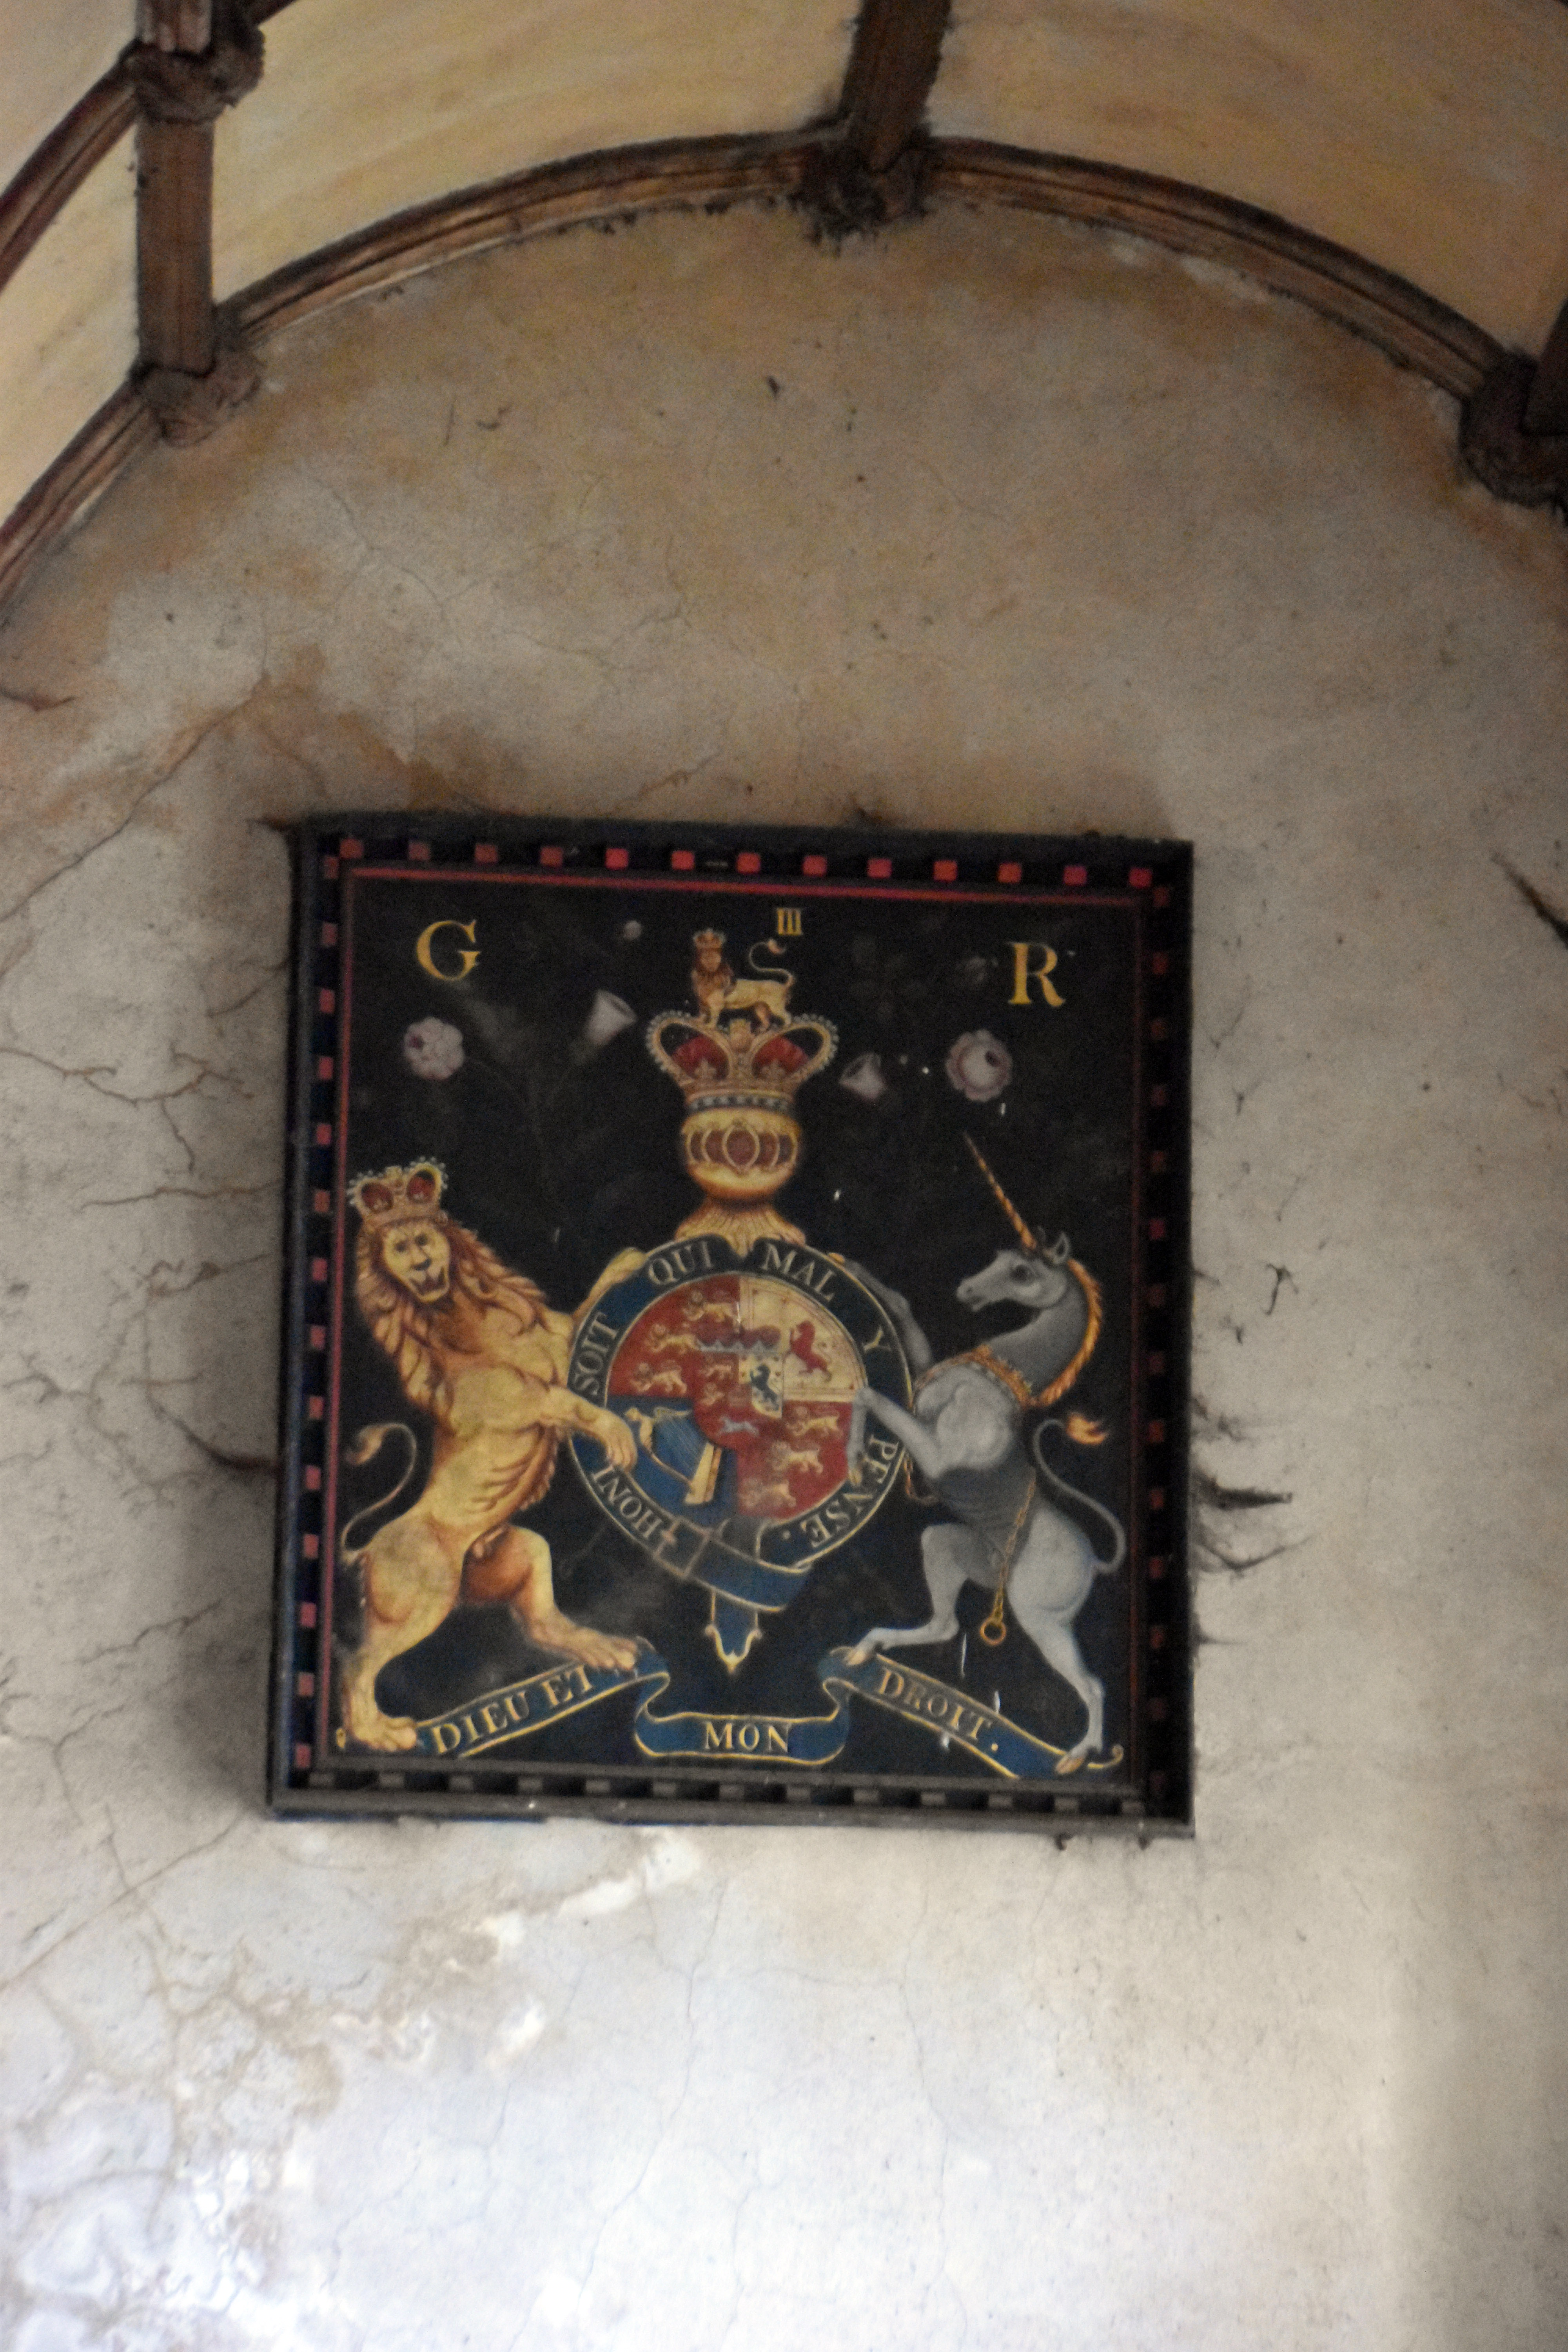
A view back towards the nave and west end of the church, showing the medieval wagon roofs and the restored seating arrangement beneath them. The pipe organ beneath the tower arch — a later installation, but set within the tall, moulded early‑16th‑century tower opening that dominates the west end of the church. The Royal Arms of George III — part of the post‑Reformation requirement for parish churches to display loyalty to the Crown, an interesting contrast in a village remembered for its 1549 rebellion. Rupert emerging from the pulpit — the 18th‑century mahogany pulpit that replaced the medieval one removed in 1831, now standing on its later oak base.
Ceiling boss depicting a crowned female figure Medieval stained glass panel in St Andrew’s Memorial tablet to Mary Tickell, 1808 View from the south porch towards the churchyard
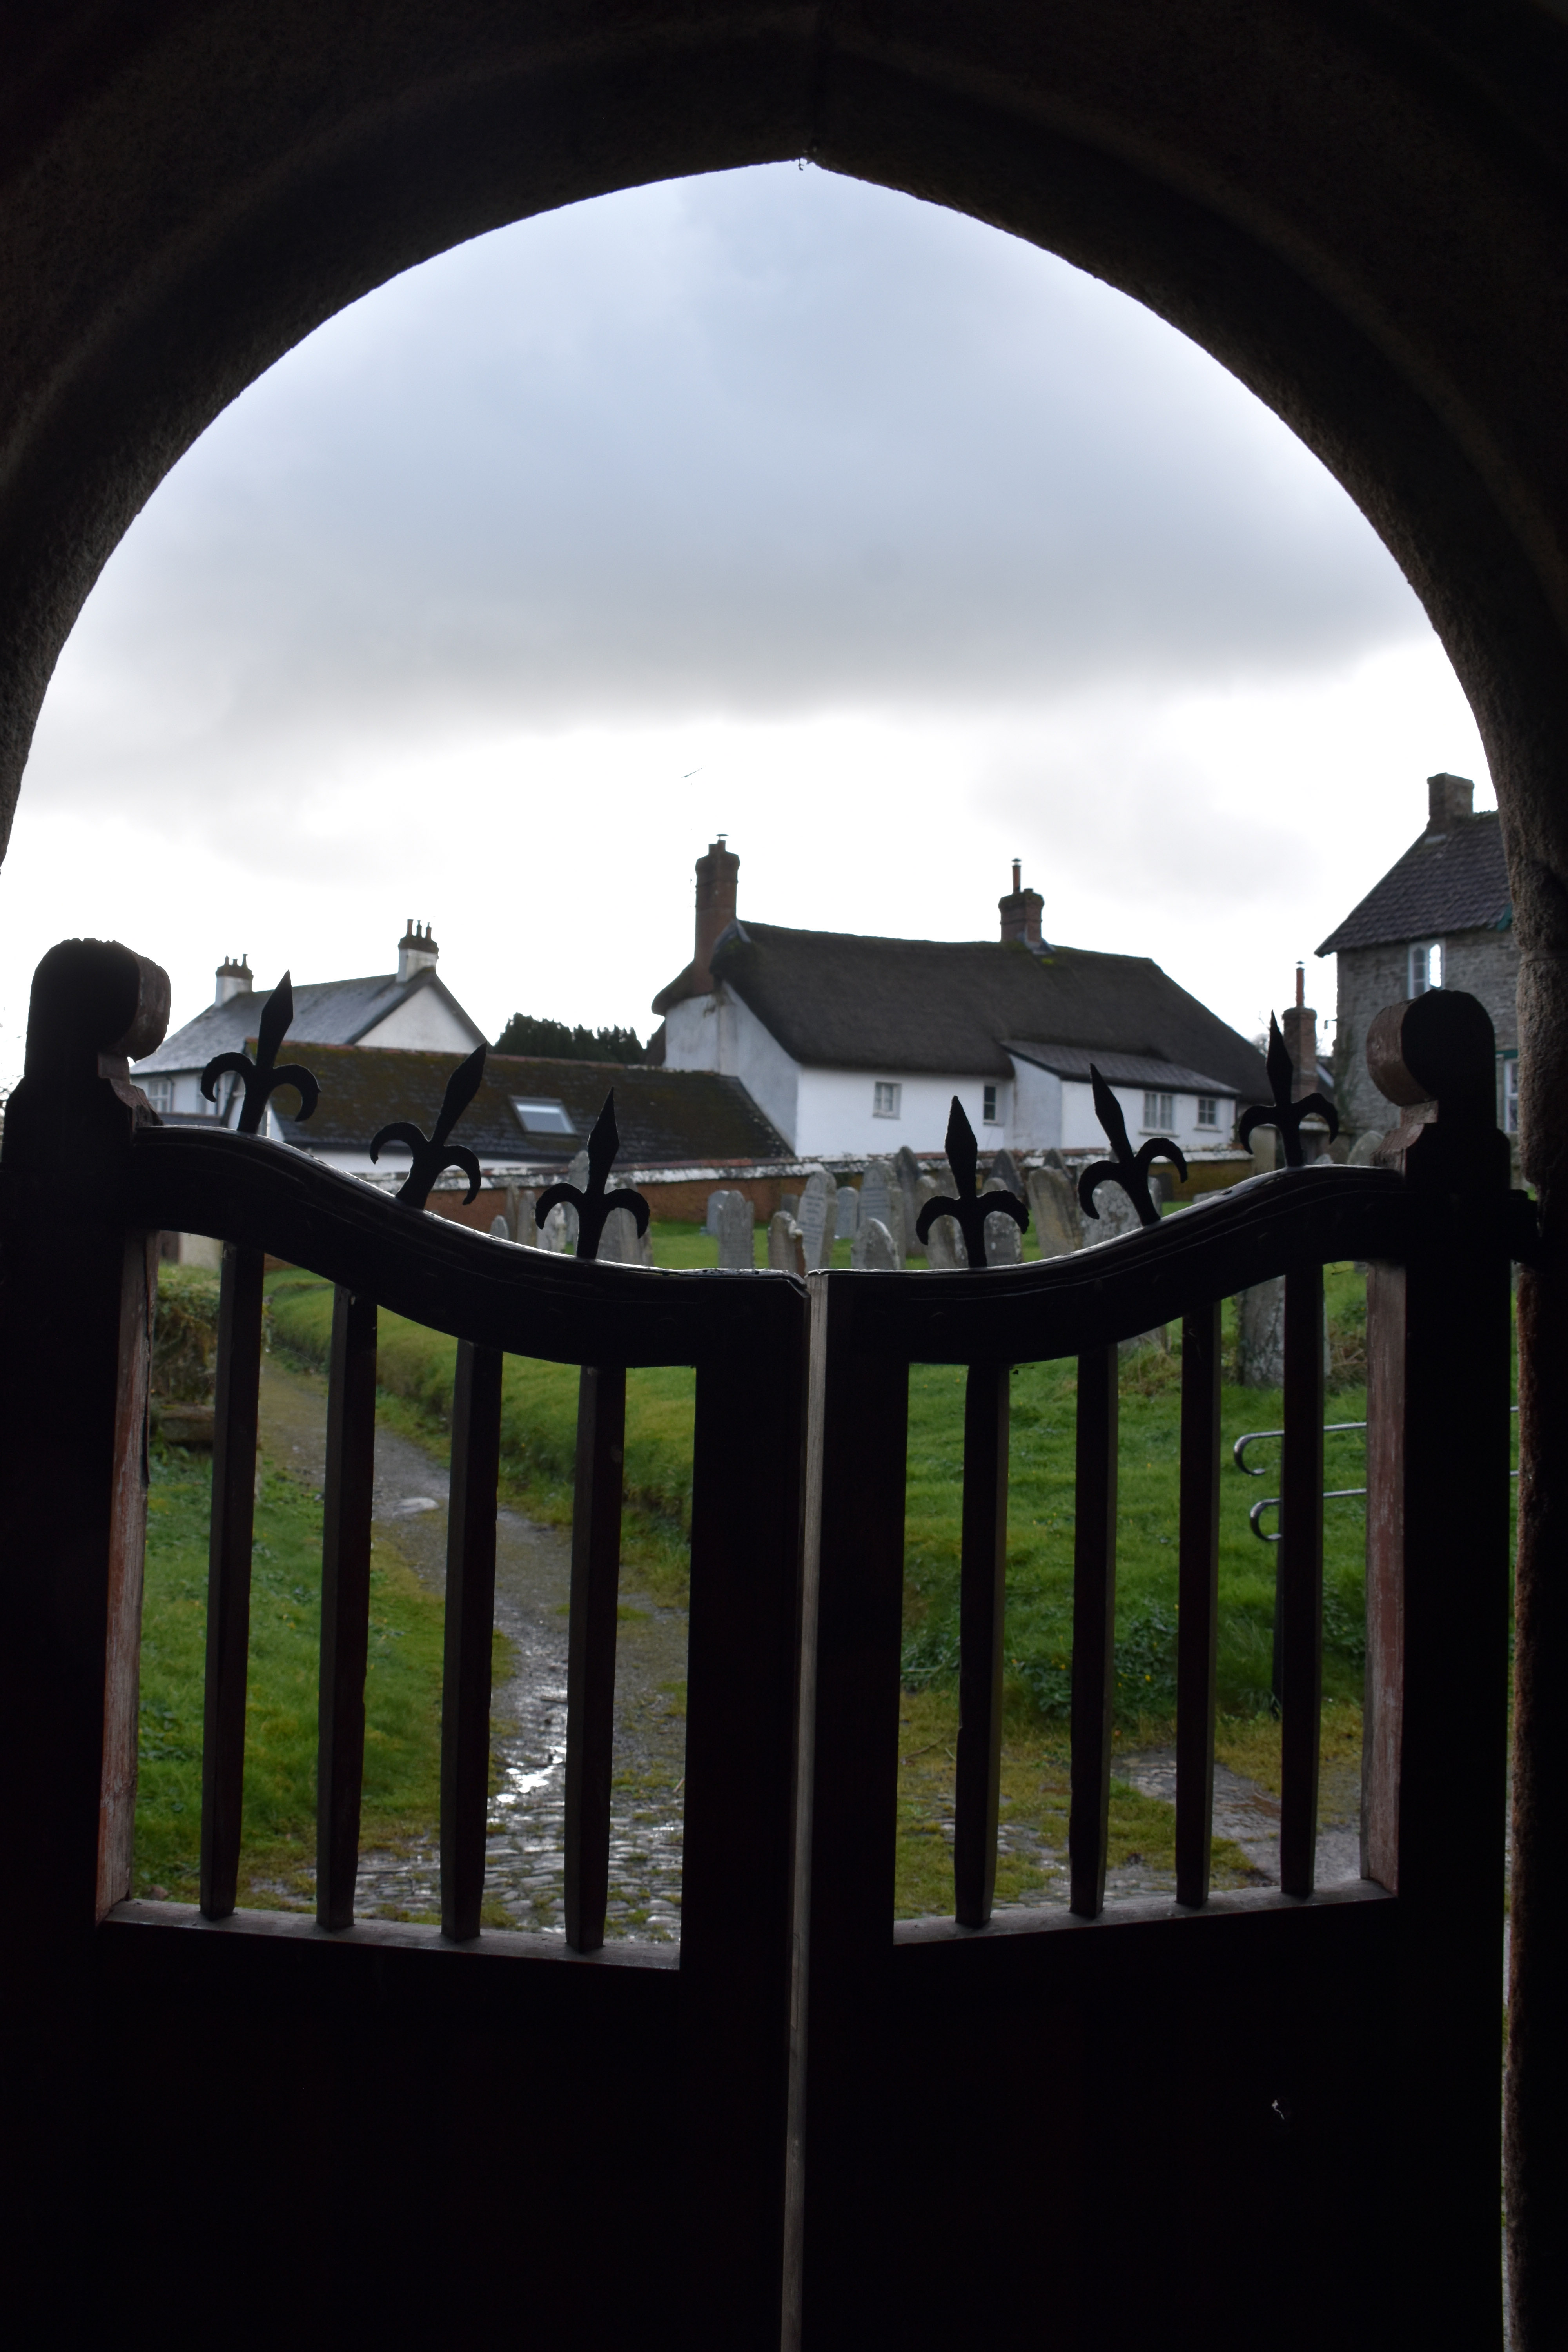
A roof boss showing a crowned female figure — likely intended as Mary, Queen of Heaven — one of several finely carved survivals in the nave roof. A fragment of medieval stained glass, preserving the figure of a saint within a field of patterned quarries — a rare survival given the losses of the Reformation and later restorations. The memorial to Mary Tickell (d.1808), erected by her son, recording a long life described in the measured, devotional language typical of early‑19th‑century parish tablets. A view from the south porch looking out across the churchyard towards the village — a reminder of how closely church and settlement sit together here.
Classic cars outside Church House, Sampford Courtenay View south through Sampford Courtenay village Sampford Courtenay Village Hall, formerly the school Muddy track after heavy rain near Sampford Courtenay
Two classic cars outside Church House — the building where the village’s part in the 1549 Prayer Book Rebellion began with the killing of William Hellyons. A view south through the village, showing the line of thatched cottages and the gentle fall of the road towards the open countryside. The Village Hall — once the parish school — now serving as the community’s main social space. Bulland Lane: A muddy track after heavy rain, typical of the deep Devon lanes that surround the village.
Stone cross near Sampford Courtenay Road leading towards Honeychurch St Mary’s Church, Honeychurch Rupert at the Honeychurch church gate with VR 1890 plate
A surviving stone cross of the type that once marked many Devon crossroads — weathered, but still recognisable as part of the old parish landscape. The narrow lane leading towards Honeychurch, a reminder of how isolated the tiny medieval parish once was. St Mary’s, Honeychurch — a remarkably untouched C12 church with its C15 tower and wagon roof, one of the best-preserved small medieval churches in Devon. Rupert at the entrance to St Mary’s, beside the Victorian gate bearing the VR 1837–1897 plate — installed for Queen Victoria’s Diamond Jubilee.
Graves of the Lancaster Satow family in Honeychurch churchyard Priest’s door at St Mary’s, Honeychurch St Mary’s Church, Honeychurch Faded Elizabeth I coat of arms inside St Mary’s, Honeychurch
The graves of the Lancaster Satow family, with the headstone of Lawrence Lancaster Satow MC on the left — a striking modern presence in this small medieval churchyard. The priest’s door on the south side of St Mary’s — a C15 granite opening with its original form intact, part of the remarkably untouched medieval fabric of the church. St Mary’s, Honeychurch — a small medieval church retaining its original C12 plan, later given a C15 tower and porch, and unusually untouched by Victorian restoration. The faded painted coat of arms of Elizabeth I on the north wall — one of the most important survivals in the church, with traces of the original Tudor colouring still visible.
Nave of St Mary’s, Honeychurch looking towards the chancel Altar of St Mary’s, Honeychurch Royal Arms of Charles II in St Mary’s, Honeychurch Royal Arms of George III in St Mary’s, Honeychurch
The tiny nave of St Mary’s looking towards the chancel — a simple C12 space later given its C15 wagon roof and still retaining its early proportions. The altar at St Mary’s, set beneath the tall east window and framed by the church’s original plastered walls. The Royal Arms of Charles II — a post‑Restoration requirement, marking the return of the monarchy and the re‑establishment of Anglican authority. The Royal Arms of George III, one of several later heraldic panels added to the church, reflecting continued Crown oversight of parish life.
12th-century corbel in St Mary’s, Honeychurch Second 12th-century corbel in St Mary’s, Honeychurch View along the nave of St Mary’s towards the font Medieval wooden bench end in St Mary’s, Honeychurch
A 12th‑century corbel built into the nave wall — one of the few sculptural survivals from the church’s original Norman fabric. The second early corbel, similarly carved and equally weathered, giving a rare glimpse of the church’s C12 decorative work. A view back along the tiny nave towards the C12 font, showing the scale of the building and the simplicity of its medieval interior. One of the medieval bench ends — plain in form but with carved panels and motifs typical of the modest rural craftsmanship found here.
12th-century font at St Mary’s, Honeychurch South door of St Mary’s, Honeychurch seen from inside Ornate candle holder in St Mary’s, Honeychurch Lectern with candle holders and open Bible
The C12 tub font, carved with cable and chevron ornament — one of the oldest fittings in the church — topped by its early C17 cupola‑shaped wooden cover. The south door seen from inside, its C15 granite opening still fitted with the early studded plank door and its original hand‑forged nails. An ornate candle holder used to give light for reading — a reminder of how services were conducted here long before electric lighting. Two candle holders flanking an open Bible on the lectern — simple but practical fittings in keeping with the church’s unaltered interior.
Wooden candelabra in St Mary’s, Honeychurch 17th-century pulpit in St Mary’s, Honeychurch Recess in nave wall of St Mary’s, Honeychurch View down the nave of St Mary’s towards the altar
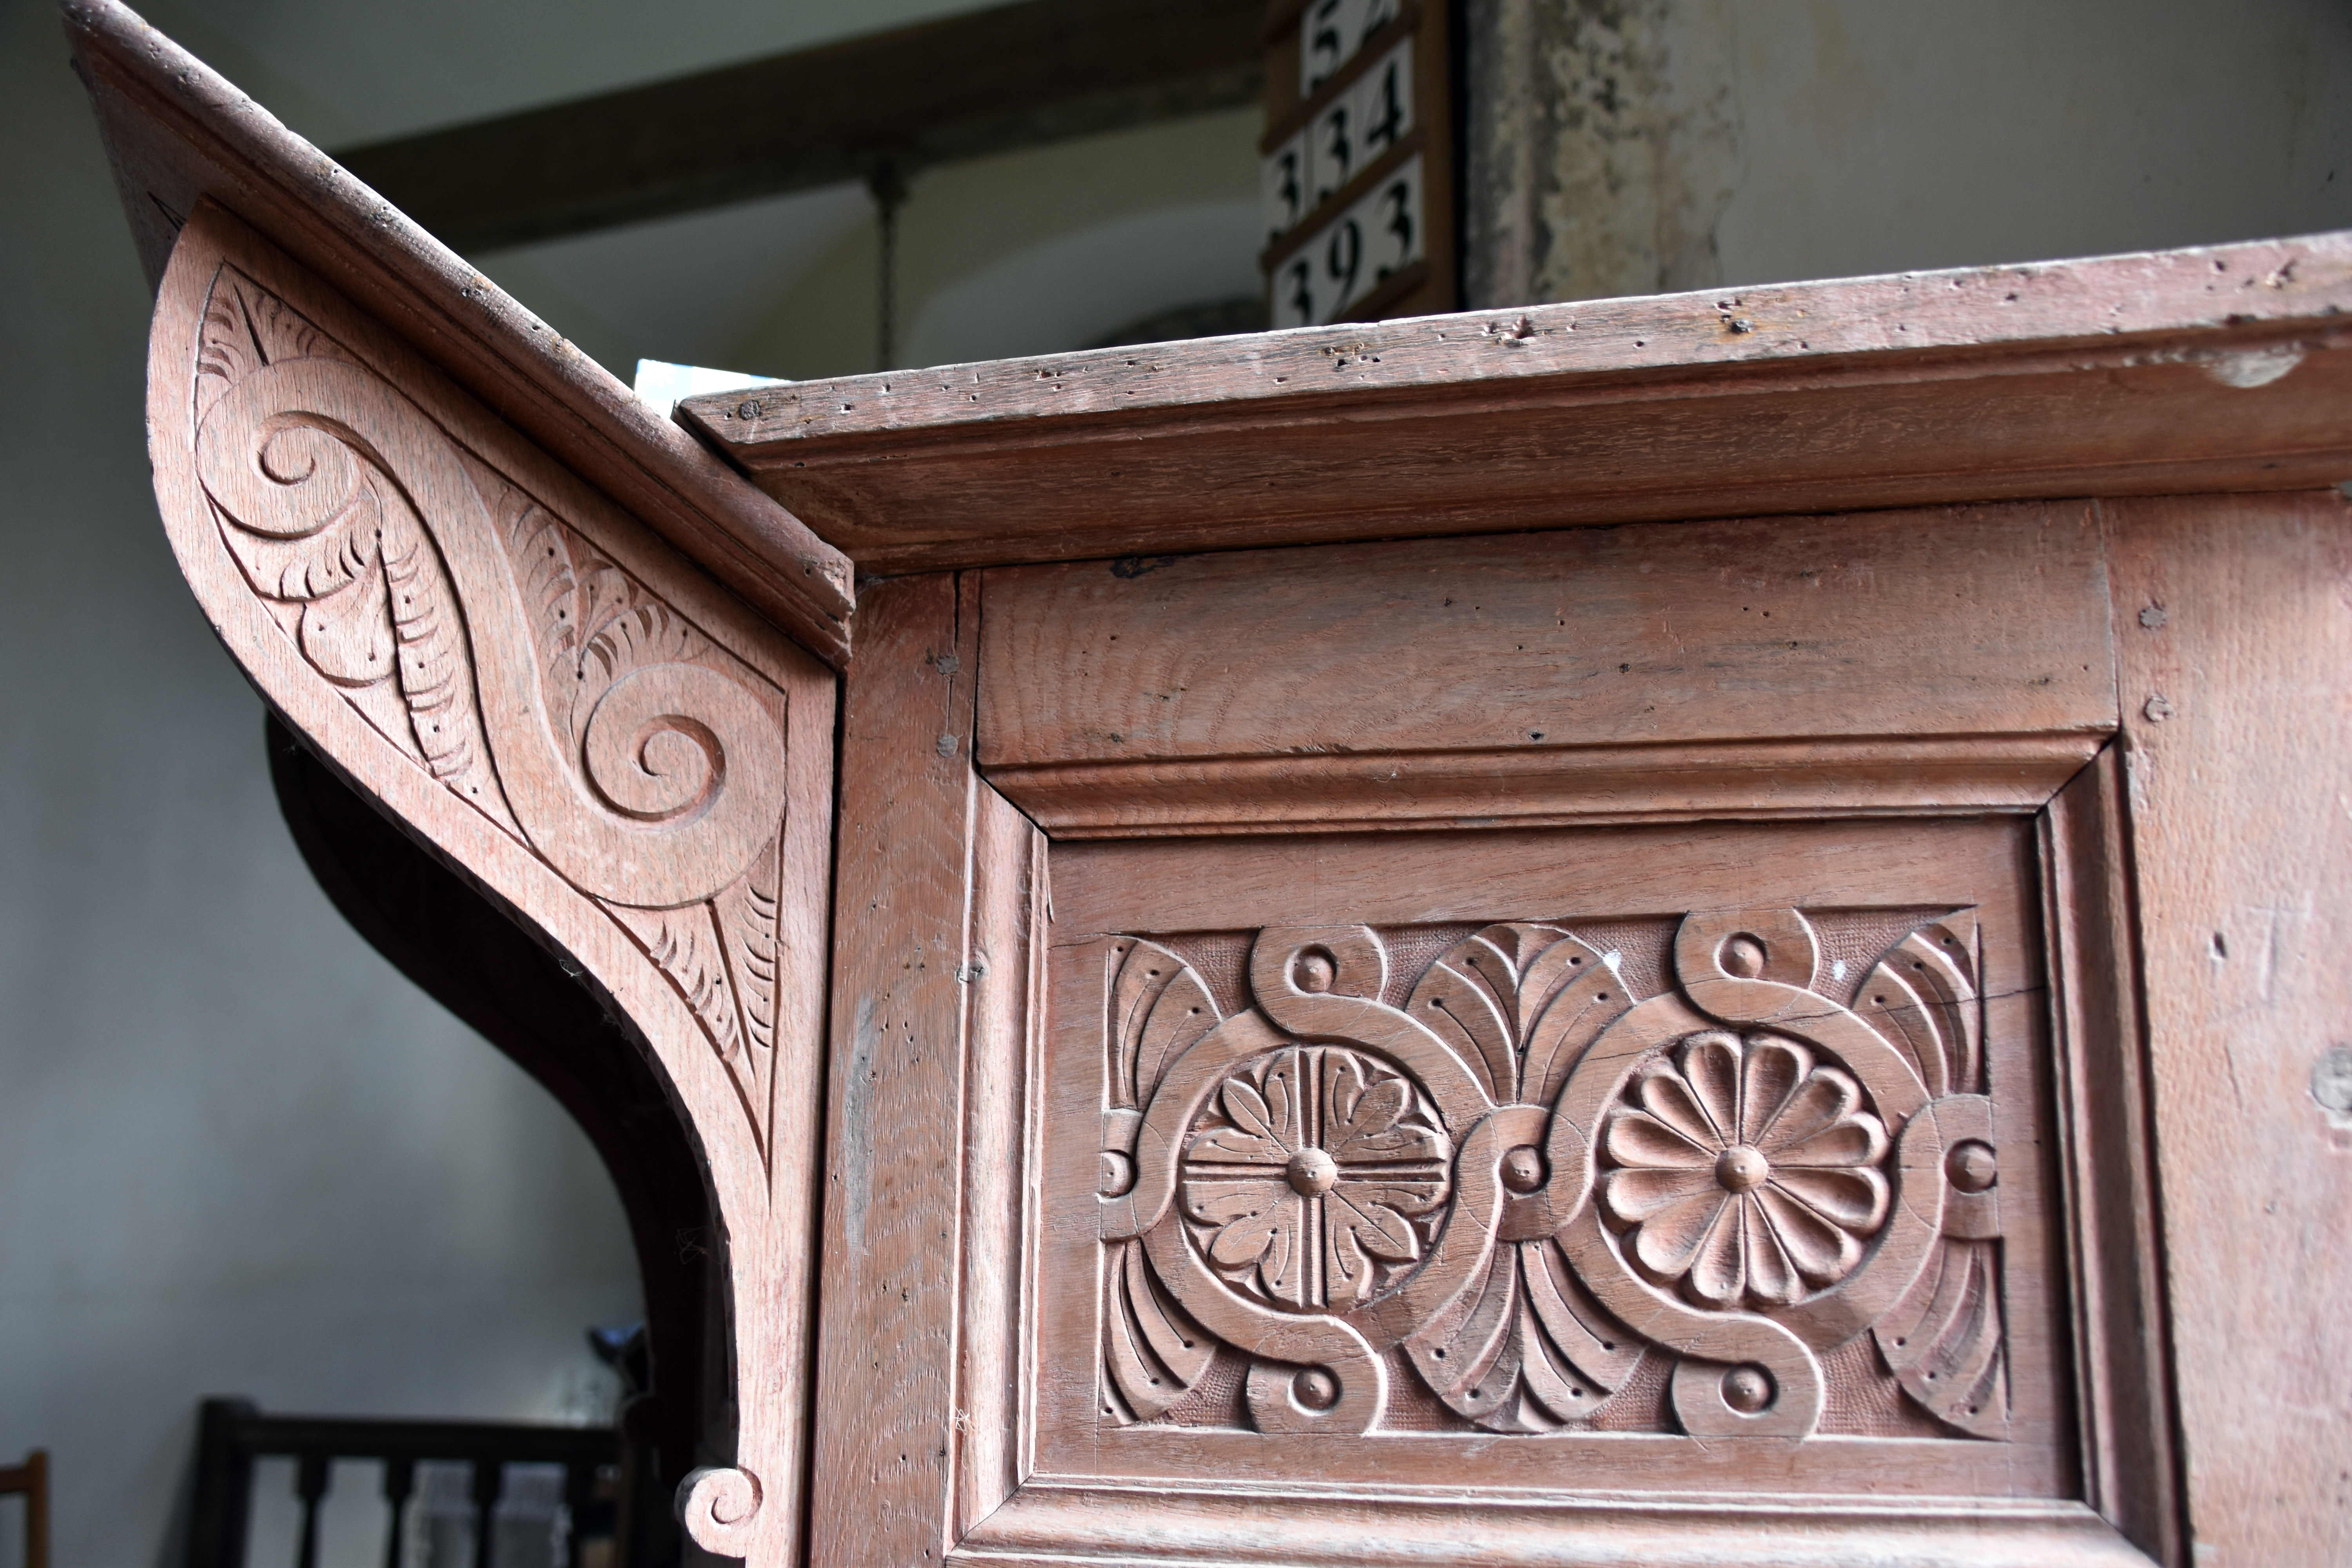
A wooden candelabra used to provide light during services — a practical survival from the period before the church was wired for electricity. The early C17 panelled wooden pulpit, with its decorative floral carving on the upper panels and the geometric design cut into the underside of the integral lectern — one of the finest pieces of woodwork in the church. A small wall recess now used for flowers, but originally intended to hold a candle or lamp — one of several simple medieval fittings that survive in the nave. A view down the nave towards the altar, showing the scale of the building and the unaltered medieval interior beneath the C15 wagon roof.
C15 roof carvings in St Mary’s, Honeychurch West door of St Mary’s, Honeychurch Road back to Sampford Courtenay with St Andrew’s visible The New Inn, Sampford Courtenay
The basic four‑petal flower carving on the C15 wagon roof, with its carved bosses (dosses) — simple but characteristic details of late‑medieval Devon carpentry. The west door of St Mary’s — a plain medieval opening beneath the tower, part of the church’s unaltered C15 exterior. The road back towards Sampford Courtenay, with the tower of St Andrew’s visible in the distance across the fields. The New Inn — the village’s historic pub, long associated with local tradition and (reputedly) a ghost or two.

Walks by the Westcountry Walker
Armed Forces | Art and Culture | Articles | Biographies | Colonies | Discussion | Glossary | Hiking | Home | Library | Links | Map Room | Sources and Media | Science and Technology | Search | Student Zone | Timelines | TV and Film | Wargames
Donate by Stephen Luscombe